
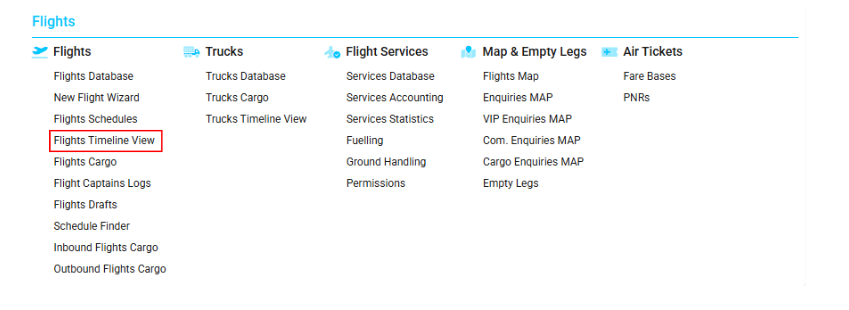
Accessing Flights Timeline View
Navigate to the Flights section and under the Flights Section, click the “Flights Timeline View” Button.
Overview
The Flights Timeline View interface provides a graphical representation of all flights, allowing users to visualize flight schedules and related operations in a timeline format.
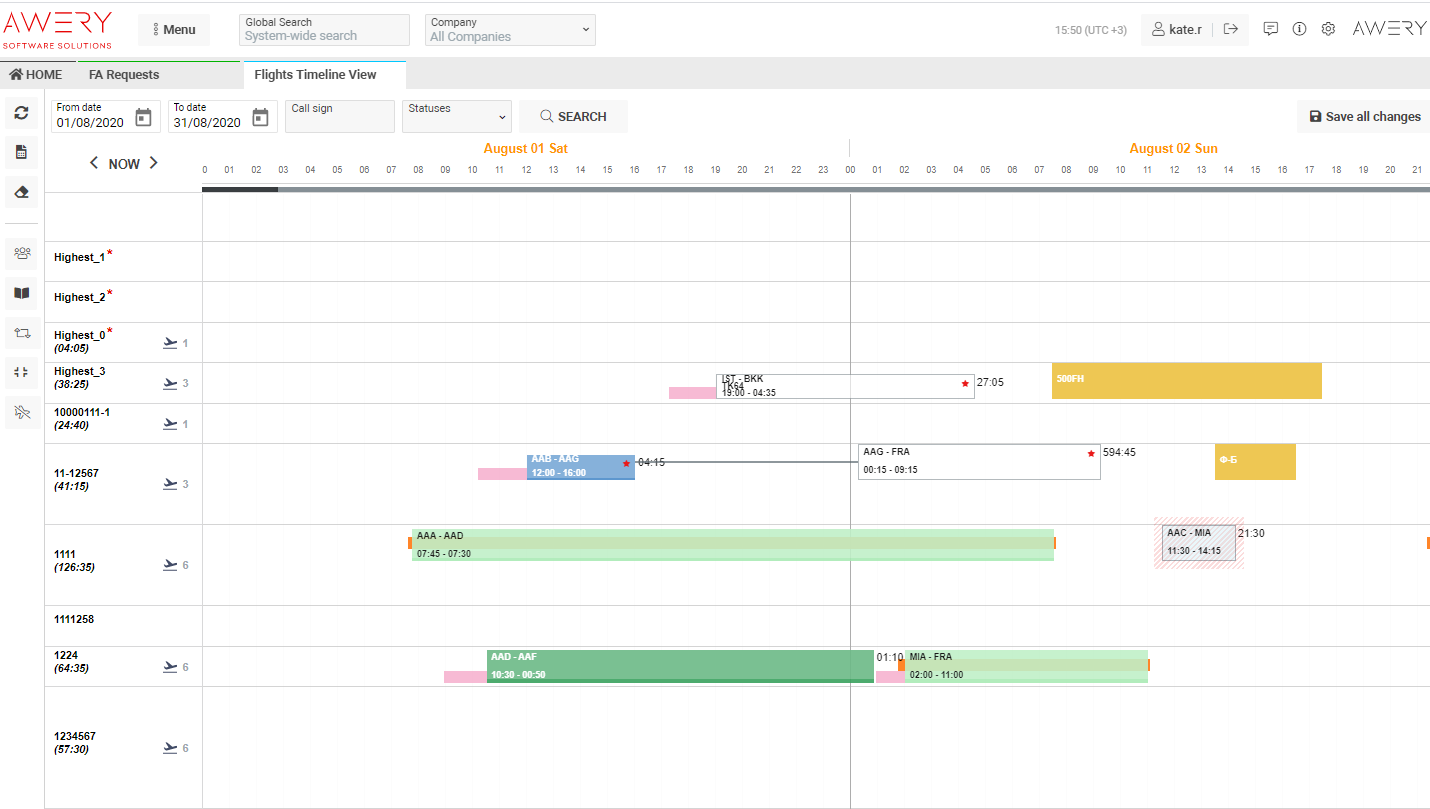
From this interface, you can:
-
Create new flights and define their planned, estimated, and actual times.
-
Assign or modify crew members.
-
Manage flight delays.
-
View maintenance and service information.
-
Move flights to another aircraft registration number.
-
Change waypoint statuses.
-
Clone flights (with or without payload and services).
-
Add notes and download relevant documents.
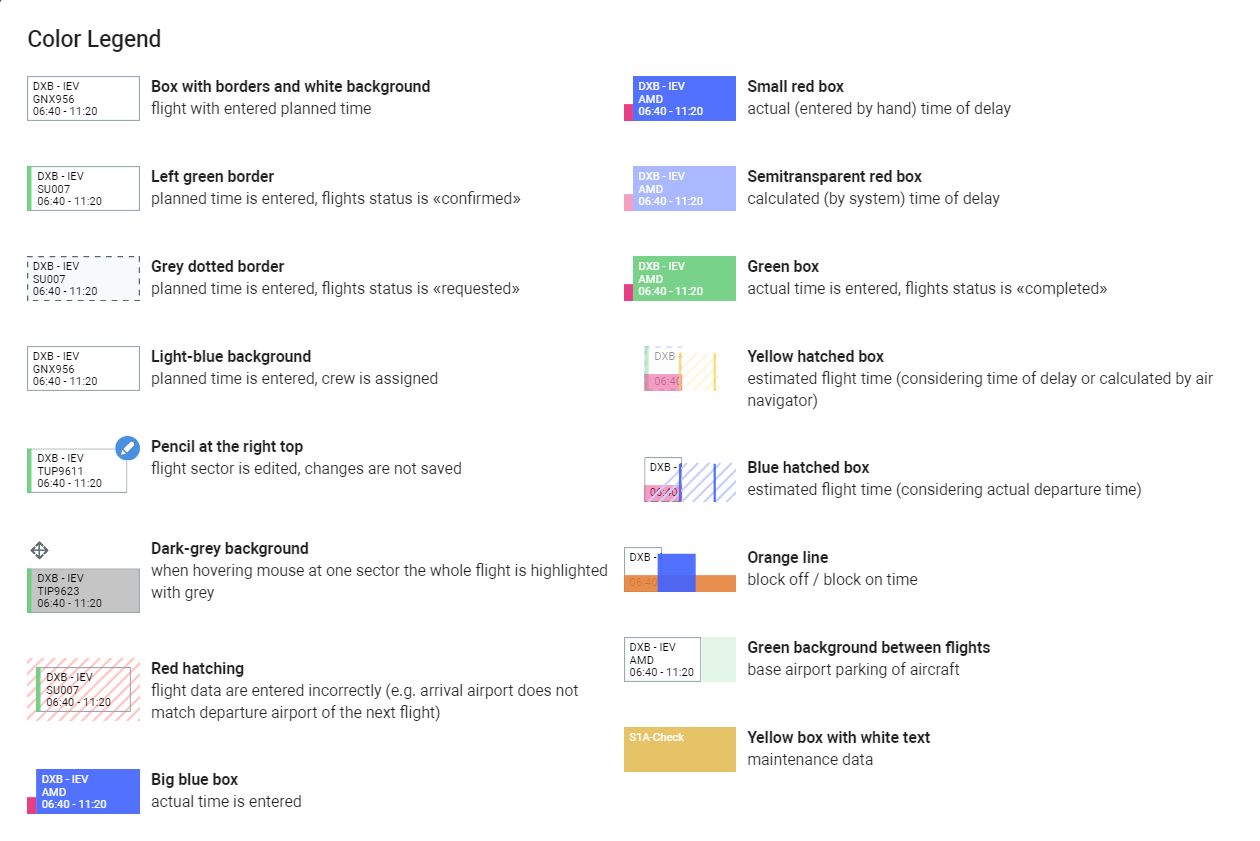
A reporting feature allows users to generate a chart report for a selected number of days. The legend helps interpret graphical elements within the chart.
Manuals
Interface Elements
-
Search / Refresh Button – Refreshes the page or updates data.
-
Reports Button – Opens the form for generating and downloading reports.
-
Clear Filters Button – Clears all applied filters.
-
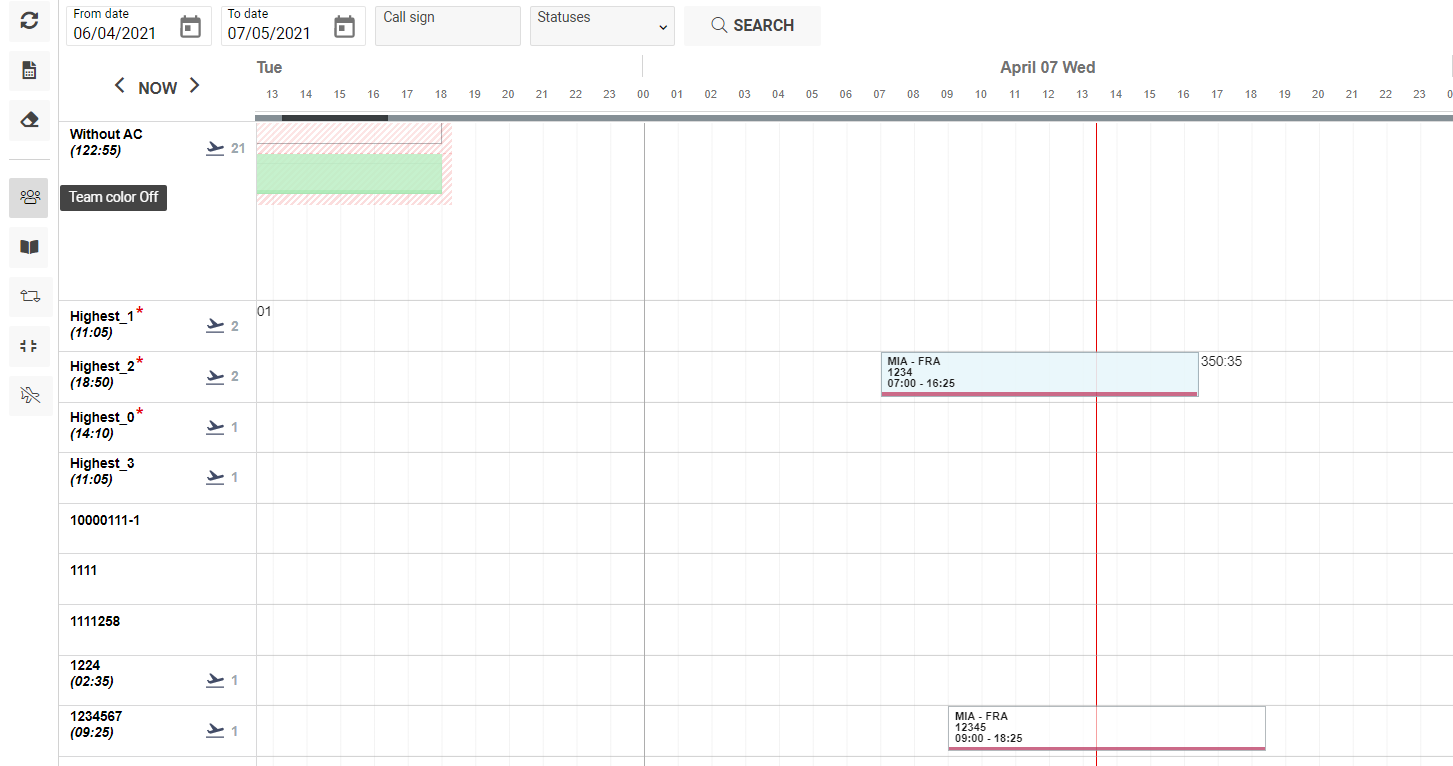
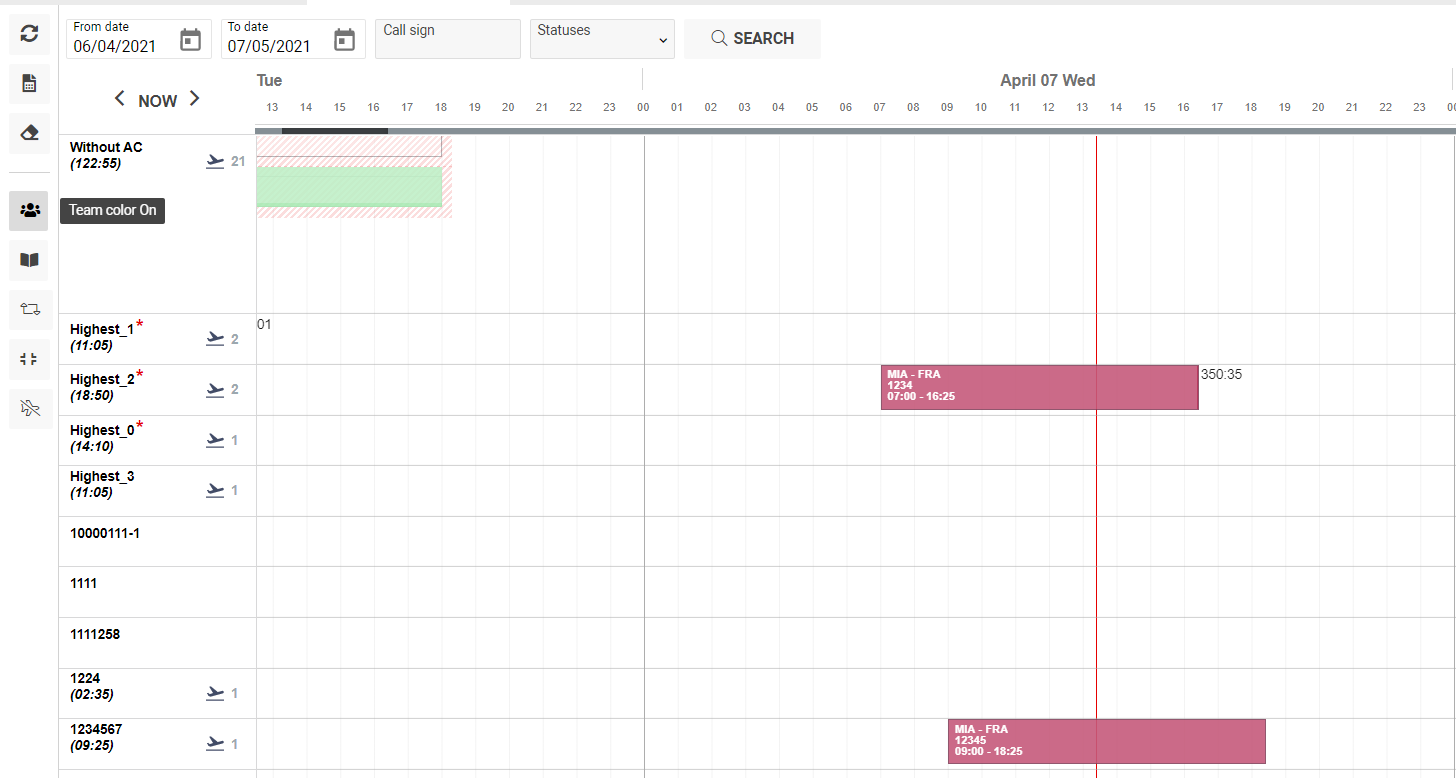
Team Color Buttons – Switches between flight color group modes.
-
Team Color OFF is enabled by default.
-
-
Legend Panel – Displays graphical descriptions for box colors and types.
-
Navigation Arrows – Move the schedule view forward or backward by one day.
-
Auto-Update Toggle – Enables or disables automatic interface refresh every 5 minutes (disabled by default).
-
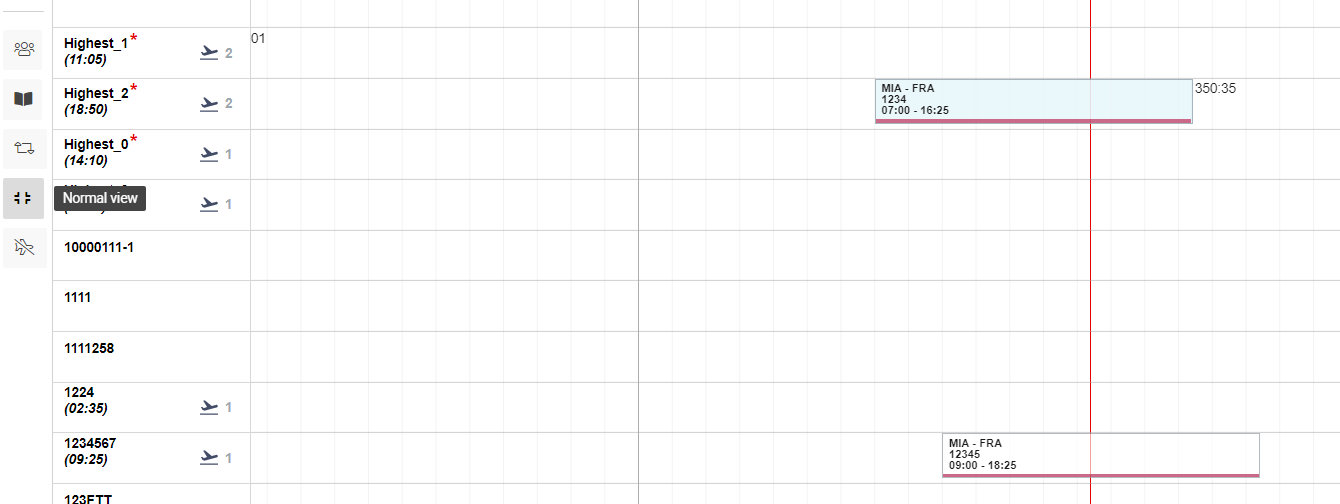
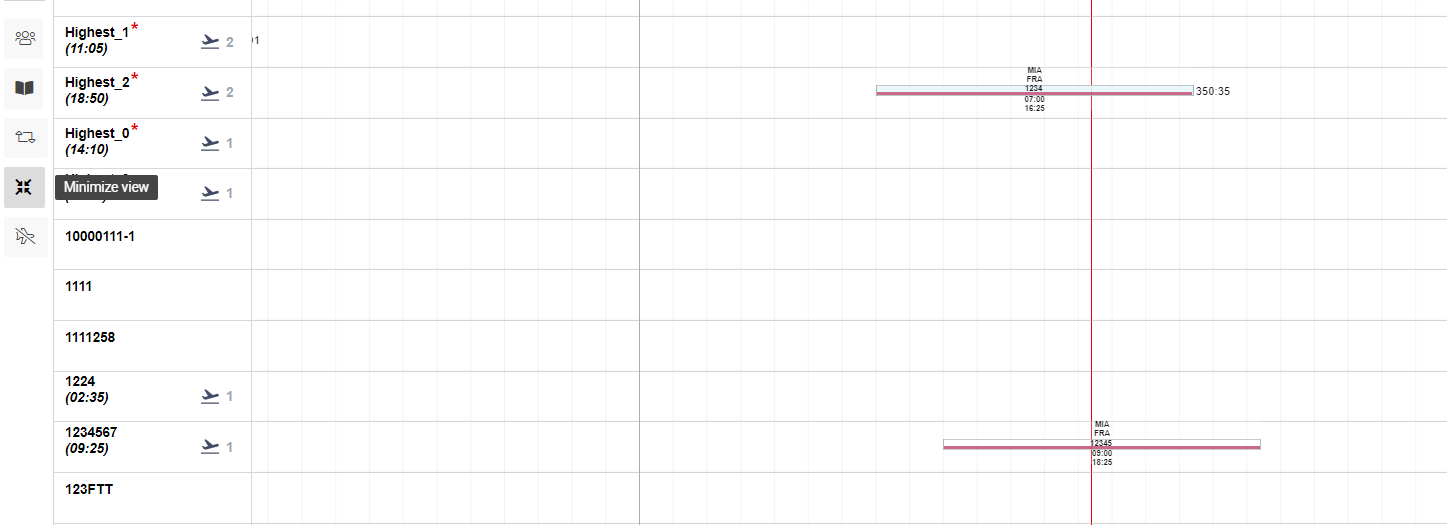
Normal / Minimize View Buttons – Adjust the chart’s visual layout.
-
Hide / Show Aircraft Buttons – Toggle between viewing all aircraft or selected aircraft according to user preferences.
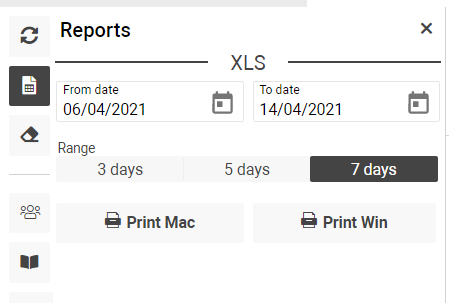
Reports Tab
Click Report to open the sidebar and generate XLS reports for Windows or iOS.
You can choose a reporting period of 3, 5, or 7 days, and all data will be displayed on a single sheet.
Display Examples
-
Team Color Off / On:
Displays the timeline either without or with team-based color grouping.
-
Normal / Minimize View:
Switch between full and compact display of flight timelines.
-
Hide / Show Aircraft:
Aircraft visibility is toggled using the eye icon.
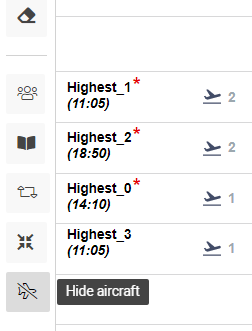
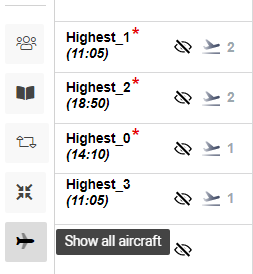
-
Hidden aircraft – icon crossed out.
-
Visible aircraft – icon active.
Flight Schedule Display
Each row represents a specific aircraft and includes:
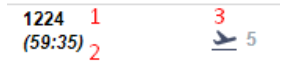
-
Registration Number – Aircraft identifier.
-
Flight Hours – Total hours within the selected period.
-
Cycles – Number of flights performed within the specified date range.
Flight Details
Timing Tab
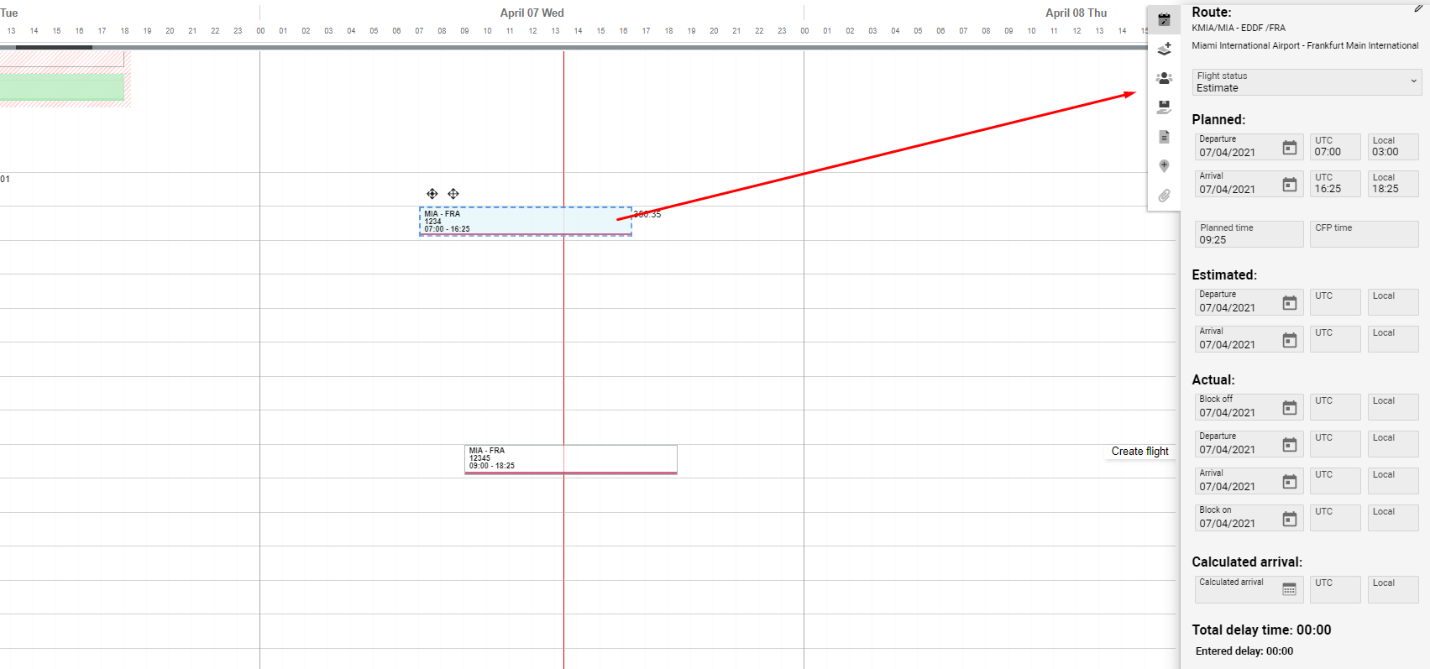
Click any flight box on the timeline to open its sidebar with detailed flight information.
-
Flight Information Button – Opens the full flight details.
-
Save Button – Saves all applied changes.
-
Call Sign – Displays the flight call sign.

-
Route Block – Shows origin, destination, and alternative airports.
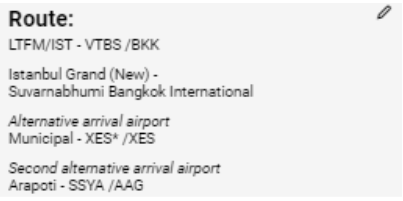
-
You can edit alternatives directly using the pen icon.
Time Blocks
Divided into three sections: Planned, Estimated, and Actual.
-
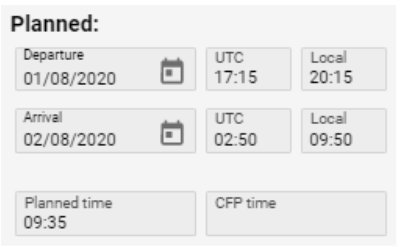
Planned:
Displays scheduled departure and arrival times (in both UTC and Local).
The field Planned Flight Time is auto-calculated and not editable.
-
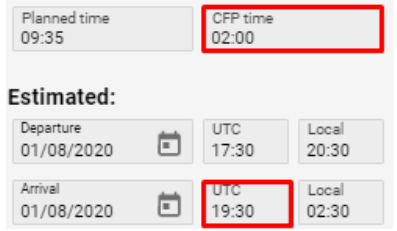
Estimated (ETD/ETA):
ETA is automatically calculated as ETA = ETD + CFP Time.
If CFP Time is empty, ETA = ETD + Planned Time.
-
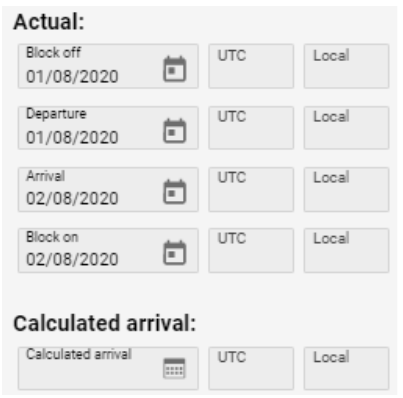
Actual (ATD/ATA):
Displays real-time performance data.
Calculated Arrival = ATD + CFP Time or ATD + Planned Time if CFP is empty.
Additional Options
-
Send to Crew – Opens templates for sending MVT messages.

-
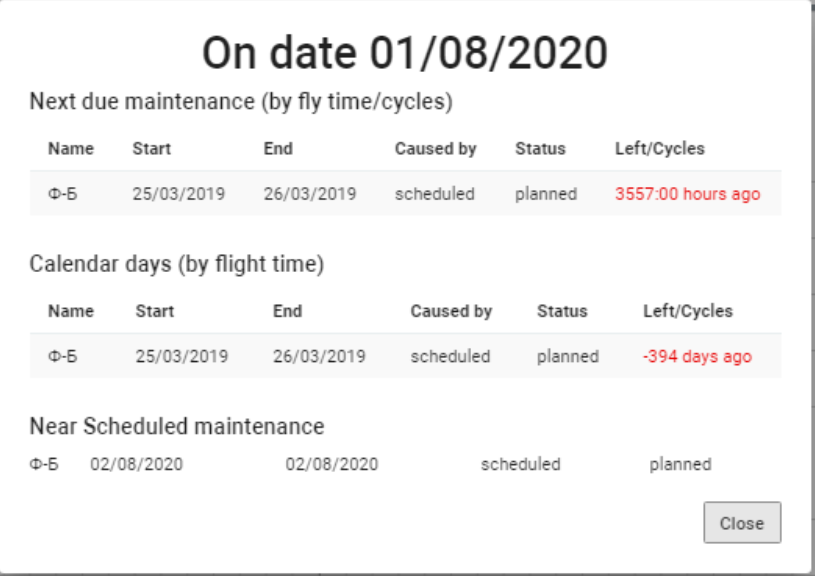
Technical Inspection – Opens aircraft inspection details.
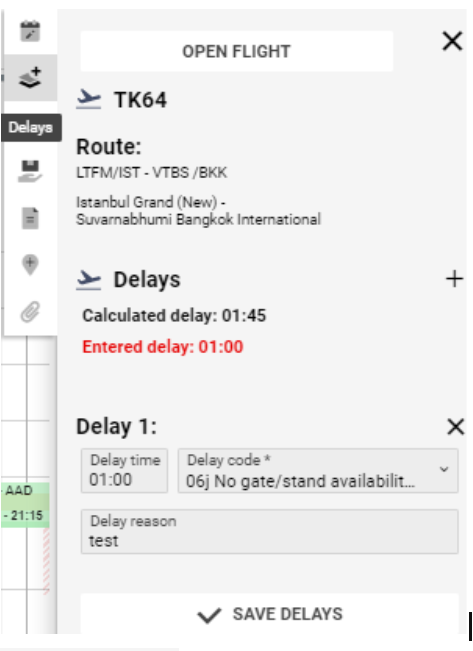
Delays Tab
Displays detailed delay information, including time, reason, and code.
-
Calculated Delay: Automatically generated (STD vs ETD/ATD).
-
Entered Delay: Manually input by the user.
-
If the two values differ, they appear in red.
-
Creating or Deleting Delays:
-
Click Add Delay
-

-
→ fill in Time, Code, Reason, then click Save Delays.
-
Click Delete Delay
-

-
to remove an entry.
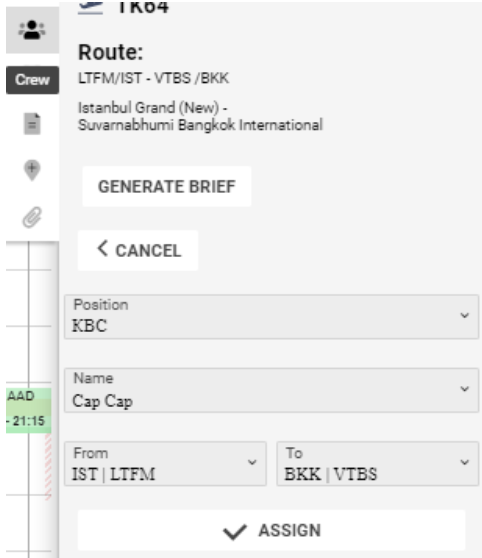
Crew Tab
Displays assigned crew and allows adding or removing members.
How to Add Crew:
-
Click Add New Crew.
-
Fill in Position, Name, From, and To fields.
-
Click Assign.
-
Click Generate Brief to print the crew brief.
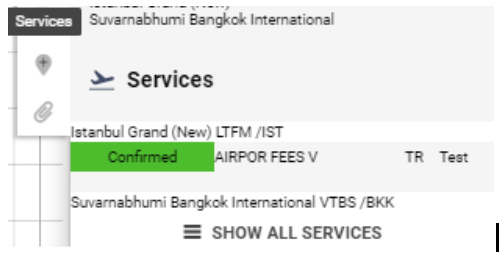
Services Tab
Shows information about flight services, including their type, provider, and location.
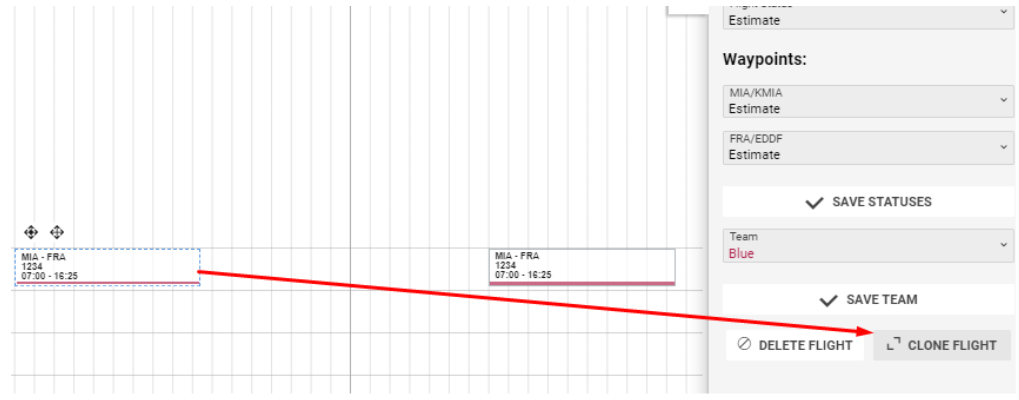
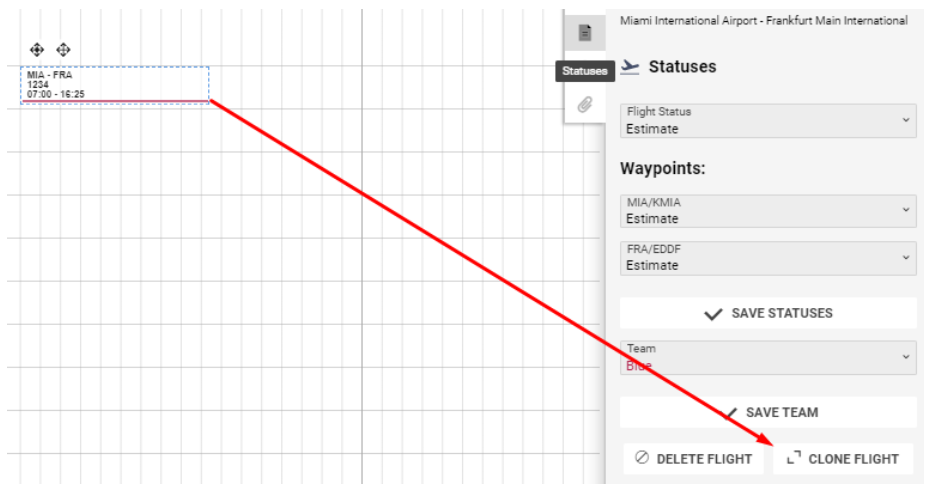
Statuses Tab
Allows you to control the overall flight status and individual sector statuses.
You can:
-
Assign a team (Save Team button).
-
Clone or delete flights.
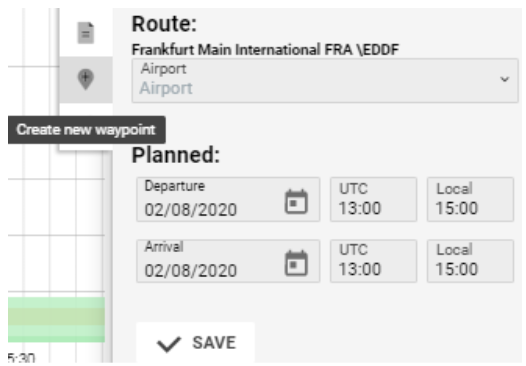
Create New Waypoint Tab
Allows adding new route points to the end of a flight path.
Editing is possible only from the main flight card.
Attachments Tab
Used to upload documents and create notes related to a specific flight or sector.
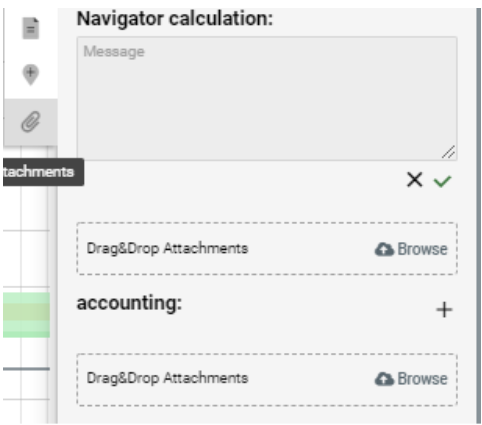
Star Color Indicators:
-
Red Star – Text notes present.
-
Pink Star – Files uploaded.
-
Red Star (combined) – Both text notes and files exist.
Graphical Flight Operations
You can move entire flights or individual sectors directly on the chart using icons.
-
Move Entire Flight:
-

-
Click on the flight box → drag to new position → click Save Sector or Save All Changes. -
Move Individual Sector:
-

-
Click the sector → drag to new time → confirm with Save. -
Move to Another Aircraft:
Click and hold the flight → drag to a new aircraft’s row (shows “+” icon) → click Save All Changes.
Flights with recorded Actual Times cannot be moved.
Creating Flights from the Interface
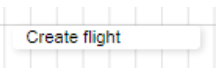
-
Select an aircraft registration, day, and time.
-
Click on the timeline to open the Create Flight button.
-
Click it to open the flight creation form.
Sorting and Filtering
You can filter the displayed flights using:

-
Call Sign Input Field
-
Status Selector
Cloning Flights
Schedule Creation (Without Services)
-
Select the flight → click Clone Flight.
-
Enter From Date, To Date, Status, and Days of the Week.
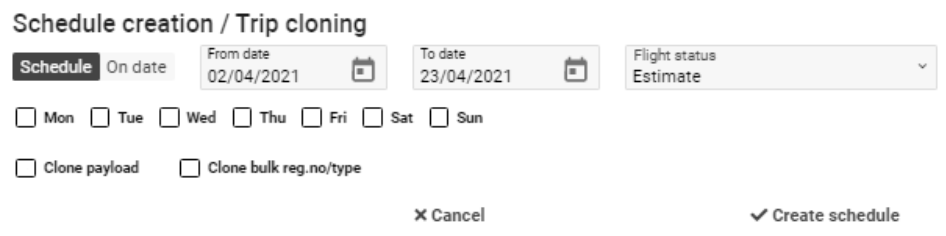
-
Click Create Schedule to confirm or Cancel to abort.

-
If successful, a confirmation message will appear.

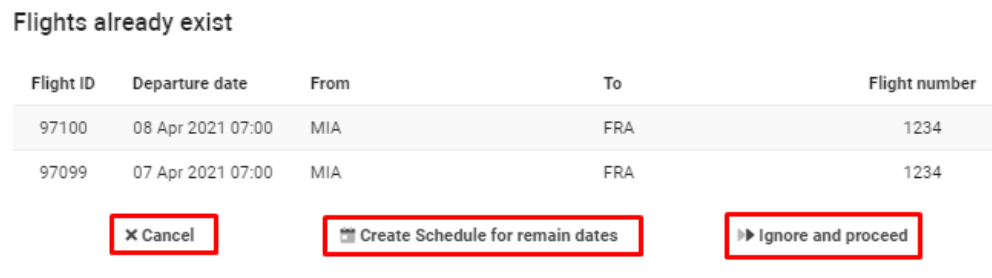
If a conflict occurs (duplicate schedule):
-
Cancel – aborts cloning.
-
Create Schedule for Remaining Days – skips duplicates.
-
Ignore and Proceed – overwrites existing data.
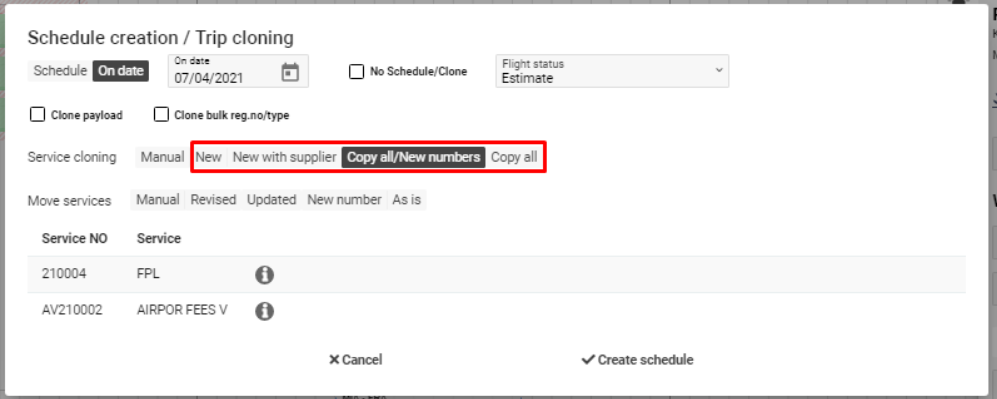
Schedule Creation (With Services)
-
Click Clone Flight.
-
Select one of the cloning methods:
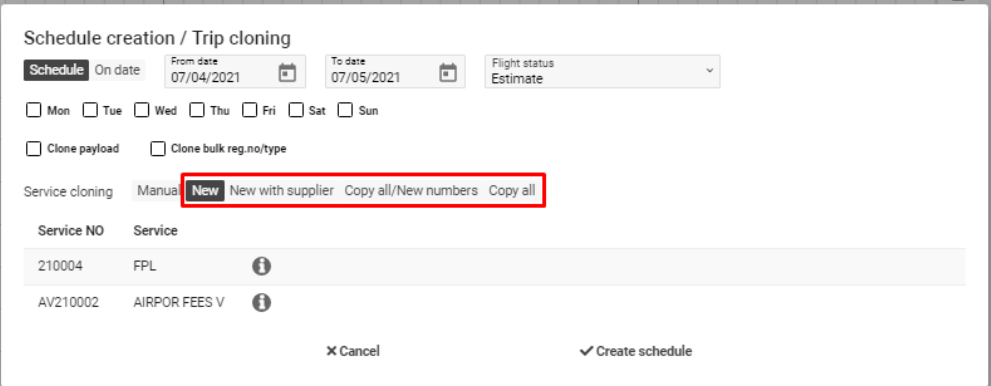
-
New: Creates new services with empty references.
-
New Supp: Keeps suppliers but resets references.
-
New Num: Keeps suppliers and statuses, resets references.
-
Copy All: Clones services exactly as-is.
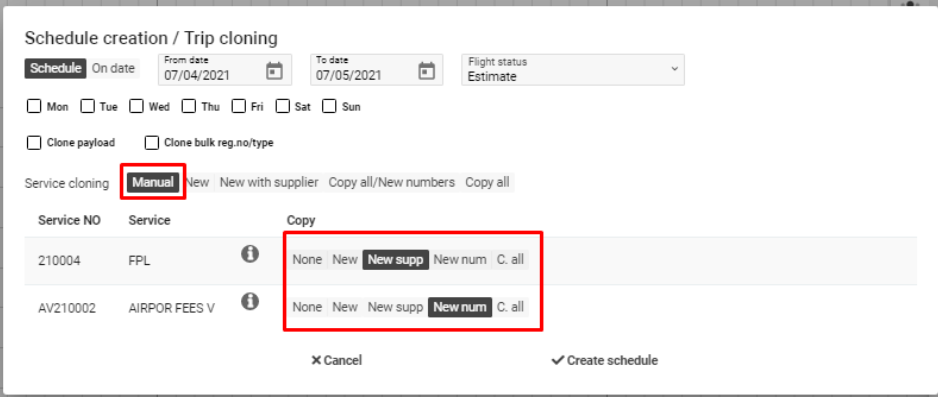
-
-
For detailed control, use the Manual Tab to select different options for each service.
-
Click Create Schedule to confirm or Cancel to stop the process.
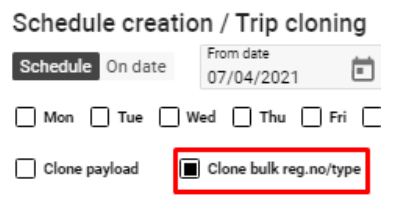
Optional Settings:
-
Clone Payload – Creates a new flight with the same load.
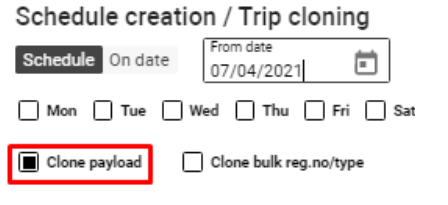
-
Clone Bulk Reg. No / Type – Clones flight with same registration number and aircraft type.
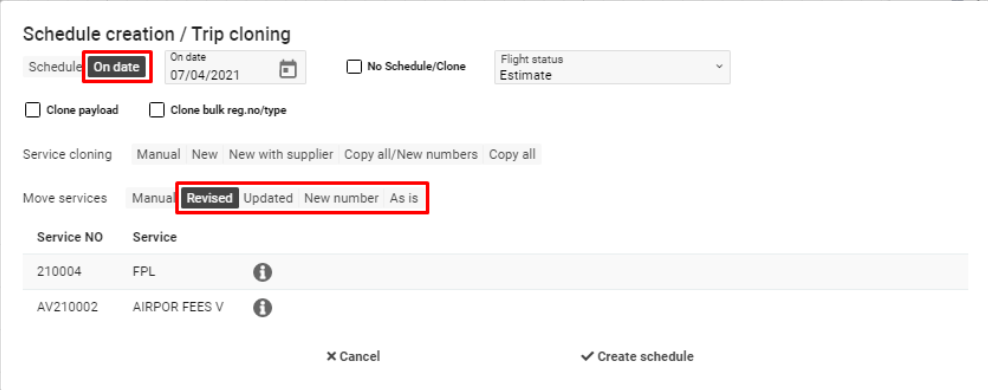
Schedule Creation for One Date
-
Switch to One Date Tab, select Date and Status.

-
Enable No Schedule / Clone to create a one-time flight copy.

-
Choose cloning options for services (same as above).
-
Click Create Schedule to confirm.
Moving Services
Allows transferring services from one flight to another.
You can select one of the following options:
-
Revised: Keeps Ref No and suppliers; creates a new revision.
-
Updated: Keeps suppliers, resets Ref No, marks schedule as updated.
-
New Number: Keeps suppliers but generates a new number; clears Ref No.
-
As Is: Moves services exactly as they are.
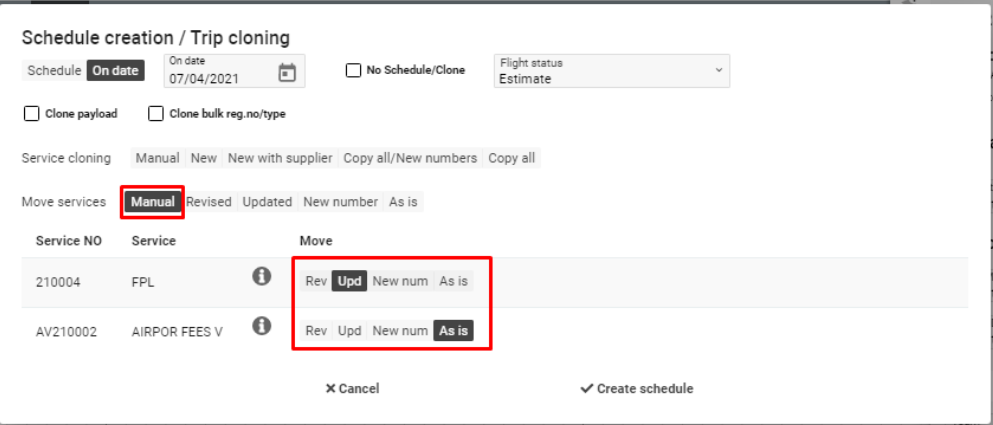
You may also use the Manual Tab to configure options per service.
Click Create Schedule to confirm or Cancel to discard changes.