
Home→ Flights→ Flights→ Flights Timeline View
Overview
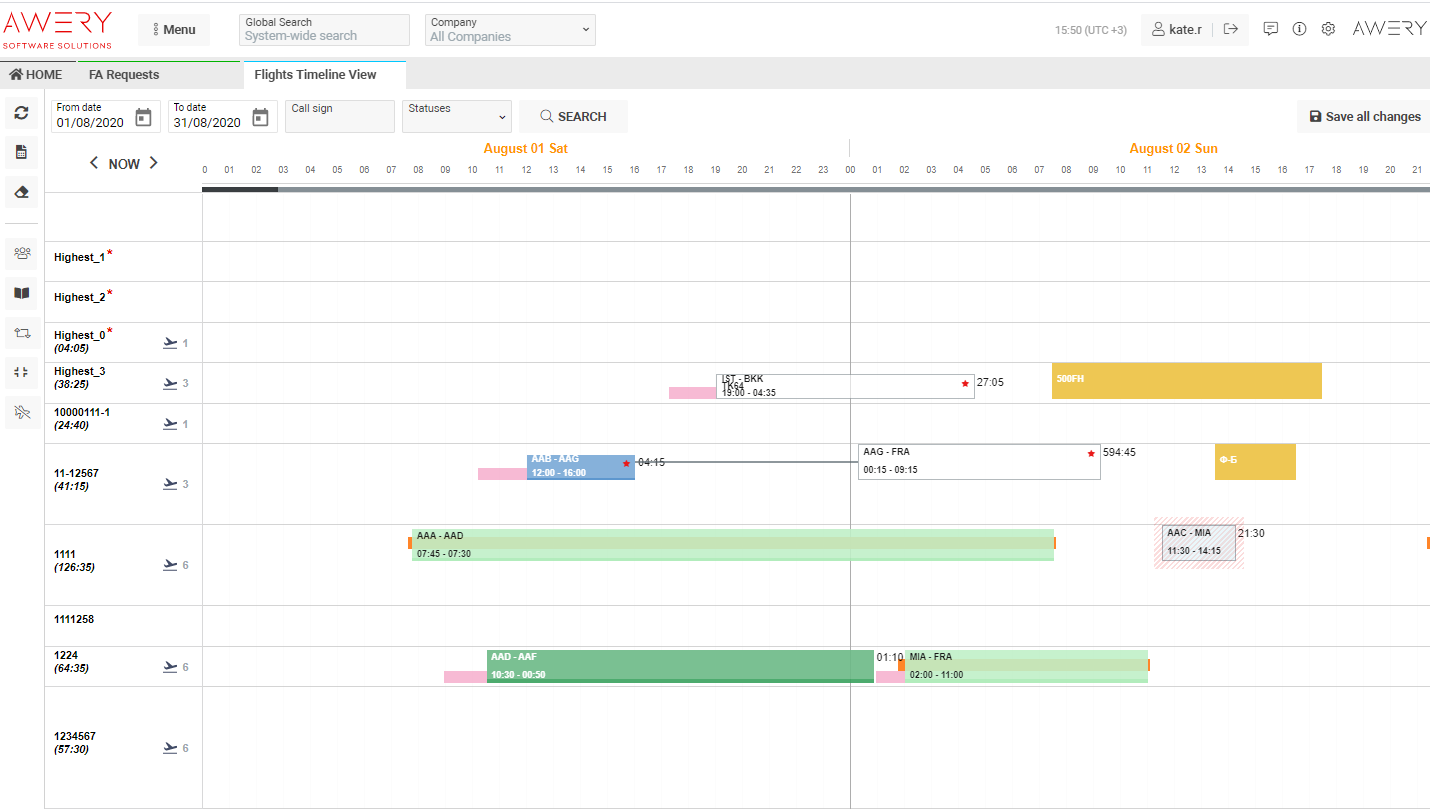
This interface helps you to see the full list of flights in the graphical view.
You can create the flight, fill in its planned/estimated/actual time, assign crew and make delays, see the information about maintenance and service, move flights to another registration number.
Also, it is possible to change waypoint statuses, clone flight with/without its payload and services or just to move them.
You can make different notes and download necessary documents. With the help of a report, you can see the chart in a more convenient view: just select the number of days.
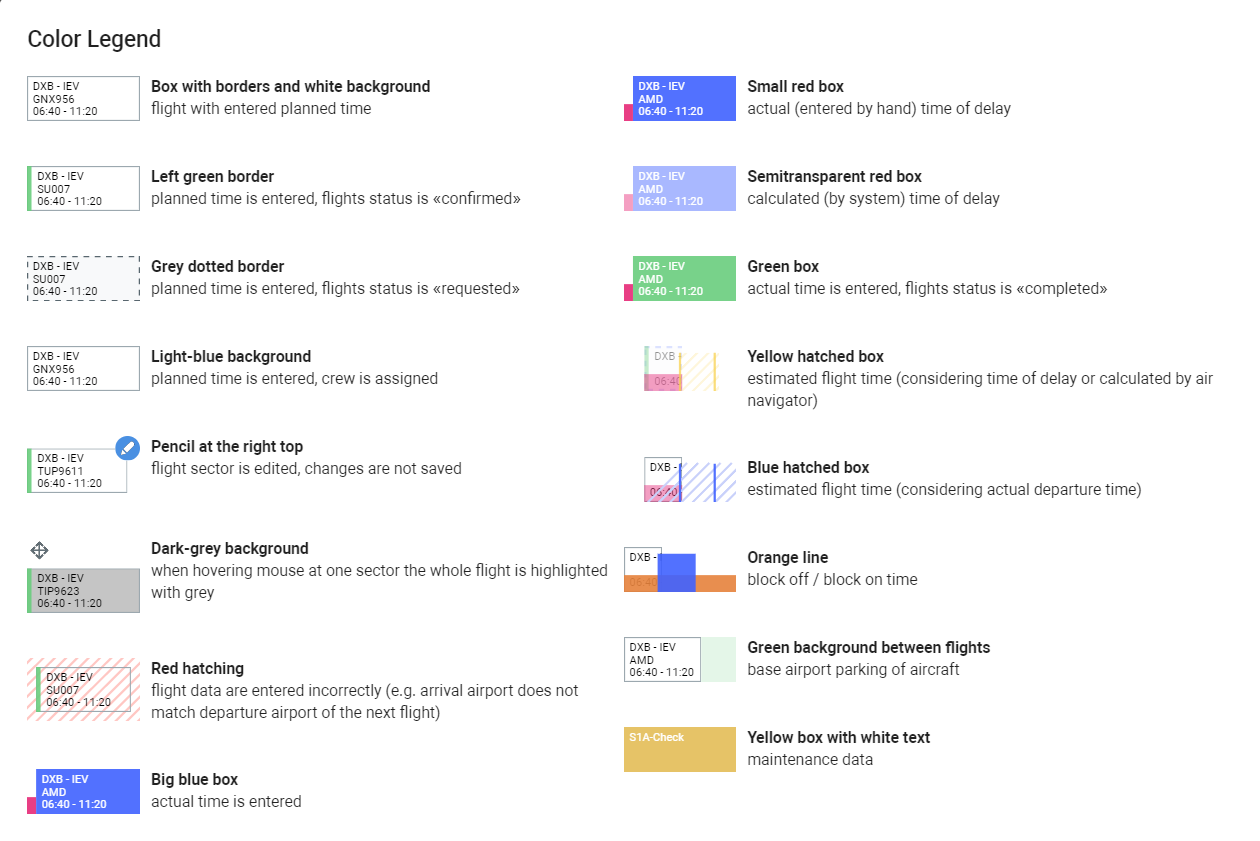
The legend will explain to you all the additional details about the chart
Manuals
-
The elements of the interface
-

-

-

-


-

-

-
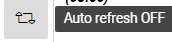

When the mode is ON, the schedule is automatically updated every 5 minutes. The auto-update function is disabled by default
-


-


Information about the Report tab
-
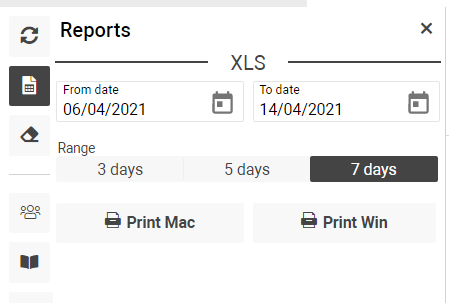
Click the Report button to open the sidebar
-
You have an opportunity to print the report in the xls format for Windows and iOS. Specified the period of 3/5/7 days and the report will be displayed on one sheet.
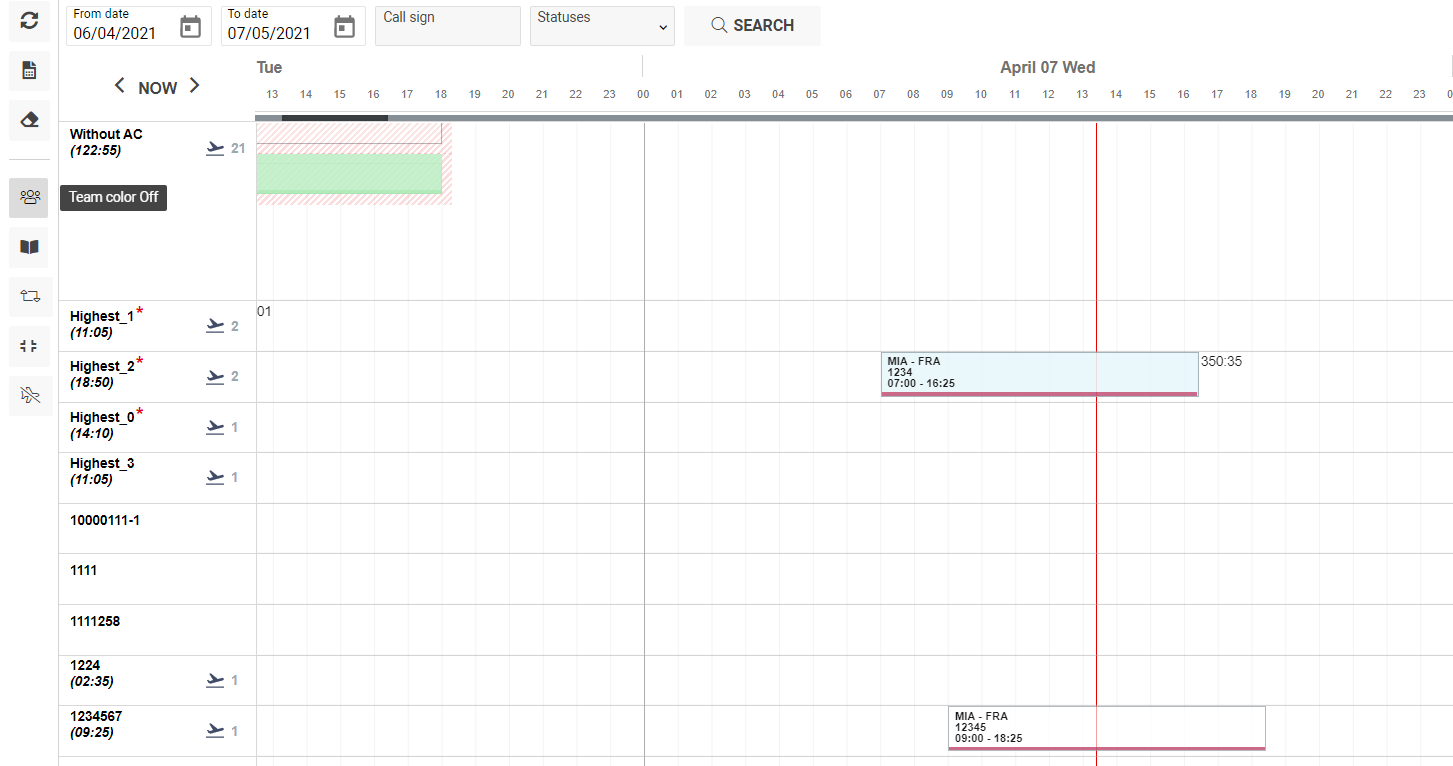
Examples of the Team color Off / Team color On
Team color Off
Team color On

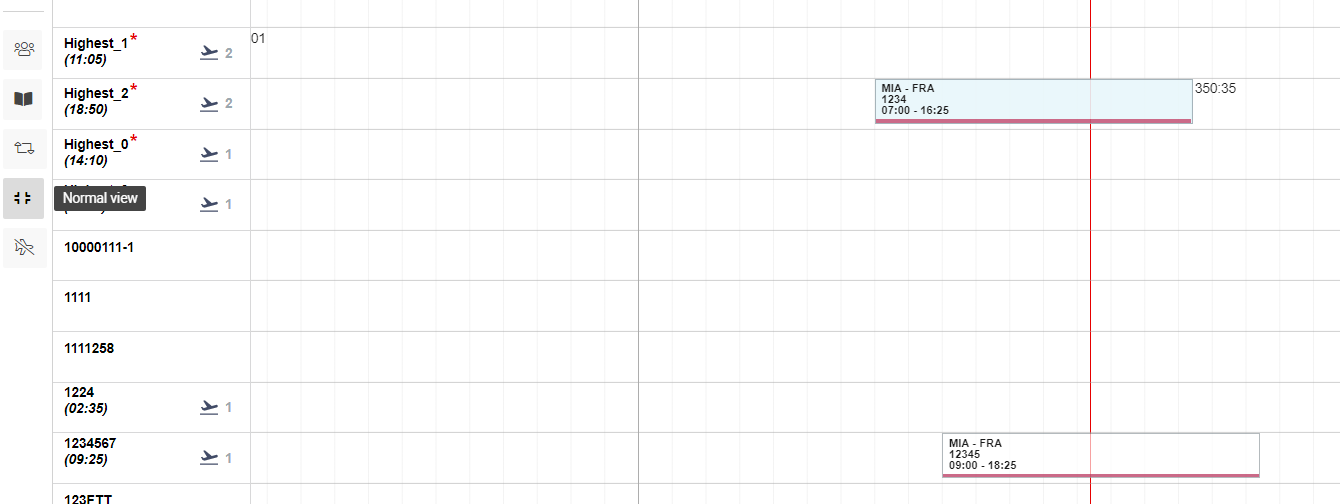
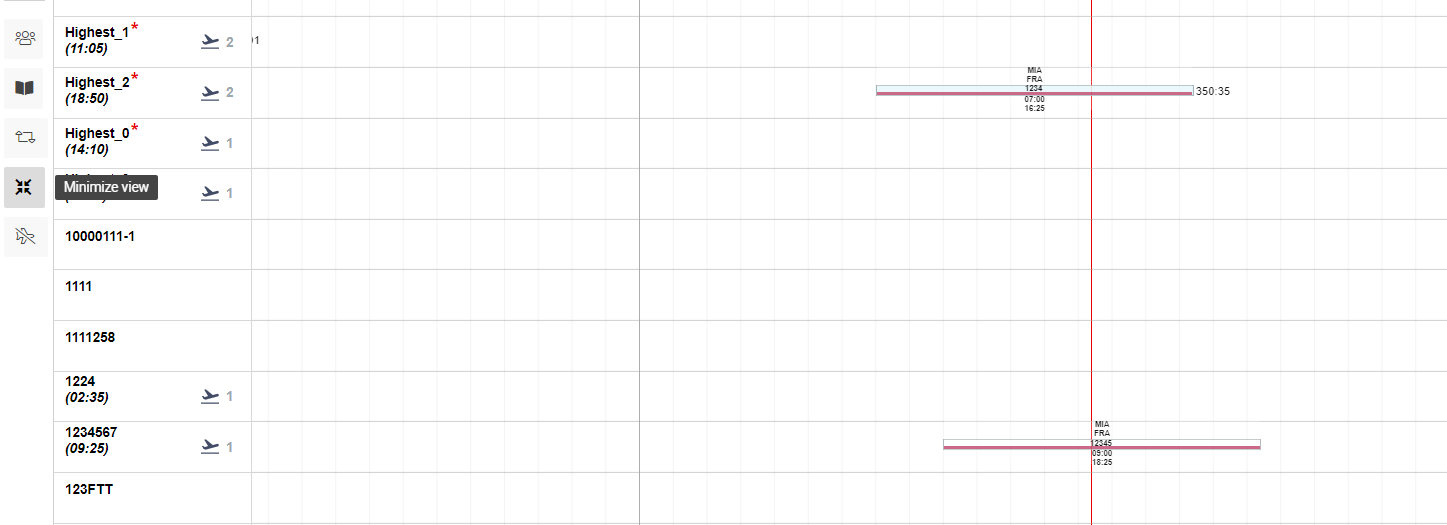
Examples of the Normal view / Minimize view
Normal view
Minimize view
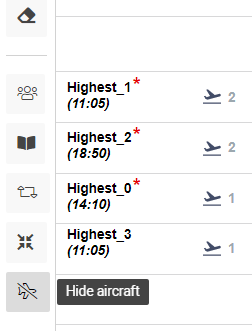
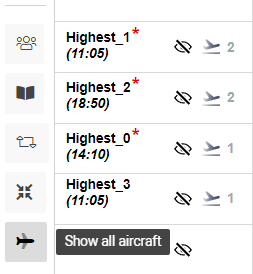
Examples of the Hide aircraft / Show all aircraft
-
Pay attention to the icon of the eye
Hide aircraft
Show all aircraft
The list of aircraft on the flight schedule
-
Each line displays flights on the aircraft, which registration number is indicated in the list on the left of the chart
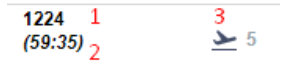
1 - the registration number of aircraft
2 - the number of aircraft’s flying hours (for the period specified in the From date and To
date fields)
3 - the number of aircraft cycles performed for a given period
2. The flight details
The timing tab
-
Select any flight and click on the box to open the details
The details of the sidebar
-

-

-

-
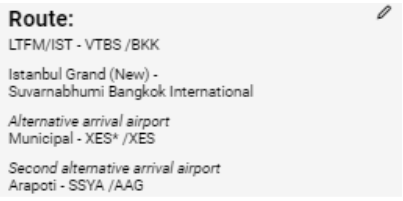
Pay attention that you have an opportunity to edit alternative/second alternative airport directly from the interface, clicking on the pen icon 
-

-
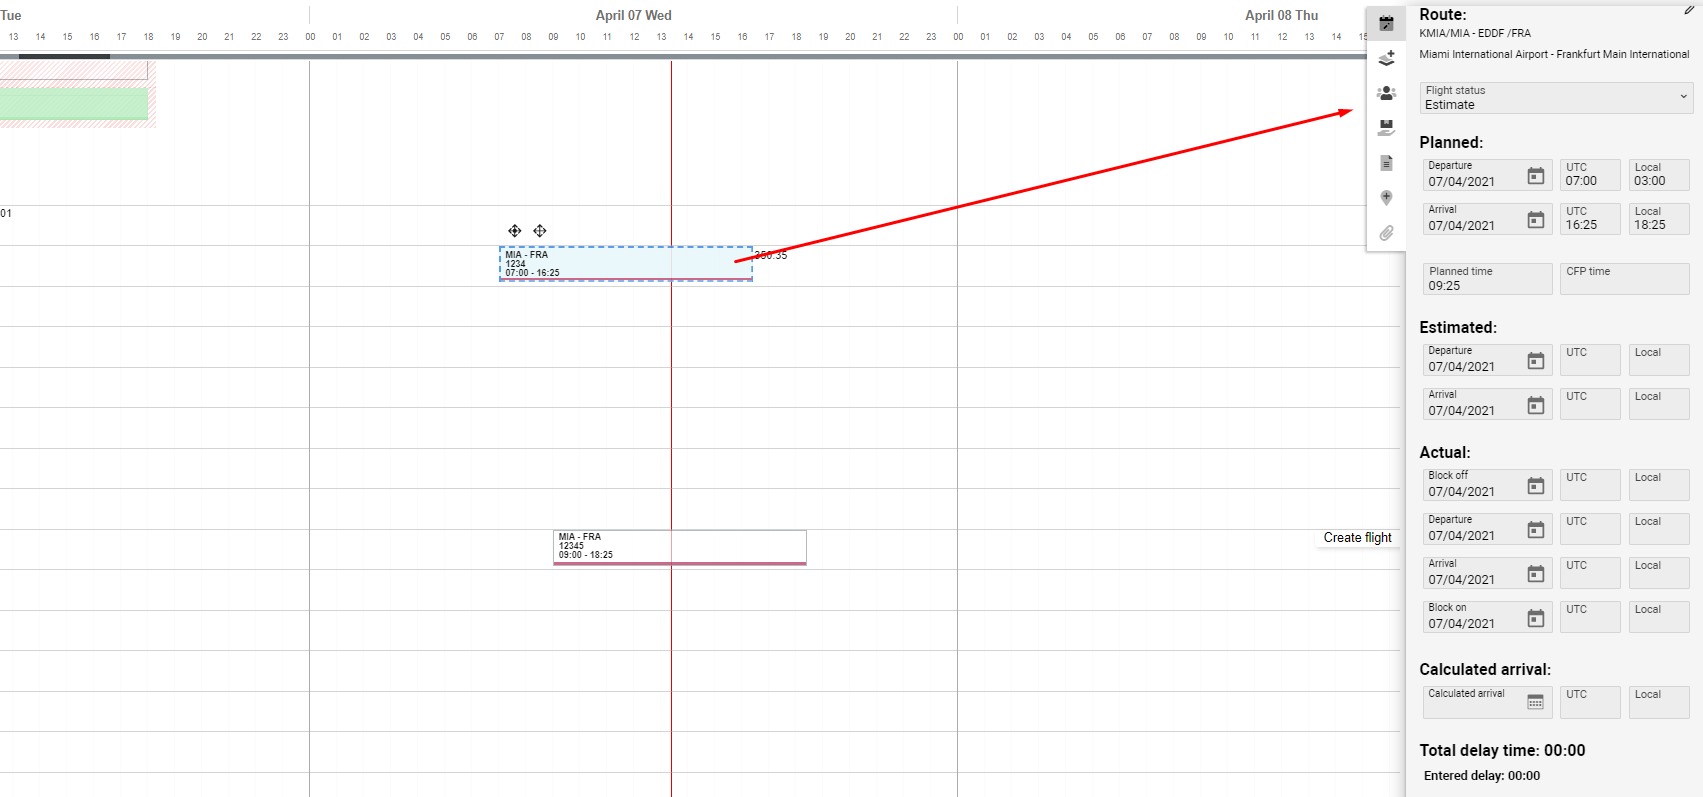
Entering STD/STA, ETD/ETA, ATD/ATA times
The block of times is divided into three main blocks: Planned, Estimated, Actual.
In each block there are two fields for entering the time for Departure and Arrival; when entered in UTC, this time is recalculated into Local and vice versa.
Planned
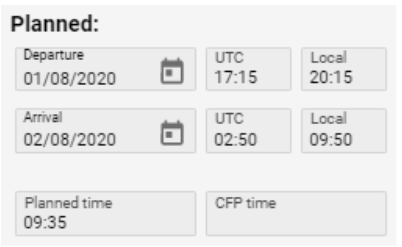
time minus the planned departure time). The field is not editable.

Estimated
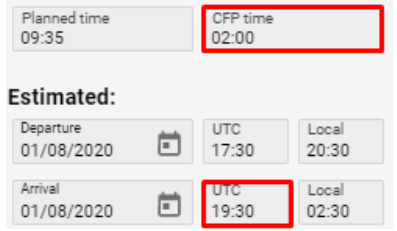
The ETA is calculated automatically after the introduction of ETD. The value is displayed
using the formula ETA = ETD + CFP time. In case the CFP time field is empty, the ETA = ETD + Planned Time. The ETA can also be filled in manually.
Actual
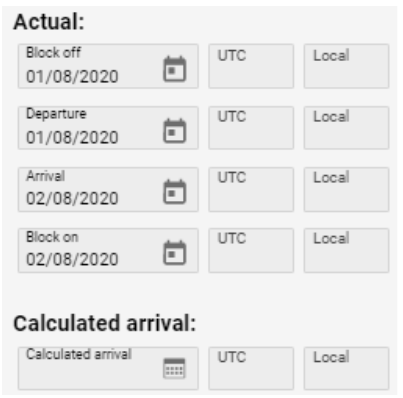
Calculated Arrival - the estimated time of flight arrival. The field is not editable. The value
in the Calculated Arrival field is calculated using the formula ATD + CFP time, in case the
CFP time is not filled, the Calculated Arrival = ATD + Planned Time. The value in this field is
displayed only after the ATD has been filled.

-
click the Send to crew
-

-
The Delays tab
-
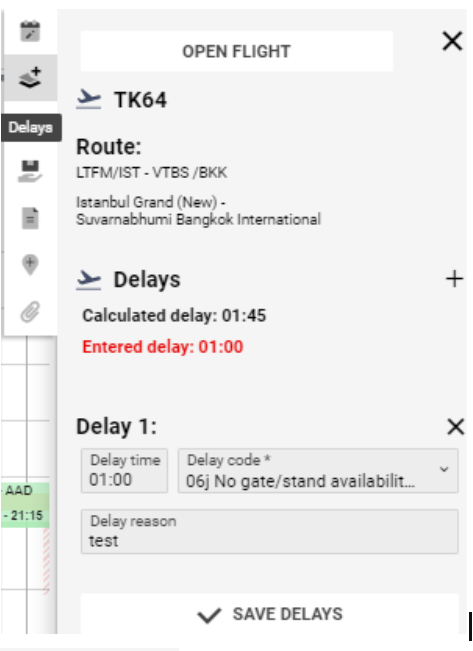
Tick the Delays button to open the information. The tab is shown detailed information about the flight delay (time, code, reason) and also allows you to add / remove delays.
-

-

In case the Calculated delay is not equal to the Entered delay, the font color will be red.
-
Click the

-
Click the

The Crew tab
-
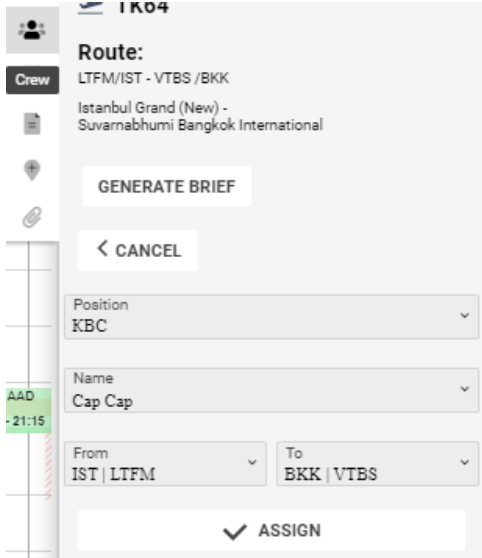
Tick the Crew button to open the information
This tab allows you to see the crew assigned to the flight and also makes it possible to assign and remove the current crew from flights. Also you have an opportunity to print brief, clicking the GENERATE BRIEF button
How to add crew
-
Click the ADD NEW CREW button
-
Fill in the Position, Name, From and To fields
-
Click the ASSIGN button
The Services tab
-
Tick the Services button to open the tab
Information about flight services, their locations and performers will be displayed on this tab

The Statuses tab
-
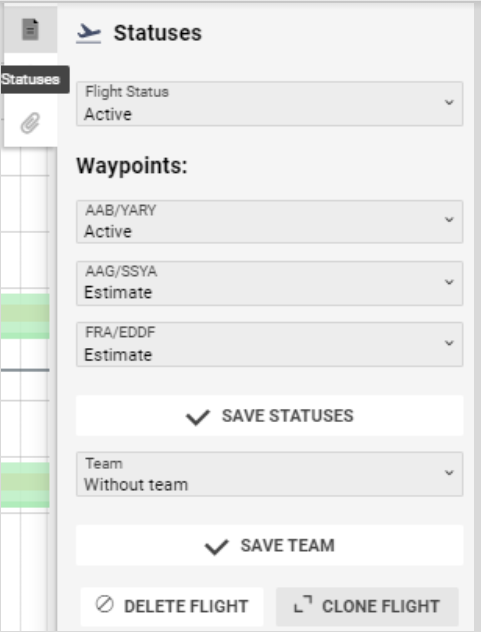
Tick the Statuses button to open the tab
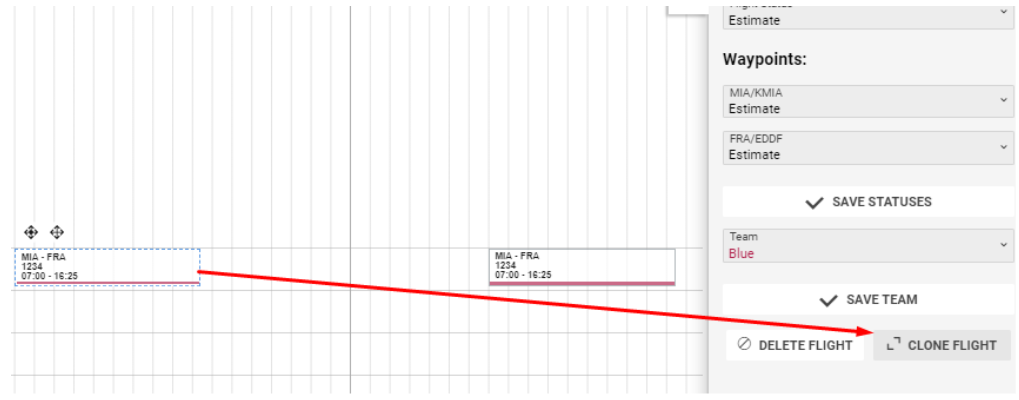
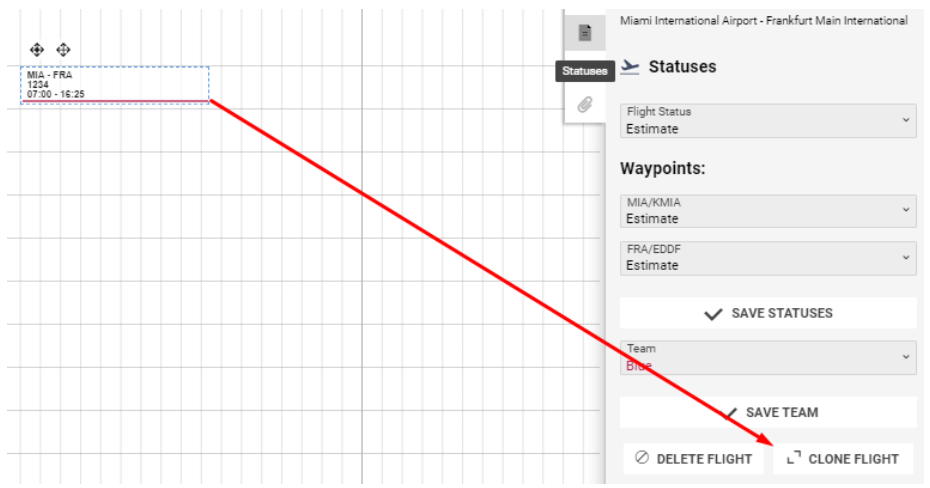
This tab allows you to control and change the status of the flight, as well as separately the statuses of each sector.
Also, you have an opportunity to assign a team clicking the SAVE TEAM button and to clone or delete flight
The Create new waypoint tab
-
Tick the Create new waypoint button to open the tab
This tab allows you to create an additional point in the route of the flight. The functionality is designed to add a new route point to the end of the flight. The editing is possible only from the main flight card.

The Attachments tab
-
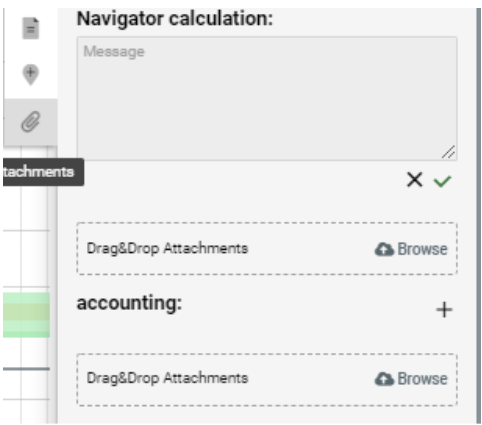
Tick the Attachments button to open the tab
This tab helps you to create and store files and text notes related to the flight in general and the sector in particular.
-
Conditions of the “stars” display:
-
-
In case of text notes, the star in the box will be red

-
In case of uploaded files, the star in the box will be pink

-
In case of the text notes and uploaded files, the star in the box will be red

-
3.The functional of the graphical flight movements and their individual sectors
-
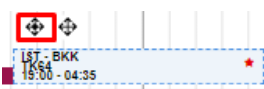
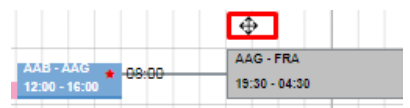
You have an opportunity to move flight boxes and their individual sectors using special icons.

-
-
click on the box and the icon will appear
-
move the flight to the desired time
-
You can see the changes in the flight details window that opens on the right, as well as on the box itself under the flight number.
-
-
-
click the SAVE SECTOR or the Save all changes button to confirm
-

-
-
click on the necessary sector and the icon will appear
-
move the sector to the desired time
-
-
-
click the SAVE SECTOR or the Save all changes button to confirm
-
+ - the icon appears in case you want to move the flight to another reg no
-
-
select the necessary flight
-
click on the box and hold it
-
the + icon will be shown
-
pull on the necessary reg no, without releasing
-
click the Save all changes button to confirm
-
Pay attention that you have no opportunity to move flights with filled actual time
-
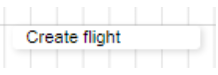
You have an opportunity to create the flight directly from the interface
-
Select the necessary reg no, day and time and click on the graph
-
The Create flight button will be displayed on the screen
-
-
-
Click on the button and the form for the flight creation will appear
-
Sorting and filtering
-
You have an opportunity to make filtration by:
-
The Call sign input field
-
The Statuses selector
-

4. Conditions for cloning flight
Schedule creation (without services)
-
To create the flight schedule, select the necessary flight and click the CLONE FLIGHT button (the Statuses tab)
2.Fill in the From date, To date, Flight status and days of the week for cloning the schedule (you can select min 1 day of week, max – all days)
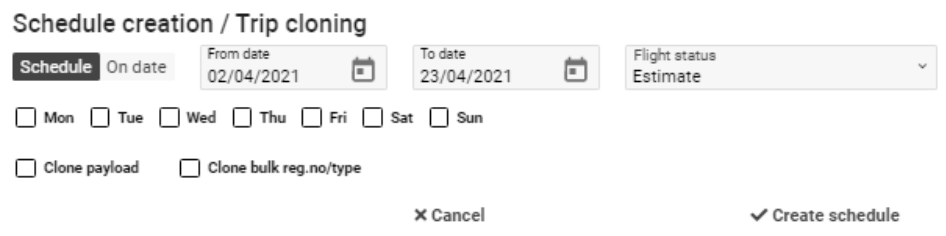
To confirm - click the Create schedule button. To cancel - click the Cancel button.
3.In case the cloning is successful, you will see the success message.

In case the cloning is unsuccessful, you will see the warning message with necessary information.

4.In case the flight has a call sign and you want to create a schedule for a day that has already had a schedule, click one of these 3 buttons.
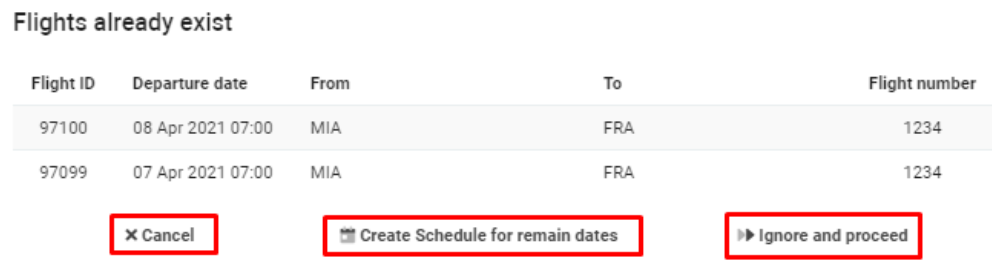
To cancel - click the Cancel button.
To create the schedule for the rest days - click the Create Schedule for remain days button.
To create the schedule for all days - click the Ignore and proceed button.
Schedule creation (with services)
1.To create the flight schedule, select the necessary one and click the CLONE FLIGHT button.
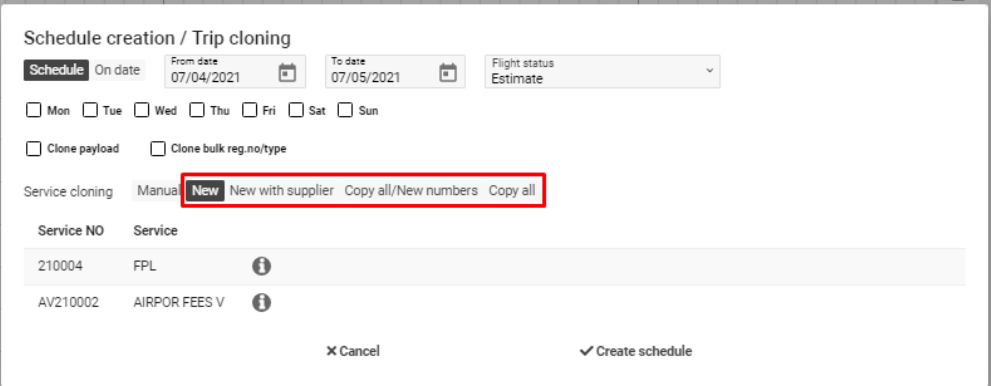
2. In case the flight has services, select the way to clone them.
2.1. Select one of the variants to use the same option for all services:
-
New – Services are cloned with no Reference number, all statuses are changed to initial, Service numbers are re-created; Notes, Name, Call sign, Validity, Execution date, Quantity, Alternative airport 1 and 2, Contacts fields are empty, Revenue and Expenses are empty too;
-
New supp – Suppliers are kept, services are cloned with no Reference number, all statuses are changed to initial, Service numbers are re-created; Notes, Name, Call sign, Validity, Execution date, Quantity, Alternative airport 1 and 2, Contacts fields are empty, Suppliers, Into/FBO Revenue and Expenses are empty too;
-
New Num – Statuses, Suppliers are kept, empty Ref No, Services numbers are re-created; Notes, Name, Call sign, Validity, Execution date, Quantity, Alternative airport 1 and 2, Contacts fields are empty, Suppliers, Into/FBO Revenue and Expenses are empty too;
-
Copy all – Services are cloned with current Statuses, same Suppliers, Service & Reference numbers, Revenue and Expenses aren’t cloned.
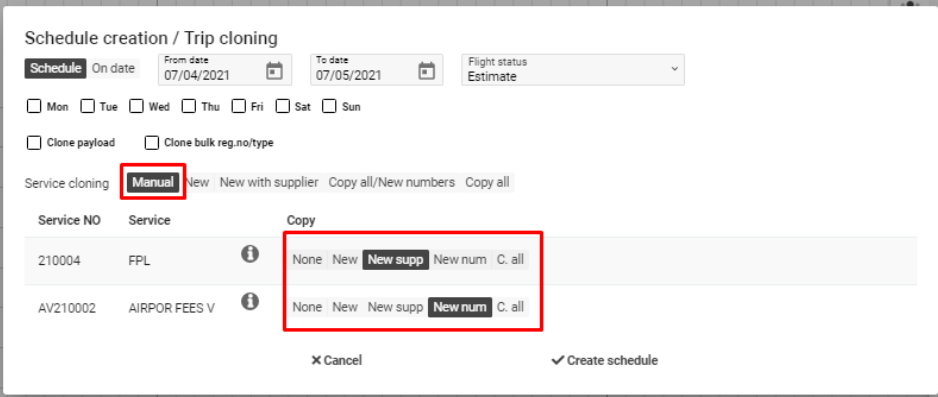
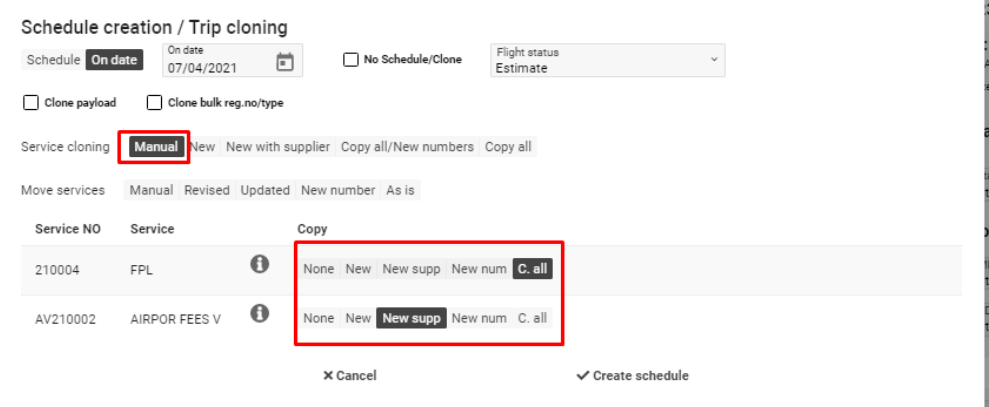
2.2. To use different options for each service, stay in the Manual tab.
Click the checkbox to the necessary tabs
-
None – Services are not cloned
2.3. To confirm - click the Create schedule button.
To cancel - click the Cancel button.
3. To see all information about service – click the 
-
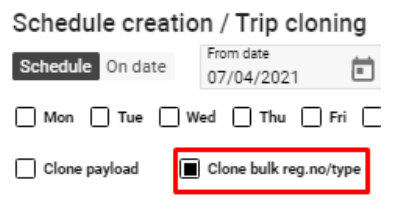
Tick the Clone payload checkbox to create new flight with the same load
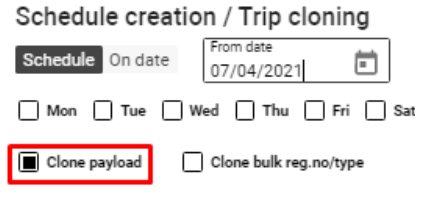
-
Tick the Clone bulk reg.no/type checkbox in case you need to clone the flight with the same registration number and aircraft type
Schedule creation for one date
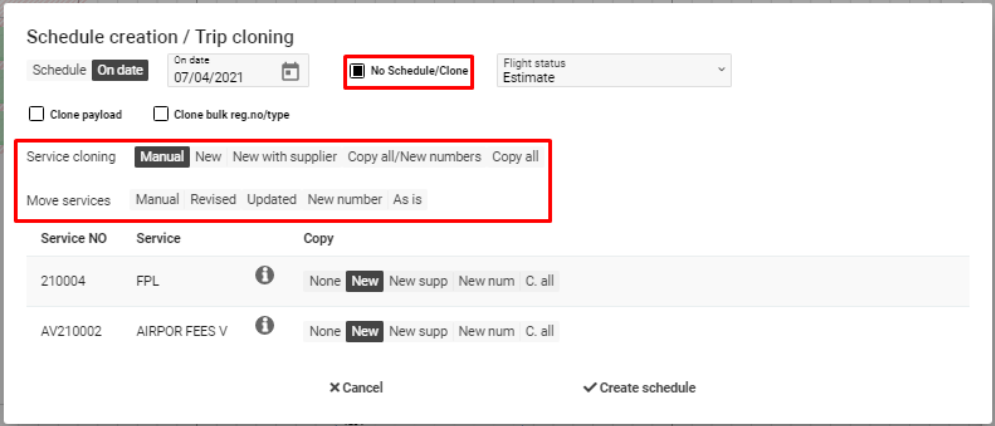
1.To create the flight schedule for one date, move the checkbox to the One date tab. Select the date and Flight status.

2.To make a new flight without creating the schedule, but with the same information about it, click the checkbox to the No Schedule/Clone tab.
After clicking the Create schedule tab, a new single flight will be created.

In case the flight has services, select the necessary way to create it with No Schedule/Clone option.
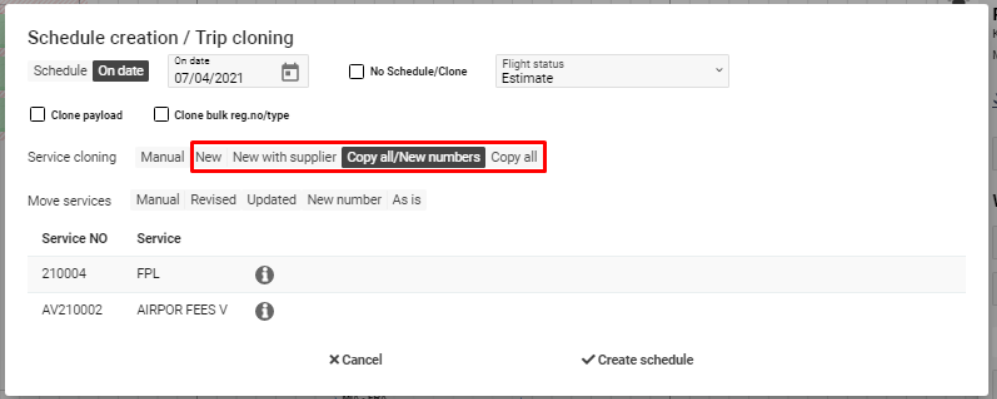
3.In case the flight has services, select the way to clone them for one date.
3.1. Select one of the variants to use the same option for all services:
-
New – Services are cloned with no Reference number, all statuses are changed to initial, Service numbers are re-created; Notes, Name, Call sign, Validity, Execution date, Quantity, Alternative airport 1 and 2, Contacts fields are empty, Revenue and Expenses are empty too;
-
New supp – Suppliers are kept, services are cloned with no Reference number, all statuses are changed to initial, Service numbers are re-created; Notes, Name, Call sign, Validity, Execution date, Quantity, Alternative airport 1 and 2, Contacts fields are empty, Suppliers, Into/FBO Revenue and Expenses are empty too;
-
New Num – Statuses, Suppliers are kept, empty Ref No, Services numbers are re-created; Notes, Name, Call sign, Validity, Execution date, Quantity, Alternative airport 1 and 2, Contacts fields are empty, Suppliers, Into/FBO Revenue and Expenses are empty too;
-
Copy all – Services are cloned with current Statuses, same Suppliers, Service & Reference numbers, Revenue and Expenses aren’t cloned
3.2. To use different options for each service, stay in the Manual tab.
Click the checkbox to the necessary tabs.
3.3. To confirm - click the Create schedule button.
To cancel - click the Cancel button.
Move services
You have an opportunity to move services from flight.
1.In case the flight has services, select the way to move them
1.1. Select one of the variants to use the same option for all services:
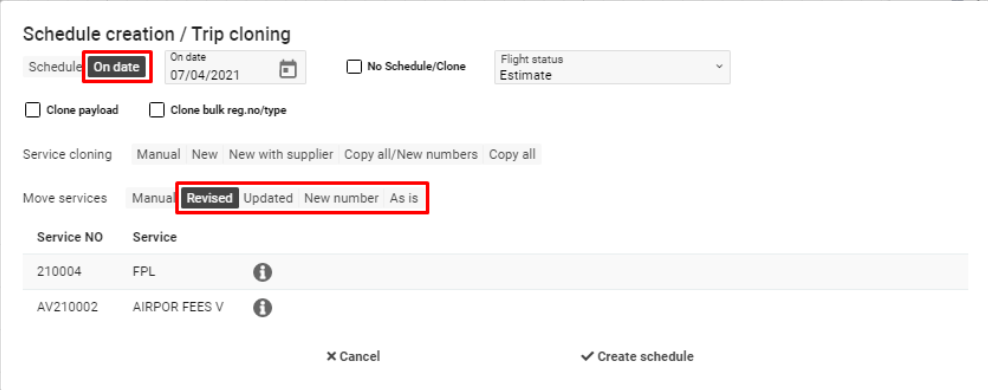
-
Revised – Services are moved with Status (Not Actioned), Ref No, Number, Supplier/-s, Expenses/Revenue, but with a created revision and Schedule status Revised
-
Updated - Services are moved with Number, Supplier/-s, Expenses/Revenue, Status Not Actioned, Schedule status Updated, Empty Ref No
-
New number - Services are moved with Expenses/Revenue, Status N/A, Schedule status Updated, Ref No deleted, New number created, Supplier/-s are kept
-
As is – Services are moved keeping Number, Ref No, Status, Schedule Status, Supplier/-s, Expenses/Revenue.
1.2. To use different options for services, stay in the Manual tab
Click the checkbox to the necessary tabs.
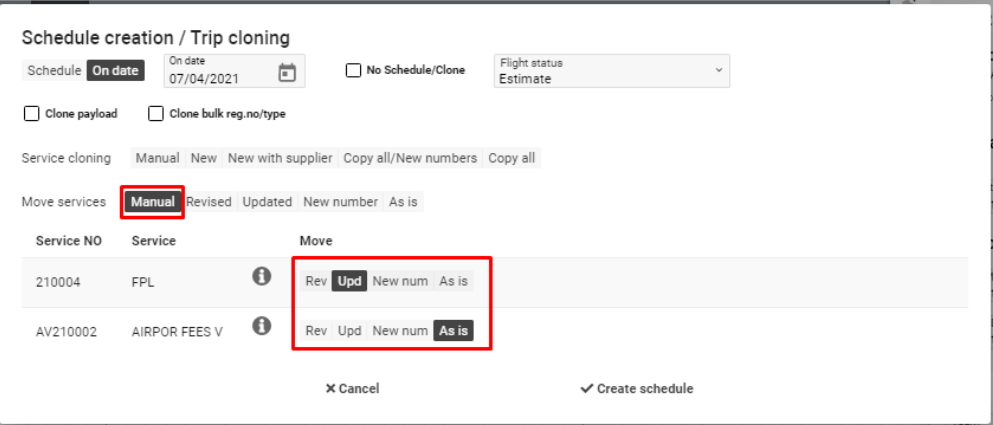
1.3. To confirm - click the Create schedule button.
To cancel - click the Cancel button.
Permissions