
Home→ Info & Rates→ Info→ Airports→ Open any or Create new
Overview
On the page you can fill in the main information about an airport: main information, general details, fuel details and others.
Also, you can see added airport location on the Map tab, see Notams etc.
Pay attention when you create a new airport only Airport Tab available. Other tabs will be available after creation.
Tabs descriptions
Airport tab
At the top of the tab you can see the main buttons: Add/Update/Delete/Reports (pdf/xls reports for download airport details in simple view or extended view).
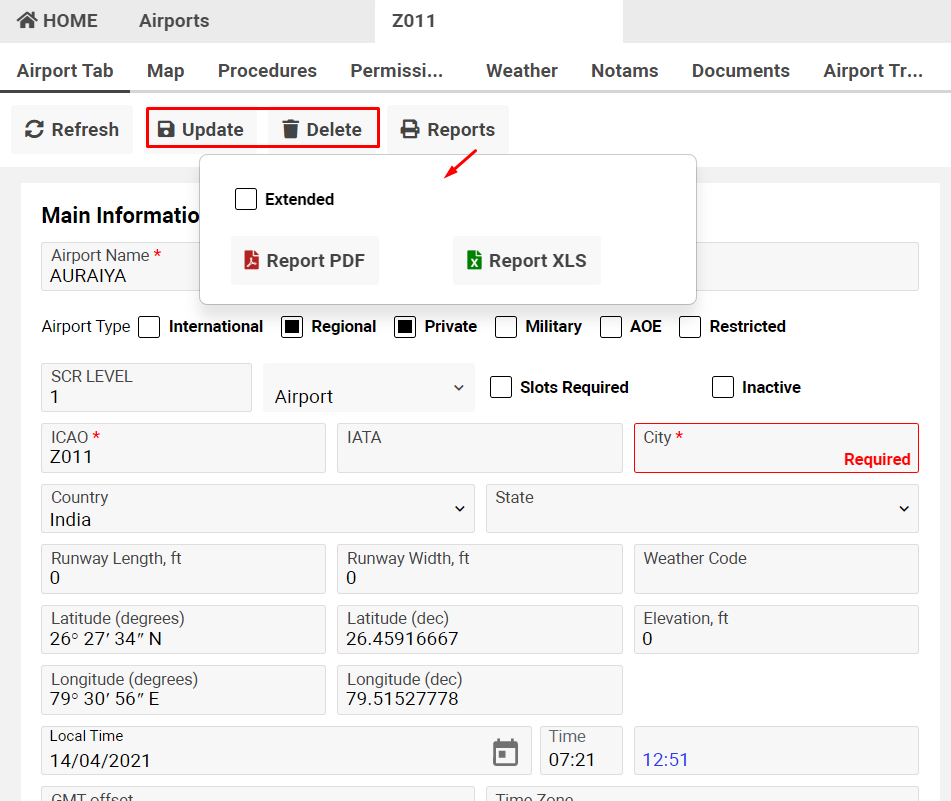
Main information block
For adding an airport you should fill in the main data in the block.
Mandatory fields (marked red asterisk): Airport name, ICAO (International Civil Aviation Organization), City, Country, Latitude (degrees), Latitude (dec), Longitude (degrees), Longitude (dec), Time Zone.
Pay attention: Country, Latitude (degrees), Latitude (dec), Longitude (degrees), Longitude (dec), Time Zone fields required by additional permission.
Example, 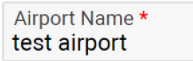
Nota Bene: The data for Main information block updated by ‘Update Airport Common Database’ button at the bottom of the block.

You can select Airport type, it can be International, Regional, Privat, Military, AEO, Restricted.
Not mandatory fields:
-
SCR Level - Slot Clearance Request Level for the airport. Level 2 will highlight in red, Level 3 will highlight in blue.
-
Port type - port type of an airport (Airport, Faa, Heliport, Seaport, City). By default type Airport.
-
Slots Required and Inactive ticks.
IATA (International Air Transport Association) - you will see the alert when you are trying to save airport data without IATA code: ‘Are you sure? Empty IATA code. Proceed to update?’ and buttons Yes/No
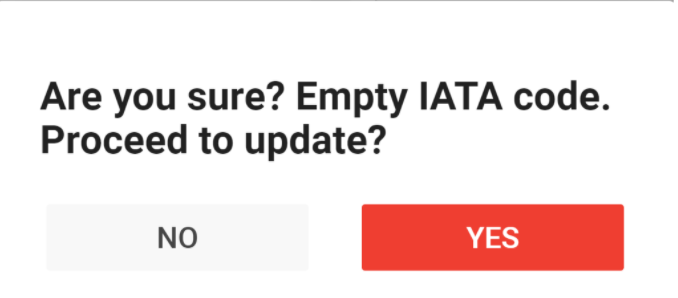
The airport will save without IATA code if you click ‘Yes’.
You can fill in more data and IATA code if you click ‘No’.
Country - country of an airport.
State - country state of an airport.
You can clarify Runway Length, Width, Latitude, Longitude, Weather Code, Elevation and see Local time in ut, Control Tower hours, Tower Phone, Web, Tower Freq. (MHz), Ground Freq. (MHz), Atis Freq. (MHz), Clearance Freq. (MHz).
Local time and GMT offset will show after saving Time Zone:

In case an airport needs Prior Permissions Required, or have Customs, or Handling mandatory, or an airport is open around the clock you can use Prior Permissions Required, Customs, Handling Mandatory, Open 24 hrs ticks.
In addition you can also select Tarmac condition, Main Deck Loader, clarify Fire Category and Slot Mail.
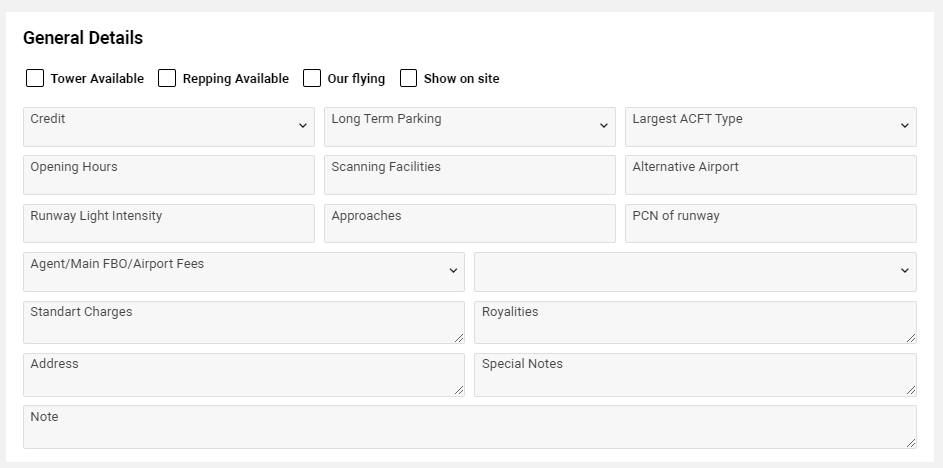
General Details block
In the General Details block you can mark an airport by a tick if an airport have a Tower, or Repping, or an airport own flying, or you need to show it on a site (setup for portals) you can use Tower Available, Repping Available, Our flying, Show on site ticks.
You can select Credit status, Load Term Parking status, Largest Aircraft type.
Also, you can enter opening hours value, scanning facilities value, alternative airport name, runway light intensity, approaches, PCN (Pavement Classification Number) of runway.
In case an airport has Agent/Main FBO/Airport Fees, you can clarify it.
As notes you can enter Standard Charges, Royalties, Address, Special Notes, Notes.
Fuel Details
In the Fuel Details block you can select the type of available fuel and fill in fuel restrictions.

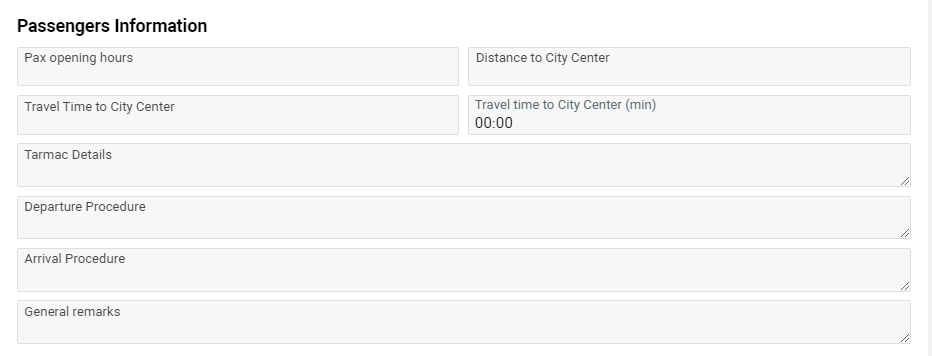
Passengers Information
In the Passenger Information block you can clarify Pax opening hours, distance to city center, travel time to city center (input and time input) and different notes: Tarmac Details, Departure Procedure, Arrival Procedure, General Remarks.
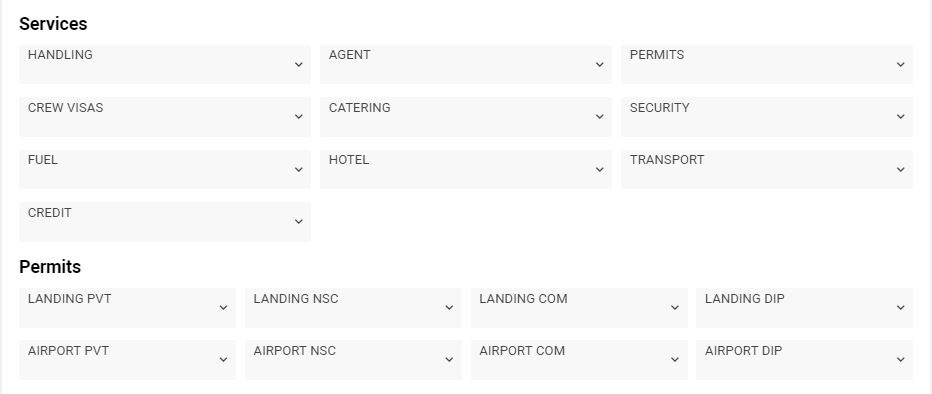
Services and Permits block
Services
You can mark availability of different services types (handling, agents, permits, crew visas, catering, security, fuel, hotel, transport) and credit condition.
Permits
You can clarify the requirements of Landing PVT/NSC/COM/DIP and Airport PVT/NSC/COM/DIP.
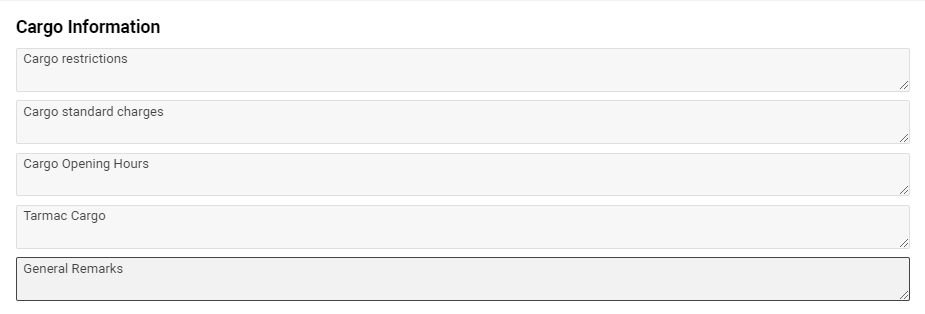
Cargo Information
In this block you can check availability of Cargo restrictions, Cargo Standard Charges, Cargo Opening Hours, Tarmac Cargo, General Remarks for an airport.
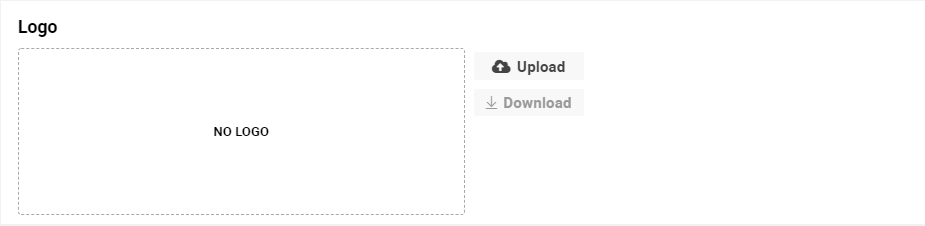
Logo
In case an airport has any logo, you can load it in the Logo block.
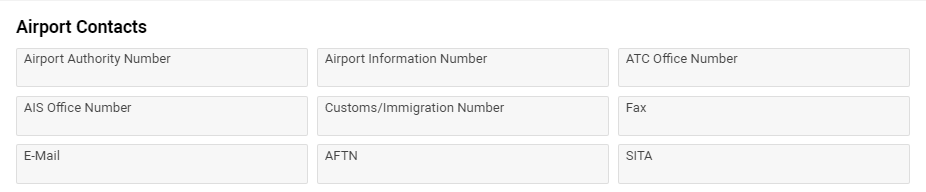
Contacts
An airport contacts you can save in the Contacts block.
You need to clicking on the ‘New Contact’ button and see the sidebar with fields for creation:
Main data: First name (mandatory field), Middle name, Surname, Prefix and Suffix.
In addition you can clarify Description and Mailing Category for a contact.
Contacts data: you can mark contact as default by ‘Default’ tick and fill in contact details, for examples, Tel, Mobile, Fax, etc.
After entering details you need to click on the ‘Save’ button in the sidebar.
In case you want to add the contact item to the contact, you can use the “New Item” button for a contact.
In case you want to change contact details, you can use the ‘Edit’ button for a contact.
Also, you can delete a contact by the ‘Delete’ button and copy contact to another airport/customer/supplier, etc. by ‘Copy to’ button - select needed contractor and click the “Apply” button.
Terminals
In this block you can enter data by terminals of an airport.
You need to fill in the Name (mandatory field) of an airport terminal, Code of an airport terminal, Latitude and Longitude, and clarify Address/Location/Description for an airport terminal.
If you want to update a terminal, you can use the ‘Update’ button.
If you want to delete a terminal, you can use the ‘Delete’ button.
In case you select a terminal and want to create a new record, you can use the ‘New’ button.

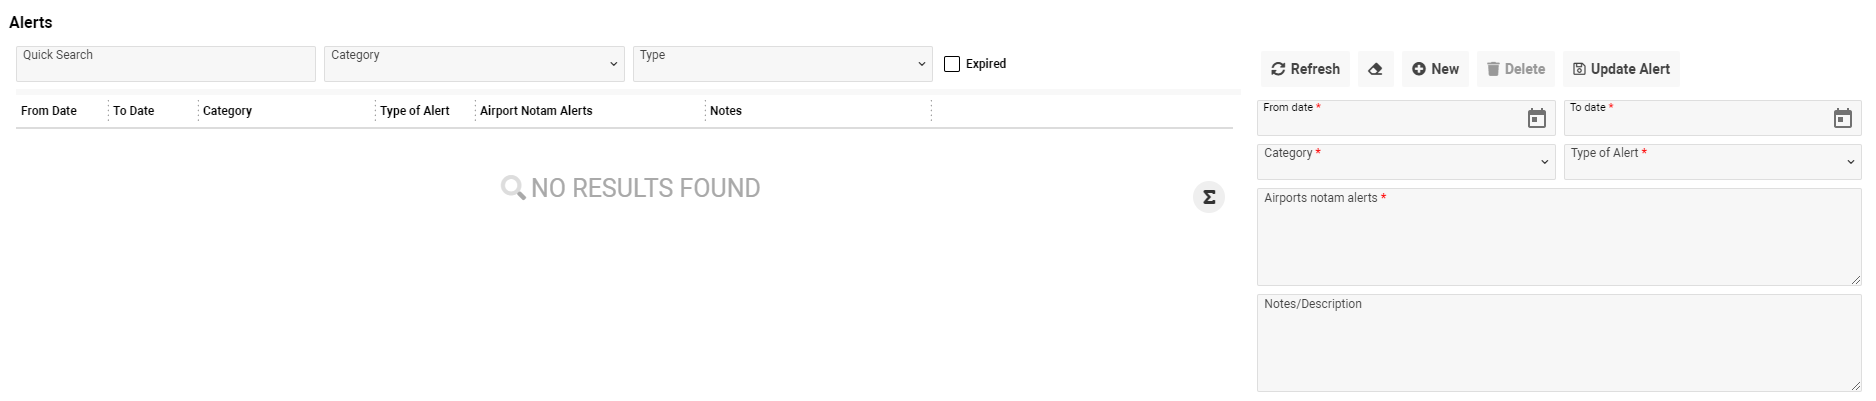
Alerts
In this block you can enter data by airport alert, for example, the airport has restrictions on International Holidays, National Holidays, etc.
You need to fill the From date (mandatory field), To date (mandatory field), Category of an alert (mandatory field), Type of alert (mandatory field), Airports notam alerts (mandatory field), Notes/Description for an alert.
If you want to update a terminal, you can use the ‘Update Alert’ button.
If you want to delete a terminal, you can use the ‘Delete’ button.
In case you select a terminal and want to create a new record, you can use the ‘New’ button.
Also, you can filter airport alerts by Category, Type and can see expired alerts by ‘Expired’ tick. You can use a quick search for the airport alert list in case you want to search fast any alert. Filtration works by Enter and Refresh buttons. In case you want clear filters, you can use the “Clear filters” button.
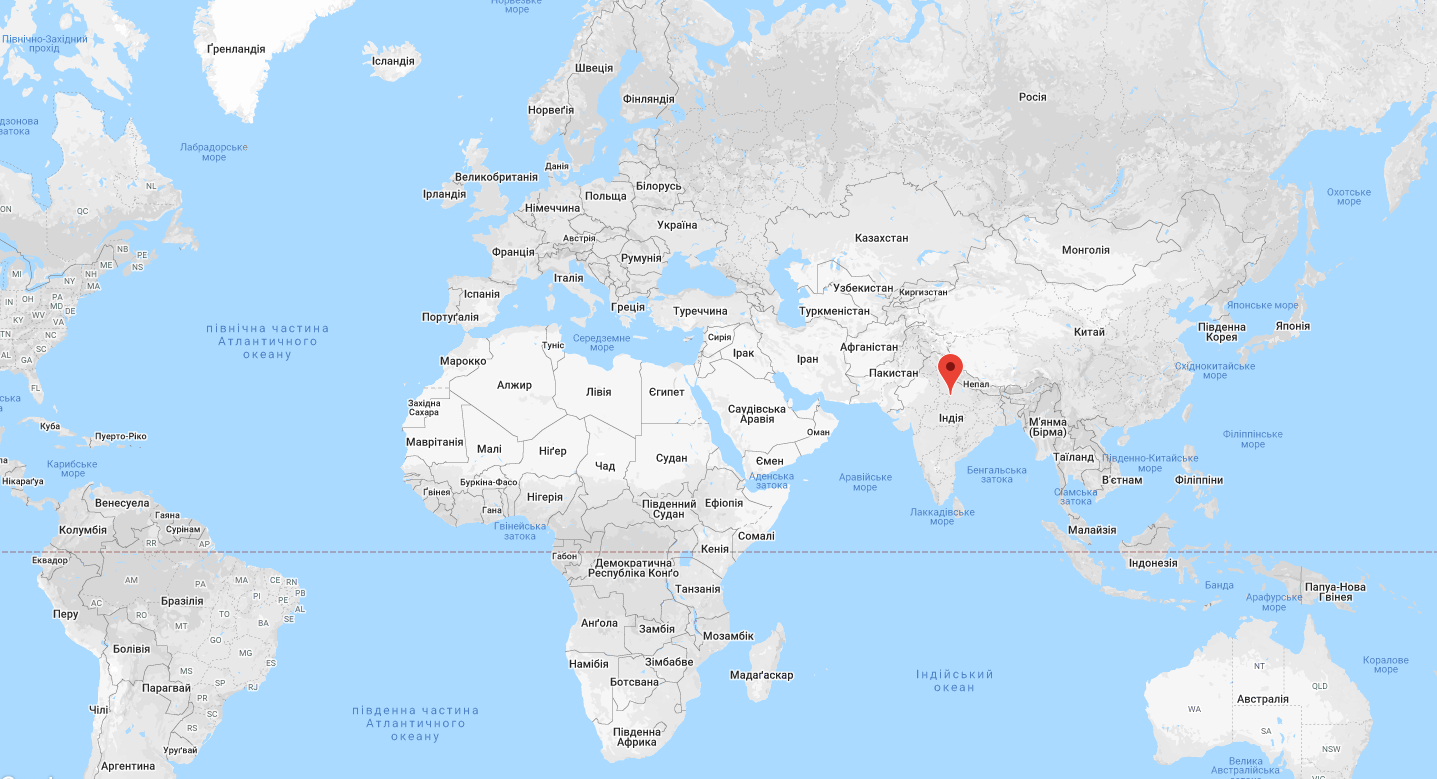
Map tab
On the Map tab you can see the airport location of the map according to the enter latitude/longitude on the Airport tab (Main Information block).
Procedures tab
On the Procedures tab you can clarify procedures for the airport and clarify information about it: type of a procedure, name of a procedure (mandatory field), terminal for procedure, notes for departure/arrival procedure.
The list of created procedures you can see at the bottom of this page.
If you want to update a procedure, you can use the ‘Update’ button.
If you want to delete a procedure, you can use the ‘Delete’ button. The ‘Delete’ button is available for created procedures.
In case you select a procedure and want to create a new record, you can use the ‘New’ button.

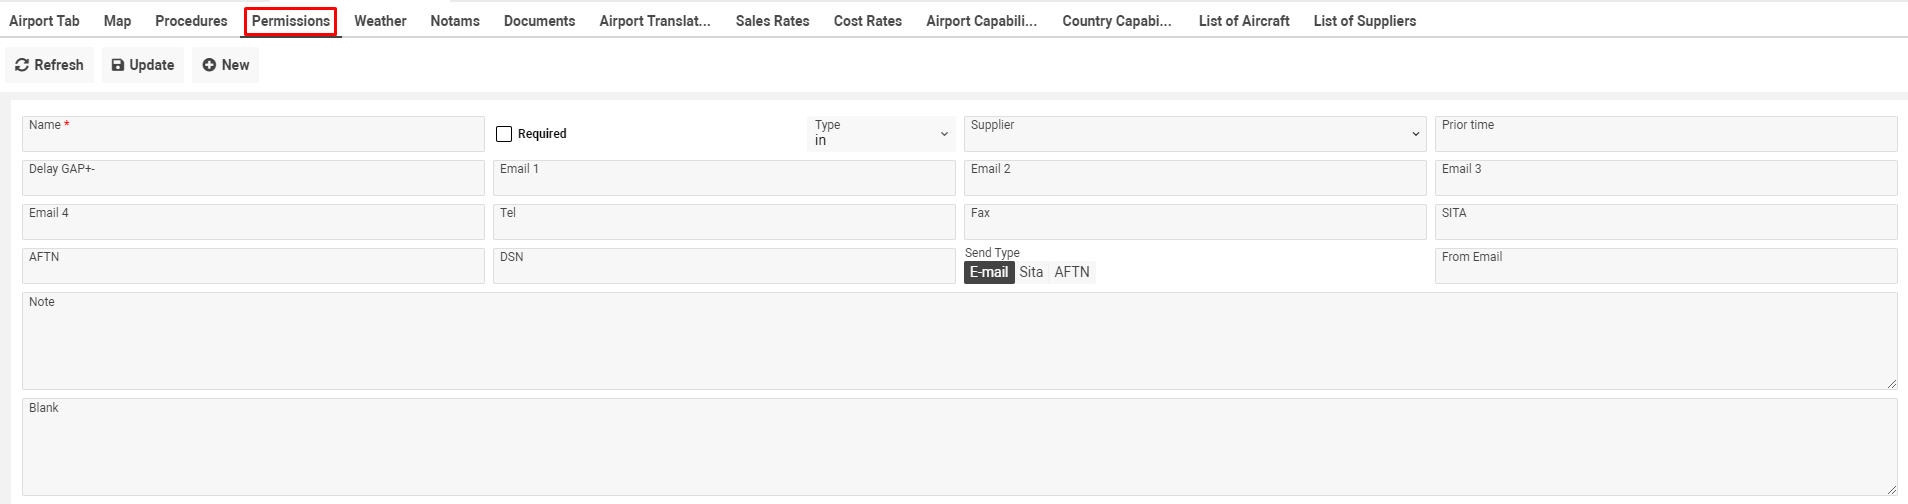
Permissions tab
On the Permissions tab you can clarify permission for the airport.
You need to fill Name (mandatory field), tick check-box ‘Required’ in case permission is required, select type of a permission (in/out, by default in), select supplier of a permission, fill in prior time, delay GAP and enter contact data: Email 1, Email 2,Email 3, Email 4, Tel, Fax, Sita, AFTN, DSN, select send type (by default E-mail), From Email.
In addition, you can enter notes and blank for permission.
The list of created permissions you can see at the bottom of this page.
If you want to update a permission, you can use the ‘Update’ button.
If you want to delete a permission, you can use the ‘Delete’ button. The ‘Delete’ button is available for created permissions.
In case you select a permission and want to create a new record, you can use the ‘New’ button.
Weather tab
On the Weather tab you can check weather in the airport.
In the list you will see Date - last update of the weather data for the airport, Metar data and Taf data.
You can print reports with weather data in pdf/html format by Reports button.
You can use the ‘Update Weather’ button for updating weather data.
In case you want to check ADDs standards or translated, you can ‘ADDs Web-site standards’ and ‘ADDs Web-site translated’ buttons.
Notams tab
On the Notams tab you can check notams for the airport.
In the list you will see Date - last update of the notams data for the airport, number and notes for a notam.
You can print reports with notams data in pdf/html format by the Reports button.
You can use the ‘Update NOTAMs’’ button for updating weather data.
In case you want to check ADDs standard, you can use the ‘ADDs Web-site standards’ button.
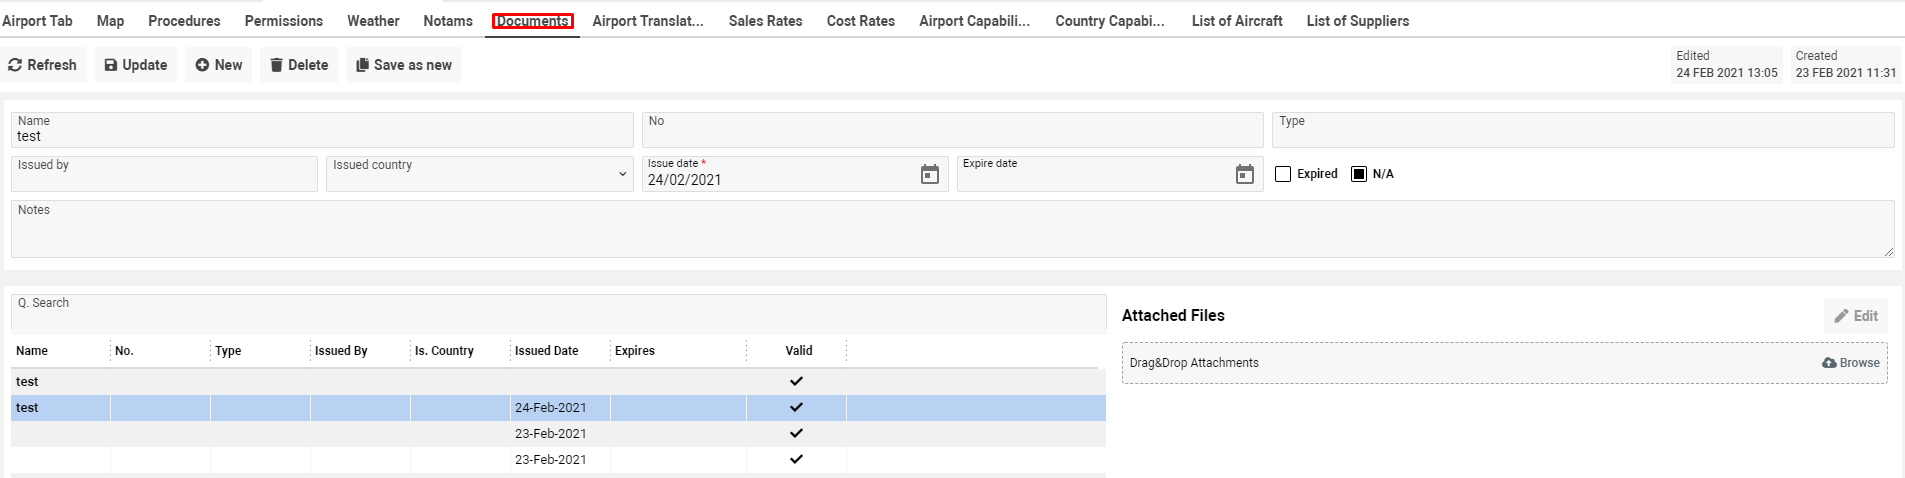
Documents tab
In case you want to add documents for an airport you can use the Documents tab.
Main Info block
In the Main Info block you can fill in the Name of a document, Number of a document, Type of a document.
Issue Info block
In the Issue Info block you can fill in the Issued by of a document, Issued Country of a document, Issued date and Expire date of a document.
If the document has already expired you can tick the ‘Expired’ check-box.
If the document never expires you can tick the ‘N/A’ tick.
Also, you can fill in notes for a document.
You can see the list of documents for the airport at the bottom of the page.
In case you need to find any document you can use ‘Quick Search’ for the list.
For each document you can add files or images using the uploader of a file. You can change file document name, edit images by the ‘Edit’ button and delete it.
If you want to update a document, you can use the ‘Update’ button.
If you want to delete a document, you can use the ‘Delete’ button. The ‘Delete’ button is available for created documents.
In case you select a document and want to create a new record, you can use the ‘New’ button.
Airport Translation tab
In case you need to add translations for any airport field you can use the Airport Translation tab.
If you want to update a translation, you can use the ‘Update’ button.
If you want to delete a translation, you can use the ‘Delete’ button. The ‘Delete’ button is available for created translations.
In case you select a translation and want to create a new record, you can use the ‘New’ button.
Selection Mode
Selection Mode selected by default. You need to select Field Name in the ‘Field Name in Airport Data tab’ selector on english, select language for translate in the ‘Language to Add’ selector and fill in translate to the ‘Field Content on Selected Language’ field.
Both selector and field are mandatory.
Text Input Mode
You need to fill in the field name in the table in the ‘Field in Table’ input, select language for translation in the ‘Language to Add’ selector and fill in translate to the ‘Field Content on Selected Language’ field.
All data are mandatory.
The list of the added translations you can see at the bottom of the page.

Sales Rates tab
On the tab you will see sales rates for the flight by flight types filtered by the current airport. Flight Sales Center
On the tab you will see cost rates for the flight by flight types filtered by the current airport. Flight Cost Center
Airport Capabilities tab
On the tab you will see the list of capabilities filtered by the current airport. Capabilities
Country Capabilities tab
On the tab you will see the list of capabilities filtered by the current airport country. Capabilities
List of Aircrafts
On the tab you will see the list of aircrafts filtered by the current airport (Base Airport.) Aircraft Database
List of Suppliers
On the tab you will see the list of suppliers filtered by the current airport country. All Suppliers
Permissions