
How to open the Person page interface
Home→ Crew→ Crew Management→ All Aviation Staff→ open any
The elements of the interior interface:
1.The Personnel Info tab
Main information block
-
The First name, Middle Name, Surname, Local Name, Birthday, Weight, Main email, Main phone input fields
-
The Gender selector
Pay attention that the Full Name field is not editable. It consists of the of the Surname field + the First name field + the Middle Name field

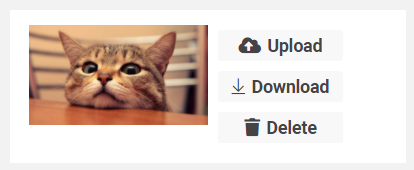
Block with logo
-
Buttons for Upload, Download and Delete logo
The Other Information block
-
The Nationality, RESIDENCE, Couriers Status, FDTL Group, Base Airport, Office, Default Currency selectors
-
The Pilot Code, Internal Code, Certificate Country, Note input fields
-
The Self Operated, Archive, Not Valid checkboxes
-
The Joined Date, Resigned Date, calendar
-
The Working Statuses radio buttons
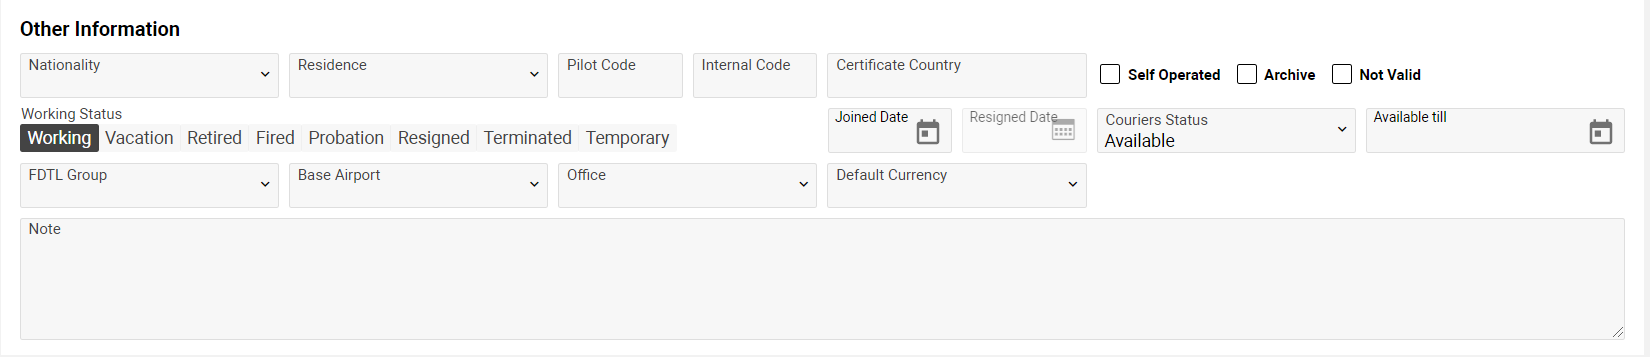
Pay attention that the Resigned Date field will be blocked in all working statuses, except the Resigned one

The Aircraft Types & Positions block
-
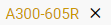
The Aircraft Types sector
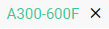
Select the necessary AC type in the selector and click the + button to add. You have an opportunity to add one or more aircraft
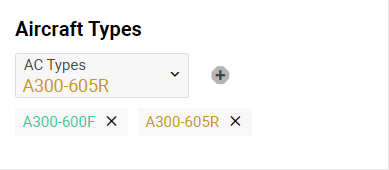
In case of the colorForAcType permission, the list of the Aircraft types will be multicolored:
-
In case the type is CommJ, the color is mustard
-
In case the type is Cargo, the color is green
-
In case the type is VIP, the color is light blue

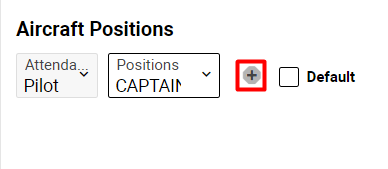
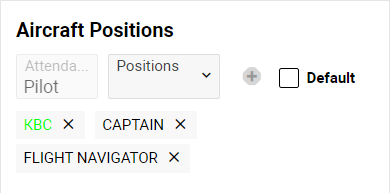
The Aircraft Positions sector
-
Select the necessary attendance in the Attendance selector and the corresponding position in the Positions selector. Click the + button to add.
-
Pay attention that the Attendance selector will be blocked in case of any added entries. You have an opportunity just to add new positions. Tick the Default checkbox to make one of the positions the main. The default position will be highlighted in green
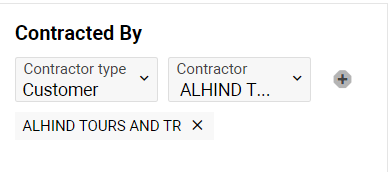
The Contactor By sector
-
Select the Contactor type, Contactor and click the + button to add. You have an opportunity to add one or more contactors
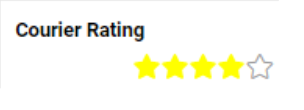
The Courier Rating sector
How to add stars:
-
Open any AWB
-
Select your person in the Courier field
-
Put the number of stars
-
Save the AWB
Go to the Personnel Info tab, the stars will be shown in the sector
Click the Edit Crew Positions button in case you need to make different changes in the Crew Positions interface

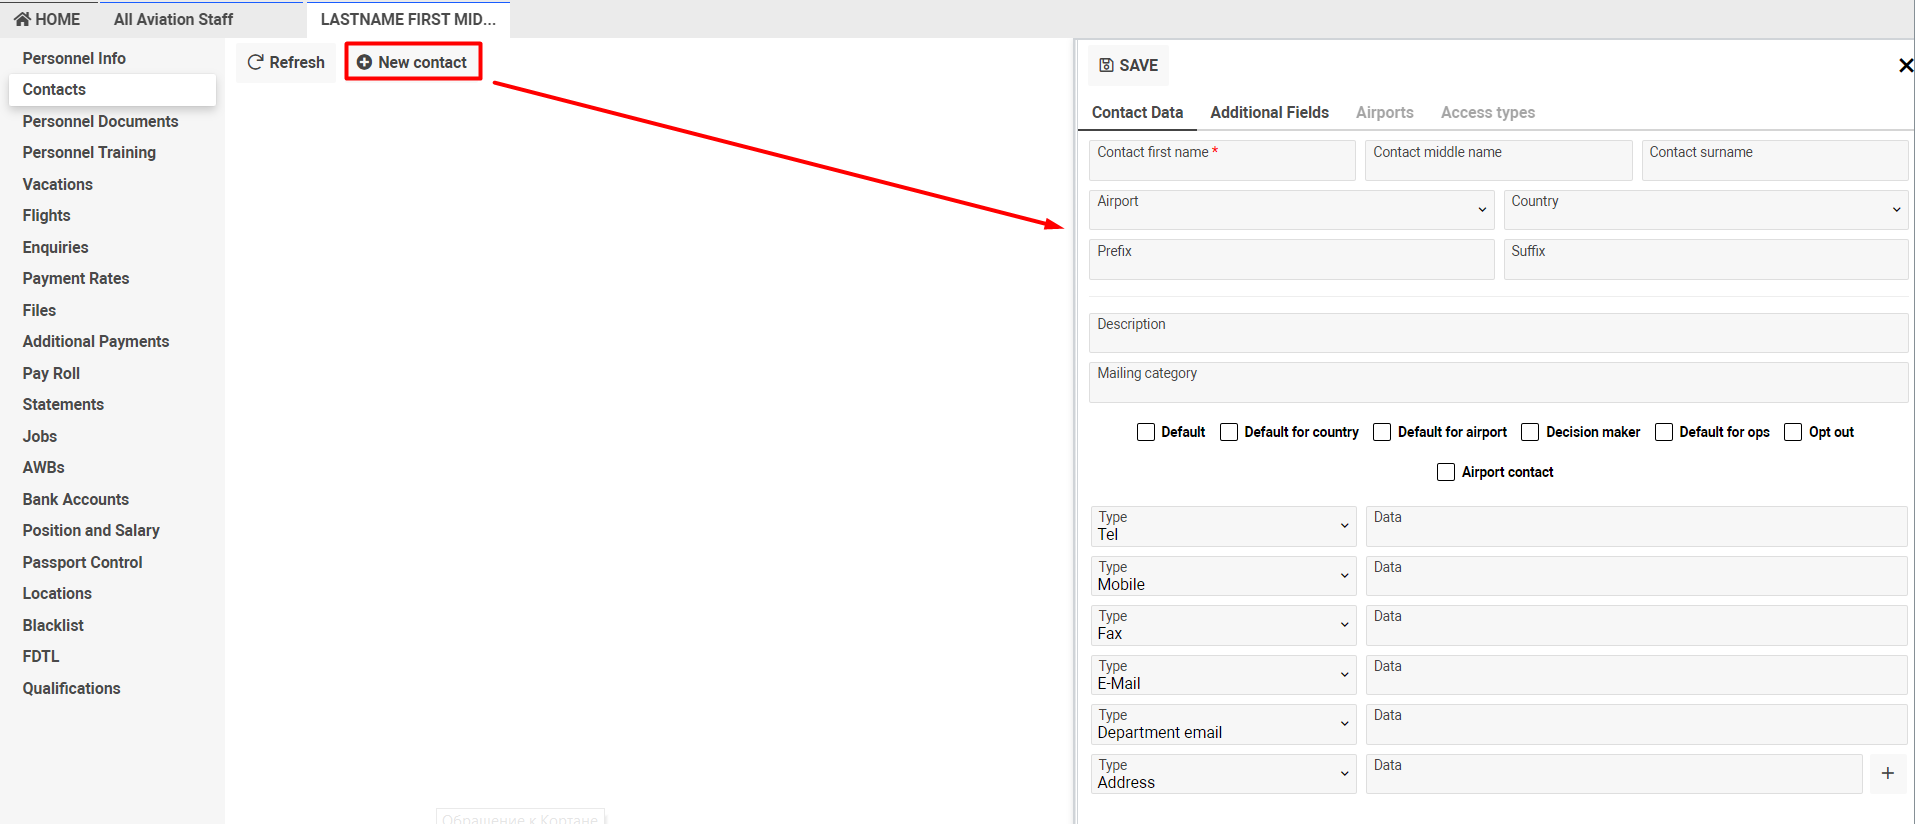
2. The Contacts tab
-
Click the + button in case you need to create contact. The sidebar will be displayed
-
The elements of the sidebar:
-
The Contact first name, Contact middle name, Contact surname, Prefix, Suffix, Description, Mailing category input fields
-
The Airport, Country selectors
-
The Default, Default for country, Default for airport, Decision maker, Default for ops, Opt out, Airport contact checkboxes
-
Block with information about tel, fax, address etc
-
The Contact Data tab (elements):
-
Fill in the necessary fields and click the SAVE button. Pay attention that the Contact first name field is required
-
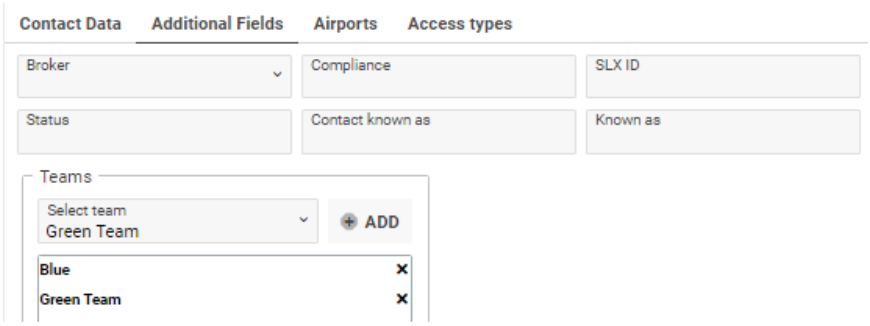
The Additional Fields tab
-
The Compliance, SLX ID, Status, Contact known as, Known as input field
-
The Broker and Teams selectors.
-
Pay attention that you have an opportunity to add one or more team, clicking the Add button 
-
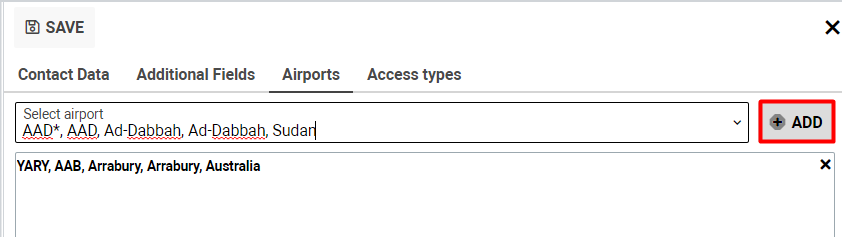
The Airports tab
Pay attention that you have an opportunity to add one or more airports, clicking the Add button
-
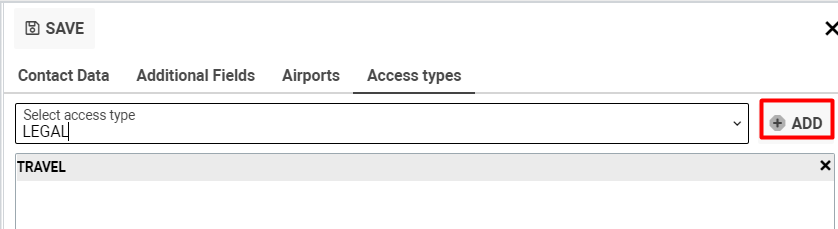
The Access types tab
Pay attention that you have an opportunity to add one or more access types, clicking the Add button
Additional options
-
You have an opportunity to add new item(s) to selected contact quicker.
-
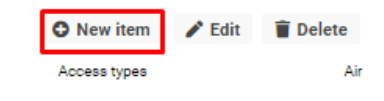
Click the New item button
-
-
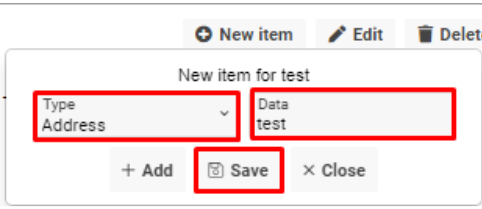
Fill in the Type and Data fields and click the Save button
-
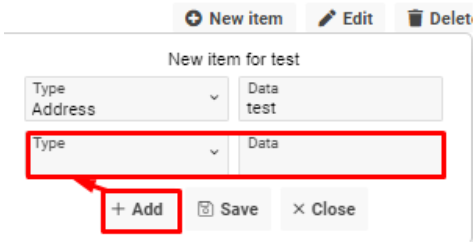
In case you need to add more items, click the + Add button and the new form will be displayed
-
Click the

-
Click the

-
Click the
3.The Personnel Documents tab
The elements of the interface:
-
Doc. Number, Name, Issued by, Issued date, Expire date, Note input fields
-
Country/Nationality, Linked Documents, Type selectors
-
Expired, N/A, Default checkboxes
List description
-
Type – the type of the document
-
No – the number of the document
-
Name – the name of the document
-
Linked Document – the name of linked document
-
Issued By – the issuing authority
-
Issued Country – the country that issued the document
-
Issued – the date of the document’s issue
-
Expires – the document expiration date
-
Valid – the validation of the document
-
The tick

-
The cross is

-
-
Default – the tick

-
Left - the number of days between the current and expired date
The N/A is shown in case the document is not active
The violet background is shown in case of more than 1 day difference 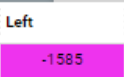
The red background is shown if up to 7 days are left before the end date 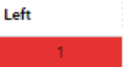
The orange background is shown if up to 30 days are left before the end date 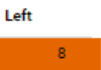
The yellow background is shown if up to 60 days are left before the end date 
The strong yellow background is shown if up to 90 days are left before the end date 
-
Files – the clip


4.The Personnel Training tab
On this tab you have an opportunity to create/edit/delete training for a person. Follow this link to see more information about the interface Crew Training
5.The Vacations tab
The element of the tab:
-
The Type, Status selectors
-
The Reference No, Note input fields
-
The From date, To date, Request Date calendars
-
The -½ day, Working days only checkboxes
List descriptions:
-
Type – the name of the type
-
Status – the condition of vacation
-
Reference No – the vacation’s reference number
-
Days – the difference between to and from date
-
Request Date – the vacation date of request
-
From – the vacation’s start date
-
Till – the vacation’s end date
-
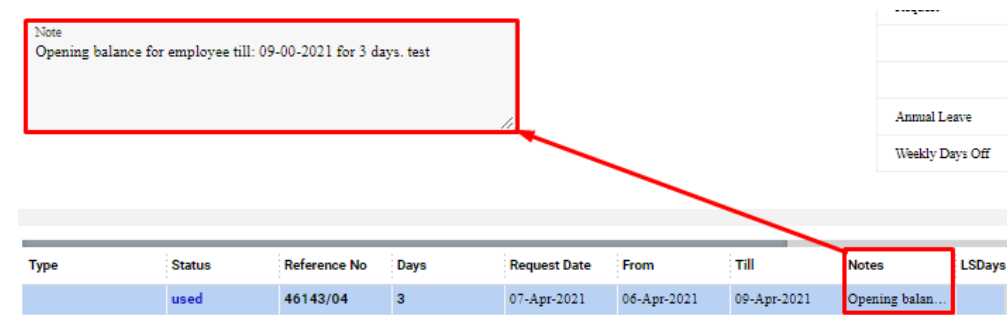
Notes – the space with additional information
-
LSDays – the quantity of the leave salary
-
Amount – the salary amount
-
Ticket – the tickets amount
-
F – the icon of clip

-
-
used,
-
at work,
-
confirmed,
-
sick leave,
-
half paid,
-
work on vacation,
-
sick leave,
-
business trip,
-
maternity,
-
emergency statuses
-
-the button is hidden in case of the:
-
-
requested,
-
sick leave not paid,
-
training,
-
planned,
-
days-off,
-
rejected,
-
not-paid statuses
-
-
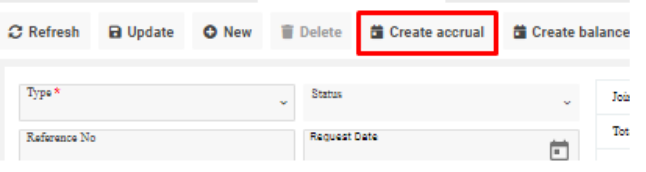
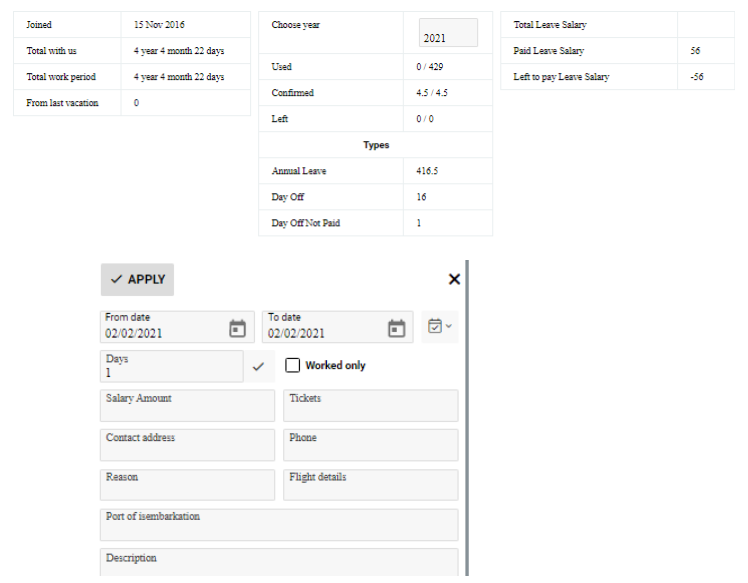
How to create accrual
-
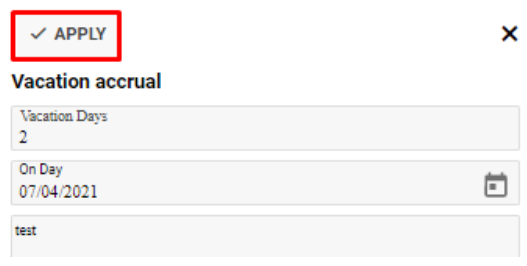
Click the Create accrual button
-
-
Fill in the necessary fields and click the Apply button
-
The new entry with the accrual status will be added to the list

How to create balance
-
-
Click the Create balance button
-

-
Fill in the necessary fields and click the Apply button
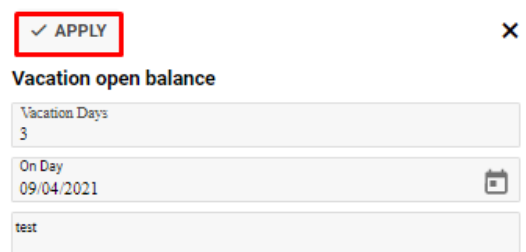
-
The new entry with the used status will be added to the list. Pay attention that the details will be displayed in the Note field
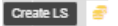
How to create leave salary
-
Click the Create Leave Salary button

-
Fill in the necessary fields and click the Apply button
-
Pay attention that in the Salary Amount field will be shown the nearest salary which was created on the Position&Salary tab.
The logic of the calculation of the Salary Amount value for LS creation sidebar: the value of the total salary divided by value from first_year_vacation global and multiplied by days from LS creation sidebar.
For example, the total salary is 1500, first_year_vacation global value 22, days 20.
Salary Amount will be (1500/22) * 20 = 1,363.64
-
The system restricts the creation of the LS in case the paid days more than the number of days worked by an employee.
The quantity of work days is calculated as SUM of the first-year vacation and next year vacation divided by the number of months worked by the employee minus 12 and divided by 12.
Formula: (first year vacation + next year vacation) * (months - 12) / 12)
-
Fields with additional information
-
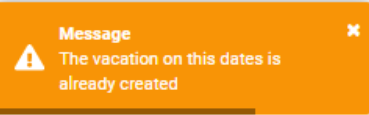
Pay attention that the error message will be shown in case a new entry is created during the period of an existing vacation
6.The Flights tab
-
The flight list is shown on this tab in case the person is linked to it
7. The Enquiries tab
-
The list with enquiries is shown on this tab in case the person is linked to it
8. The Payment Rates tab
List description:
-
-
From date – the start date
-
ACType – the name aircraft type
-
Position – the name of the post
-
Sector – the type of the sector
-
Time type – the type of the time (it can be Fly time, Block time, Fix time, Distance time)
-
Rate – the size of the tariff
-
Cur – the name of the currency
-
How to create payment rate:
-
-
Click the New button
-
Fill in the necessary fields
-
Click the Add button
-

Pay attention that you have no opportunity to edit created entries.
9. The Files tab
-
On this tab you have an opportunity to add attachments. You can edit, download/open, delete and send them.
-
Use the Drag&Drop option or select the file, clicking on the whole area

10.The Additional Payments tab
-
The list with additional payments is shown on this tab in case the person is linked to it
11.The Pay Roll tab
-
The list with pay rolls is shown on this tab in case the person is linked to it

12. The Statements tab
-
The list with statements is shown on this tab in case the person is linked to it

13. The Jobs tab
-
The list with jobs is shown on this tab in case the person is linked to it

14. The AWBs tab
-
The list with AWBs is shown on this tab in case the person is linked to it

15.The Bank Accounts tab
-
The list with all bank accounts is shown on this tab

16.The Position and Salary tab
How to create position
-
Click the New button, fill in all necessary fields

-
Click the Add button

Pay attention that the Position field is required

-
After the entry was created, new fields would be displayed in the interface.
Pay attention that the Type and the Amount fields are required. Fill them and click the Update button

-
List description
-
Position – the name of the position
-
Department – the name of the department
-
From – the start date
-
-
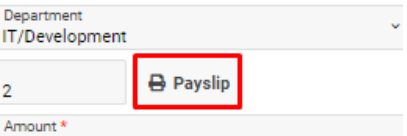
To see the salary statement report, click the Payslip button and the pdf file will be opened
17. The Passport Control tab
-
The passport information is shown on this tab in case the person is linked to it

18. The Locations tab
How to add location
-
Fill in the necessary fields and click the Add button.
Pay attention that the Location field is required

-
You have an opportunity to make filtration by:
-
The From date, To date and Location fields
-
List descriptions:
-
Location – the name of the city
-
Date – the location date
-
Created – the date when the entry was added
-
Creator – the person who created location
19. The Blacklist tab
How to add persons to the Blacklist
-
Fill in the Person's field and click the Add button.
Pay attention that the names of added people will be hidden on the interface
20. The FDTL tab
-
The list with FDTL information is shown on this tab for this person

21. The Qualification tab
The elements of the interface:
-
The Type, ACType, ICAO Category selectors
-
The Documents No, BCR, Landing L. min, Takeoff L. min input fields
-
The Document Date calendar

List description:
-
Type – the name of the type
-
ICAO Cat. – the name of the ICAO Category
-
BCR – Bottom Cloud Range (int)
-
Landing L. min – the minimum number of landings according to the selected ICAO Category (int)
-
Takeoff L. min – the minimum number of takeoffs according to the selected ICAO Category (int)
-
Document – the document’s number
-
ACtype – the name of the aircraft type
-
Document Date – the date of the document
Permissions