Accessing Offices/Companies
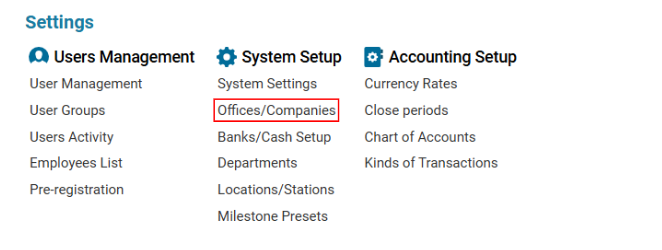
Navigate to the Settings section and under the System Setup Section click the “Offices/Companies” Button.
Overview
The Offices/Companies module allows users to manage all company-level data within the system, including core information, contact details, documents, and banking information. It supports the creation, modification, and synchronization of office data with MS Dynamics 365.
Main Interface Features
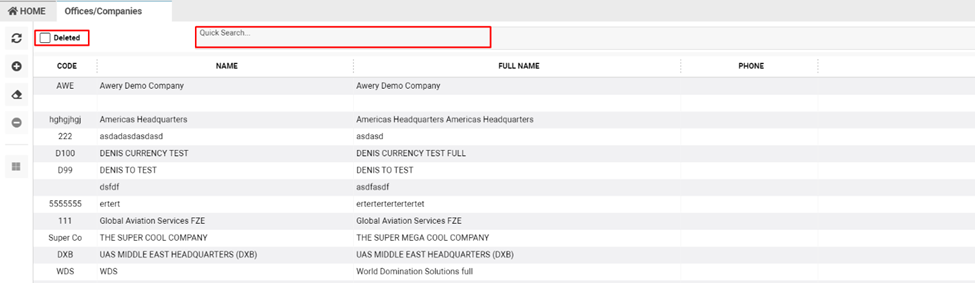
Company List Table
Displays all existing company records with essential fields:
-
CODE – Unique identifier for the company
-
Name – Short name of the company
-
Full Name – Complete registered name
-
Phone – Contact number
Search, Filters, and Sort
You can search or sort entries using the following fields:
-
Code
-
Name
-
Phone number
Additional Options:
-
Deleted checkbox: View companies that have been marked as deleted.
-
Clear Filters: Resets all active filters.
Actions
-
New – Open the New Company form to create a new entity.
-
Delete – Removes the selected company from the list.
-
Sync with Dynamics 365 – Push company data such as Customers, Vendors, Departments, Warehouses, HSN/SA Codes into MS Dynamics 365. This appears only if your system has the relevant configuration enabled.
Company Details Page
Upon double-clicking a company entry or pressing "New", a multi-tabbed form opens with the following tabs:
-
Information Tab
Required Fields:
-
Code – Company code (mandatory)
-
Name – Short name (mandatory)
-
Currency – Base currency (mandatory)
Optional Fields:
-
Full Name – Full legal name
-
VAT Id / GST No – Tax information
-
C.Code / PAN No – Company/PAN number
-
License No – Operating license
-
Settlement Currency – Company’s settlement currency
-
Priority - Priority in the list
-
Parent Company – Select a parent entity
-
Country / State – Company Country / State
-
Language – Company Language
-
Start Month - Month the company started its activities
-
Customer Portal – Used for Cargo Booking
-
Notes – Free text area for internal comments
Checkbox Options:
-
Default – Sets this as the default company
-
Double Language for Reports
-
Generate Doc No. by Location
Buttons:
-
Add – Create new company
-
Update – Save changes
-
Upload – Add company logo
-
Delete – Remove this company
-
Contacts Tab
Manage company contacts here.
Features:
-
View, add, edit, or delete contacts
-
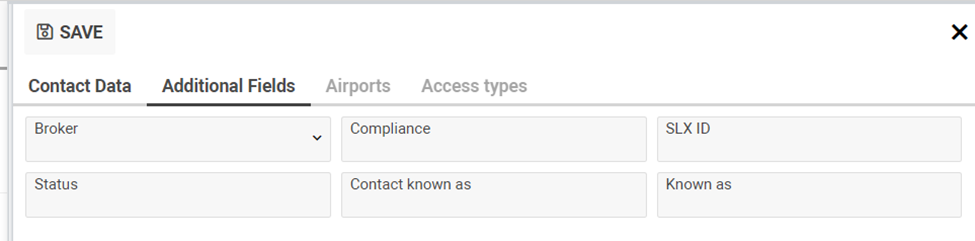
New Contact – Opens a form with multiple tabs:
-
Main Info: Basic contact details
-
Additional Fields: Broker, departments, etc.
-
-
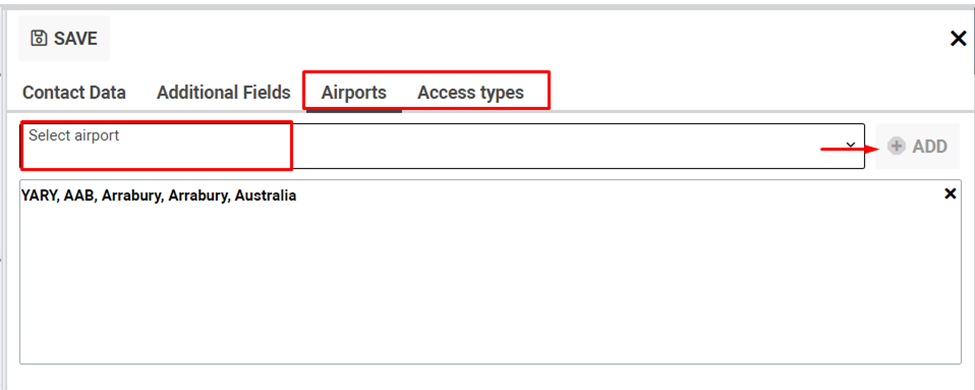
Airport and Access Types: Assign airport permissions
Advanced Options:
-
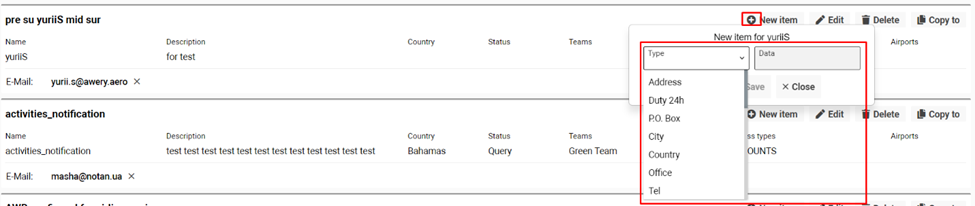
Add quick contact items (Type + Data)
-
Copy contact to Contractors:
-
Select Contractor Type
-
Choose Customer
-
Click Apply
-

-
Documents Tab
Manage all documents associated with the company.

Key Functions:
-
Upload via drag & drop or file browser
-
Add new document: New
-
Delete document: Select and press Delete
-
Edit Types: Add new document categories if missing
-
Bank Accounts Tab
Displays all financial accounts linked to the company.
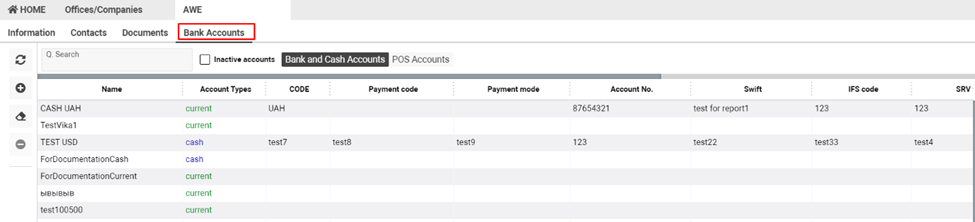
Account Types:
-
Bank
-
Cash
-
POS
Actions:
-
Search accounts by any field
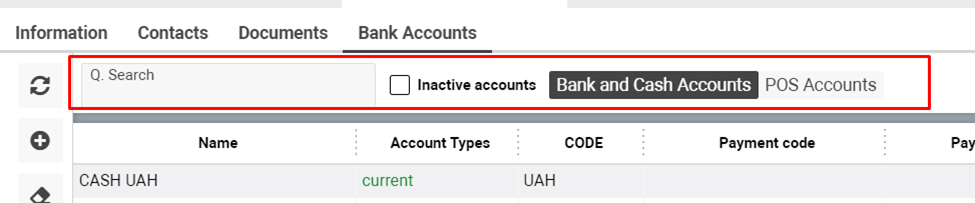
-
Toggle Inactive – Show/hide deactivated accounts
-
Clear Filters
-
Delete selected account
-
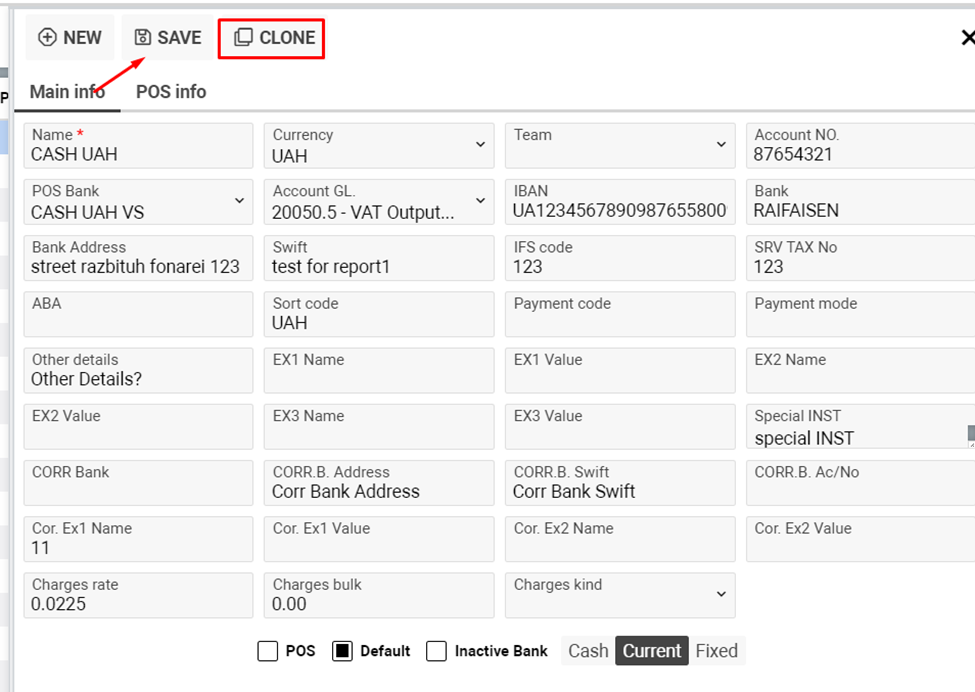
Clone an account:
-
Open sidebar → Click Clone → Edit (optional) → Save
-