Home Page→ System settings→ User management→ General mode
Overview
User Management interface allows you to add/edit/delete/view system users and their data, assign group permissions, view the statistics
Also, you will be able to customize notifications and create external users who do not have direct access to the system but can use AWERY side products (service portals, cargo booking, crew portal)
List Description
The data table for users type General contains the following columns:
Login - user login for the system access
Name - full user name
E-mail - contact e-mail
Office - user office
Linked entity - employee name which could be displayed in some interfaces as a responsible person ( mailers, awb, enquiries, etc)
Two step verification - in case of the green check-mark user has extra verification at the login page
Notes - details and comments
Groups - list of groups the user belongs to
Last login - the date of the last login
Registered on - the date of the user registration
Manuals
How to create a new System User
System users have a General user type. It means the user has direct access to the system
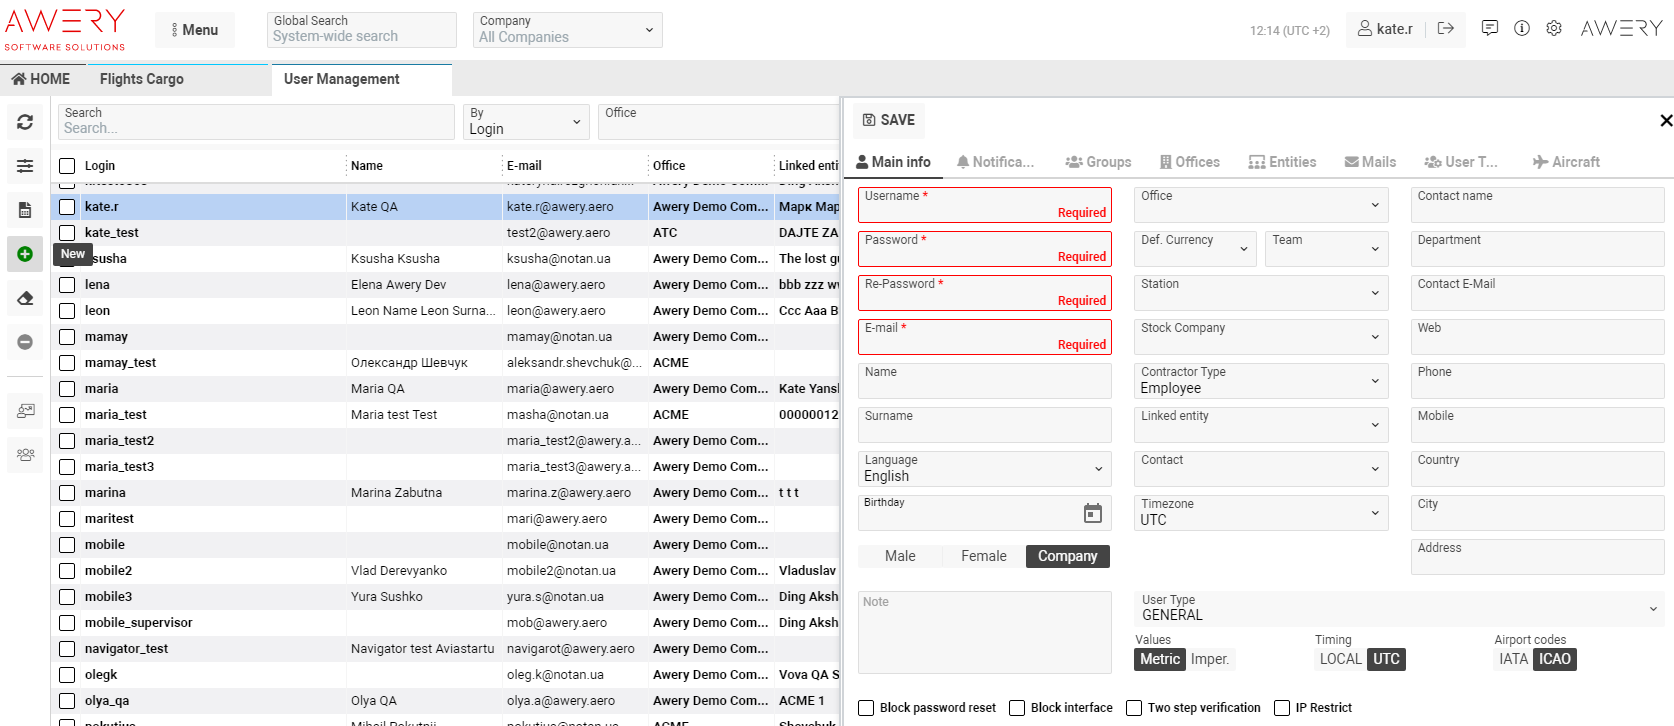
To create, please click the +New button. The sidebar will appear on the screen.
Fill in the required fields marked with a red asterisk* on the Main Info tab. Other fields are optional
Username- short username which will be used as a login, mandatory field
Password - password for access, mandatory field
Repassword- duplicate the password, mandatory field
E-mail - user e-mail address, mandatory field
Name - full name of the current user
Surname - full surname of the current user
Language - selected system language
Birthday - date of birth
Office - select the company for the current user
User type - GENERAL is the default
Pay attention to some settings on the Main tab that effect displaying data in the system:
Default currency - sets the default currency to display prices, rates, etc. for the current user
Team - select the required user team
Station- Warehouse selector
Stock. Company- Stock Company selector
Contractor type & Linked Entity - employee type and name which could be displayed in some interfaces as a responsible person ( mailers, awb, enquiries, etc)
Values - choose between metric and imperial unit formats to display values for the current user
Timing - choose between Local or UTC format for the current user
Airport codes - choose IATA or ICAO codes format for the current user
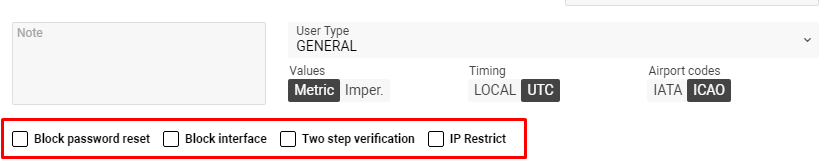
Some checkboxes will set extra settings:
Block password reset - block reset password option on the login page for the current user
Block interface - current user will be automatically logged out 30min after the last action
Two-step verification - extra verification at login for the current user
IP Restrict - allows to login user, which IP is entered to ipsecurity_ips global
To confirm creation, click the Save button
Other settings for System User
After successful creation, you will be able to continue setting up the user. To do this, please select a new user on the list, double click the entry, and the sidebar will be opened
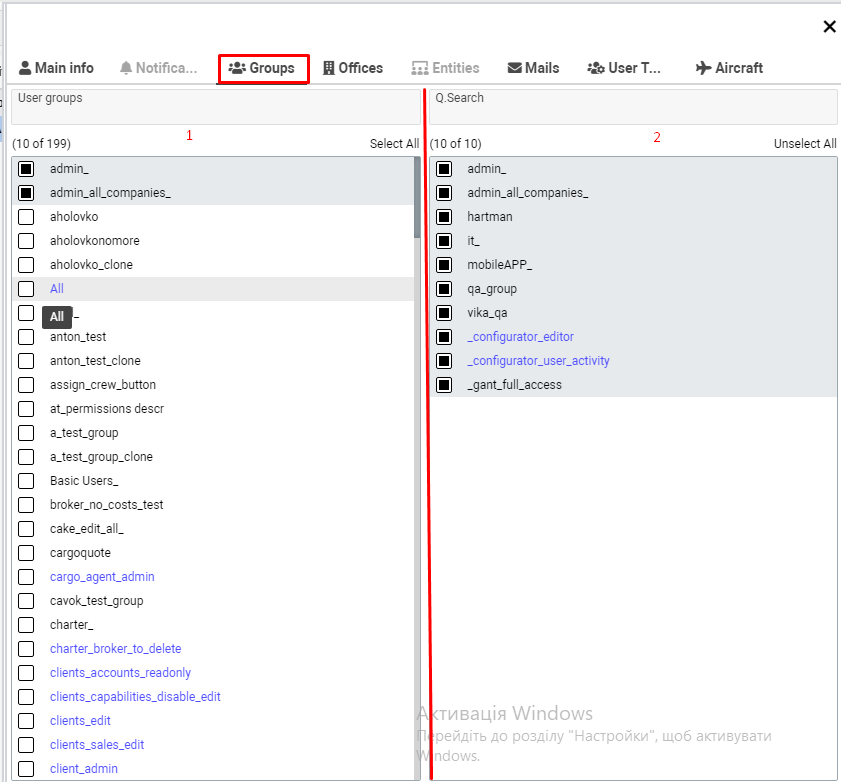
Access level depending on groups user belongs to. To assign permissions, please move to the Groups tab. The tab is divided into two parts:
1- All groups list
2- Current user groups list
Add the required groups by ticking check-boxes opposite the group title. Data will be saved automatically
To remove the group, please unselect it on the 2nd list
Please note: You can also copy permissions from one user to another on the Main tab. Copy Permission button is blocked while you do not select User from
In the same way, you can specify Mails, User Teams, Aircraft
Notification and Entities tabs are blocked for General user type
Provided user data can be edited in the same sidebar
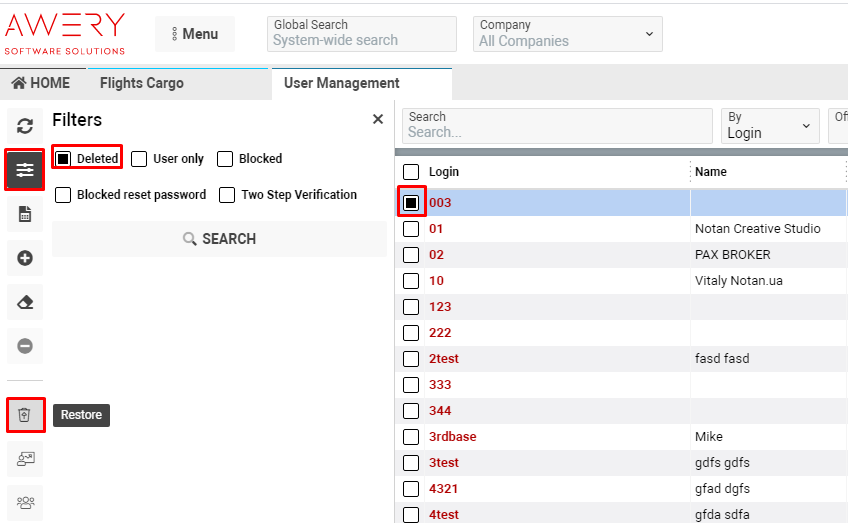
How to delete User
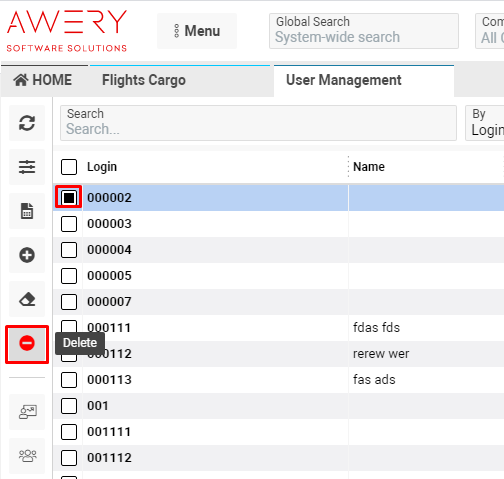
You can delete Users from the main list.
Please, tick the check-box opposite the required name and the Delete button will be available
Additional Options
In case you have deleted a user by mistake, you can restore him:
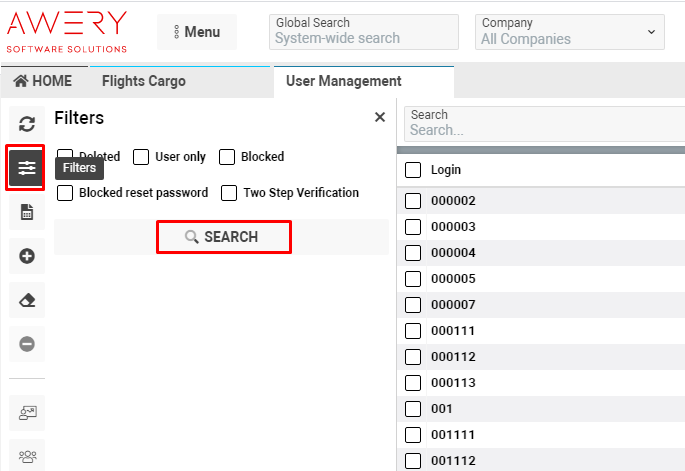
Filters button→ tick check-box “Deleted”→ tick User on the list→ click “Restore” button
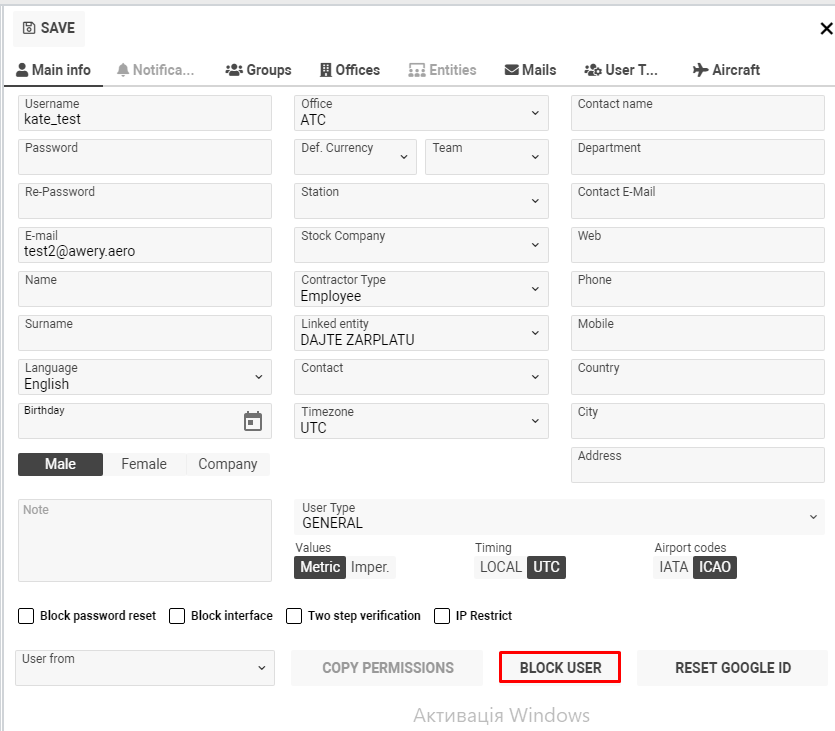
You have an opportunity to Block user. Just select the required person on the list by double click. The Block User button is located on the Main tab of the sidebar
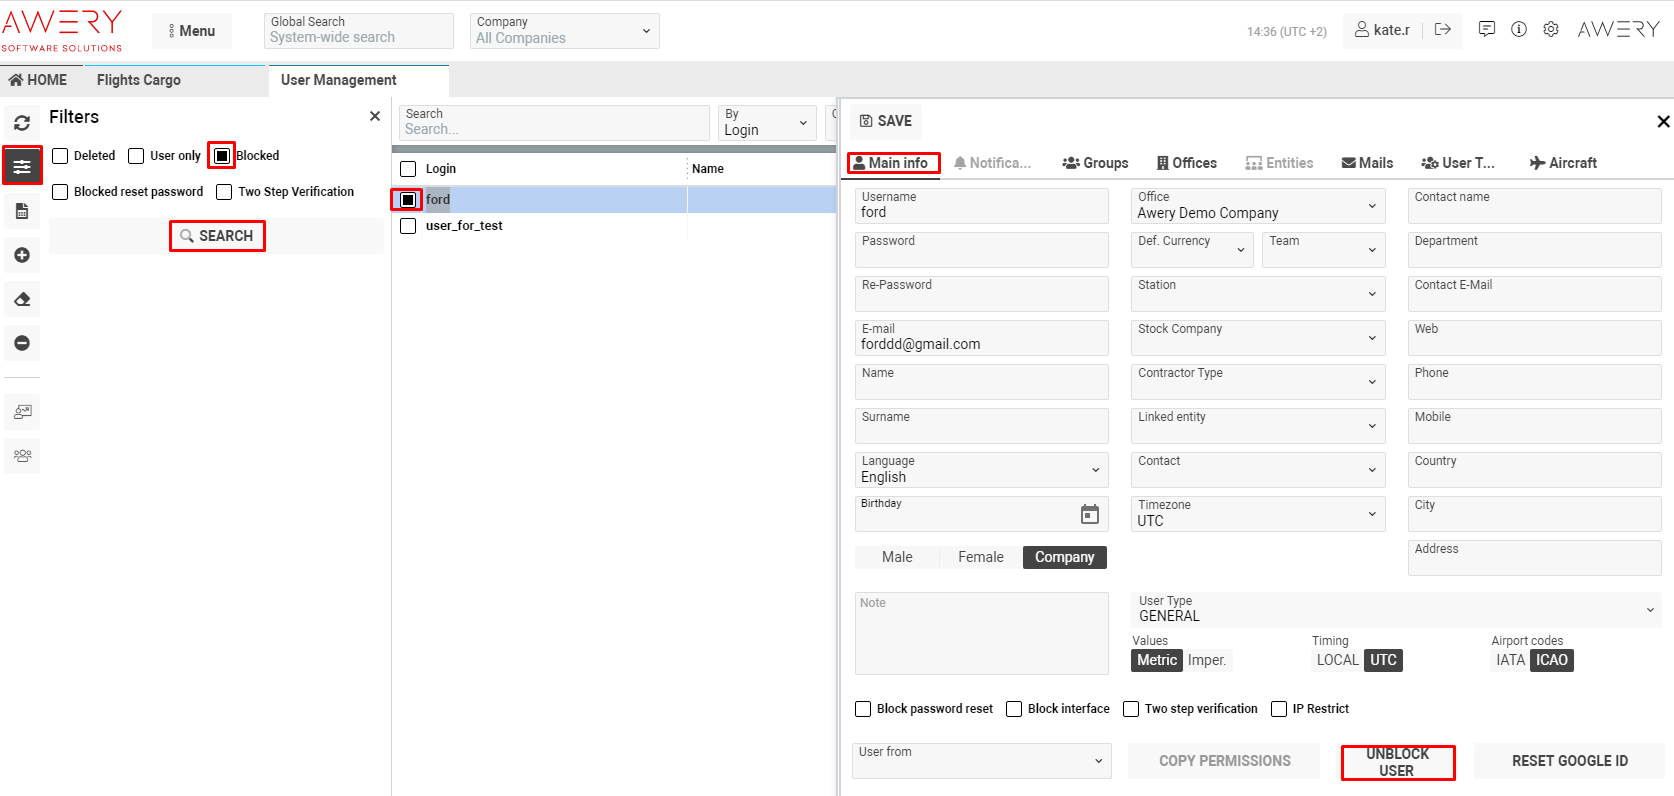
To Unblock user, please move to the Filterbar→ tick "Blocked" check-box→ Search button→ select the required user by double click→ click the Unblock button
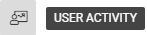
Also, by clicking the button you can switch to User Activity tab and look through statistics for the required period User Activity
Manage Team option You can use User Teams to divide participants into different departments of your system
Sorting and Filtering
Search- you choose the search parameter yourself in the selector "By"
By- available parameters are login, name, e-mail, department
Office- offices selector
Group- user groups selector
Team- teams selector
User type - available three options: General (default), Notification, External
You can combine filters for more exact results
Filterbar - additional filtering parameters: Deleted, User only, Blocked, Blocked reset password, Two-step verification. Please, click the Search button after selection
Reports
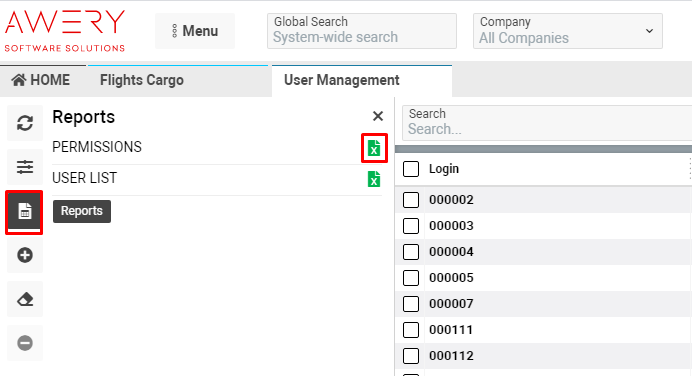
To view (print) the reports press the Reports button and select an appropriate option by clicking the Exel Report button
Permissions
JavaScript errors detected
Please note, these errors can depend on your browser setup.
If this problem persists, please contact our support.