
Home→ HR→ Human Resources→ Employees→ open any
The elements of the interior interface:
1.The Main tab
Main information block
-
The First name, Middle Name, Surname input fields
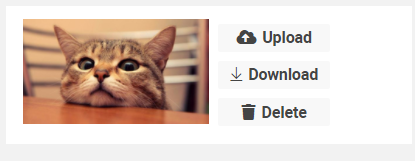
Block with logo
-
Buttons for Upload, Download and Delete logo
The Other Information block
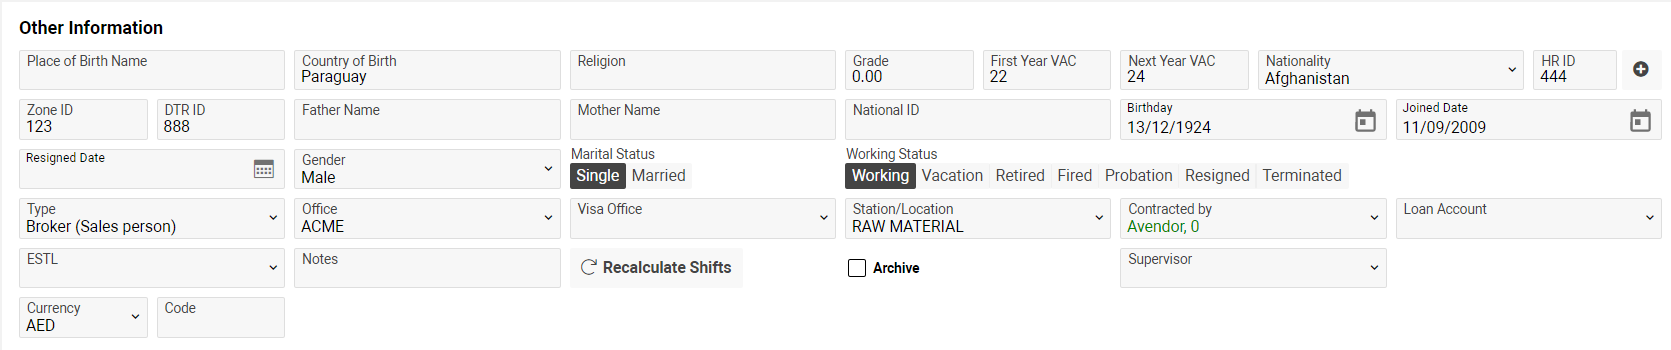
The block elements:
-
The Place of Birth Name, Country of Birth, Religion, Grade, First Year VAC, Next Year VAC, HR ID, Zone ID, DTR ID, Father Name, Mother Name, National ID, Notes, CODE input fields
-
The Nationality, Gender, Type, Office, Visa Office, Station/Location, Contracted By, Loan Account, ESTL, Supervisor, Currency selectors
-
The Birthday, Joined Date, Resigned Date calendar
-
The Marital Status (Single/Married), Working Status (Working, Vacation, Retired, Fired, Probation, Resigned, Terminated) radio buttons
-
The Archive checkbox
-
The Recalculate Shifts button – recalculate shifts duty time limitations for all period
Pay attention that the Resigned Date field will be blocked in all working statuses, except the Resigned one

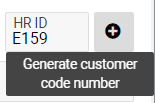
How to add information to the HR ID field
You have an opportunity to add the HR ID:
-
manually
-
automatically, clicking the Generate customer code number button
2. The Contacts tab
-
Click the + button in case you need to create contact. The sidebar will be displayed
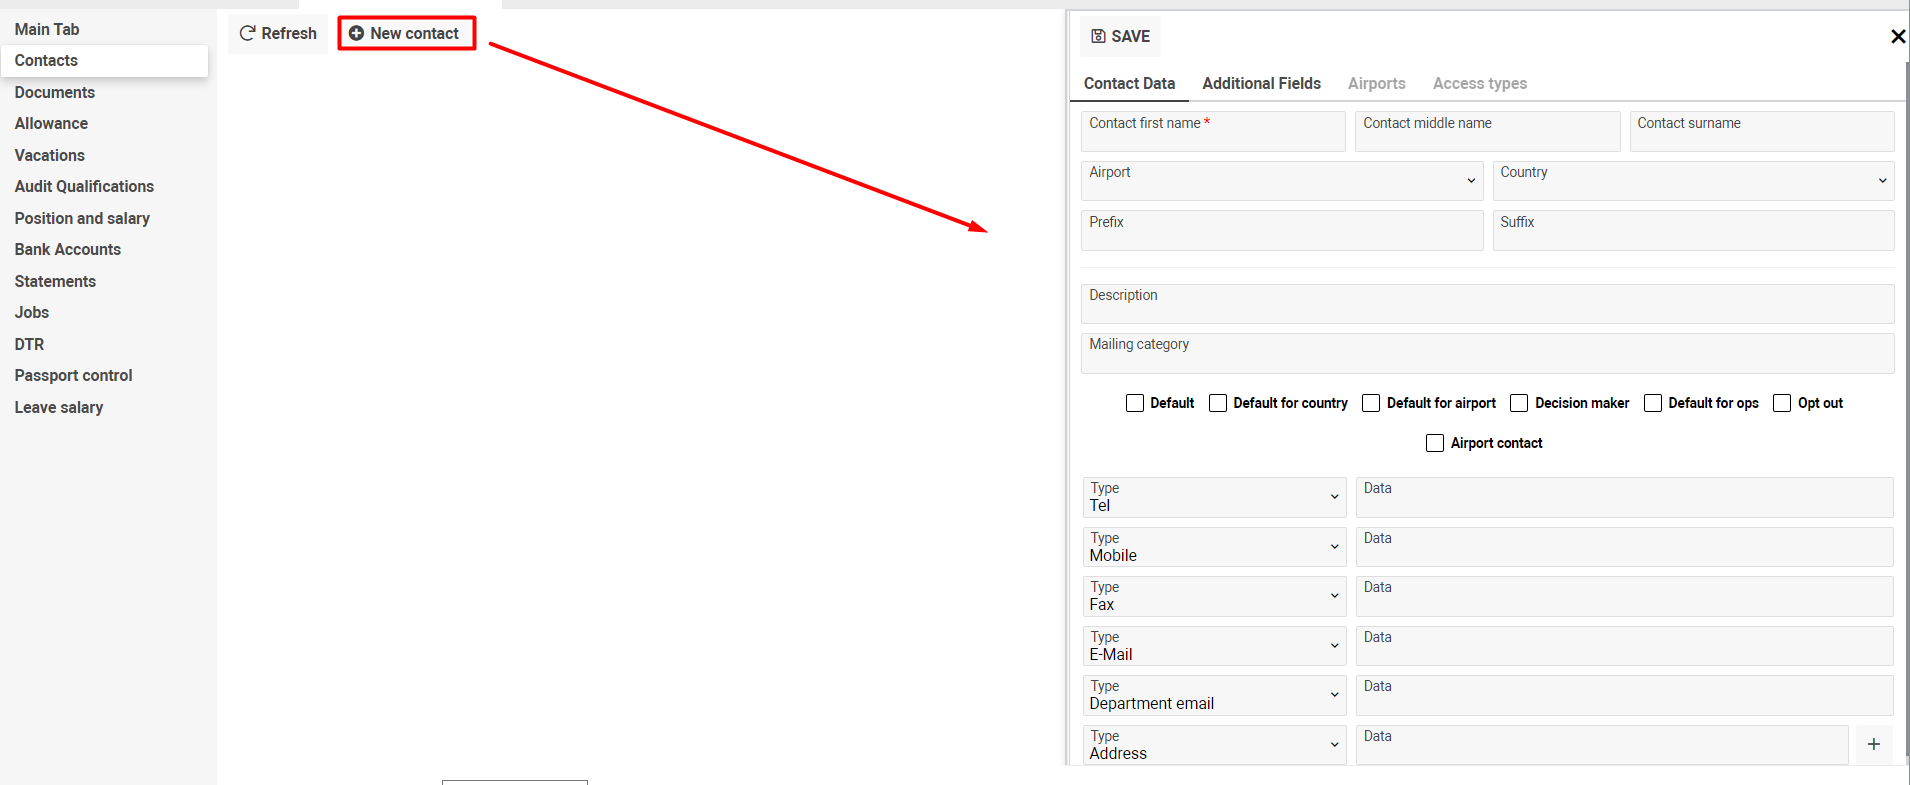
The elements of the sidebar:
-
The Contact Data tab (elements):
-
The Contact first name, Contact middle name, Contact surname, Prefix, Suffix, Description, Mailing category input fields
-
The Airport, Country selectors
-
The Default, Default for country, Default for airport, Decision maker, Default for ops, Opt out, Airport contact checkboxes
-
Block with information about tel, fax, address etc
-
Fill in the necessary fields and click the SAVE button. Pay attention that the Contact first name field is required
-
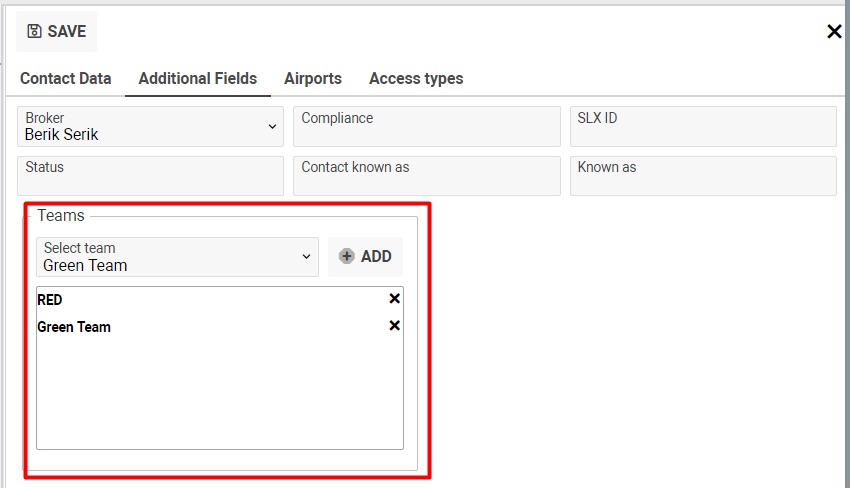
The Additional Fields tab
Pay attention that you have an opportunity to add one or more team, clicking the Add button 
-
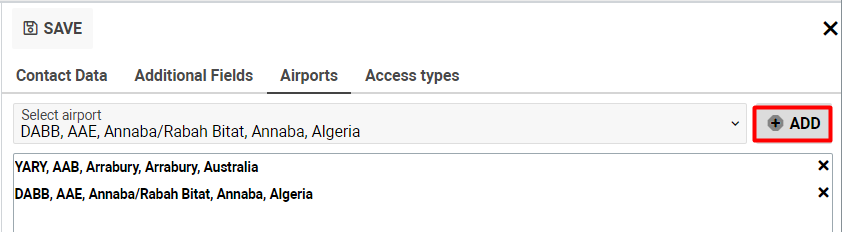
The Airports tab
-
The Airport selector
-
Pay attention that you have an opportunity to add one or more airports, clicking the Add button
-
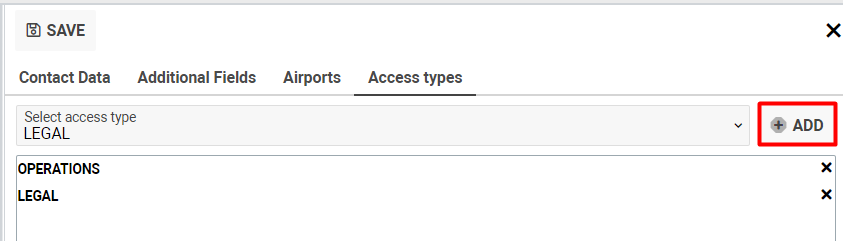
The Access types tab
-
The Access type selector
-
Pay attention that you have an opportunity to add one or more access types, clicking the Add button
Additional options
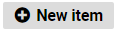
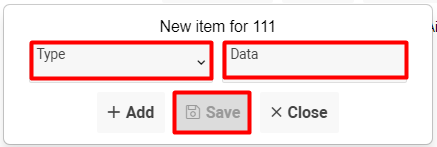
You have an opportunity to add new item(s) to selected contact quicker:
-
Click the New item button
-
Fill in the Type and Data fields and click the Save button
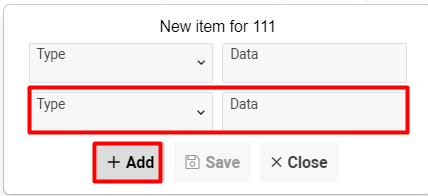
In case you need to add more items, click the + Add button and the new form will be displayed
-
Click the

-
Click the

-
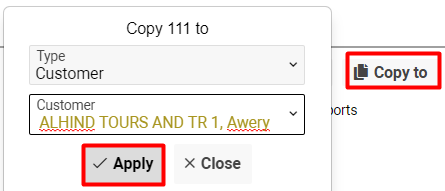
Click the button in case you need to add the same contact for another customer
3. The Documents tab
-
The elements of the interface:
-
The Name, No, Additional No, Issued By, Notes input fields
-
The Type, Issued country selectors
-
The Issue date, Expire date calendar
-
The Expired, N/A checkboxes
List description:
-
Name – the name of the document
-
Type – the type of the document
-
No – the number of the document
-
Type name – the name of the type
-
Expires – the document expiration date
-
Issued By – the issuing authority
-
Issued Country – the country that issued the document
-
Issued – the date of the document’s issue
-
Additional No – information about additional number
-
Valid – the validation of the document
-
Left - the number of days between the current and expired date
-
Files – the clip

4. The Allowance tab
-
The element of the tab:
-
List descriptions:
-
Left - the number of days between the current and renewal date
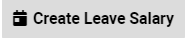
5. The Vacation tab
-
The element of the tab:
-
List descriptions:
the button is hidden in case of the:
-
-
-
requested,
-
sick leave not paid,
-
training,
-
planned,
-
days-off,
-
rejected,
-
not-paid statuses
-
-
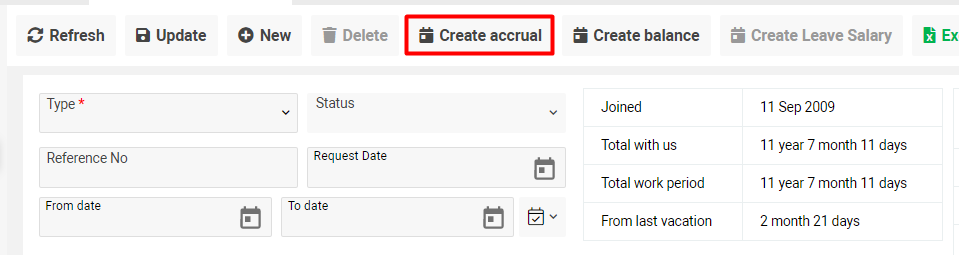
How to create accrual
-
Click the Create accrual button
-
Fill in the necessary fields and click the Apply button
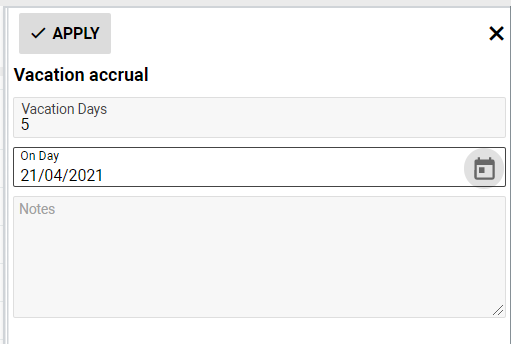
-
The new entry with the accrual status will be added to the list

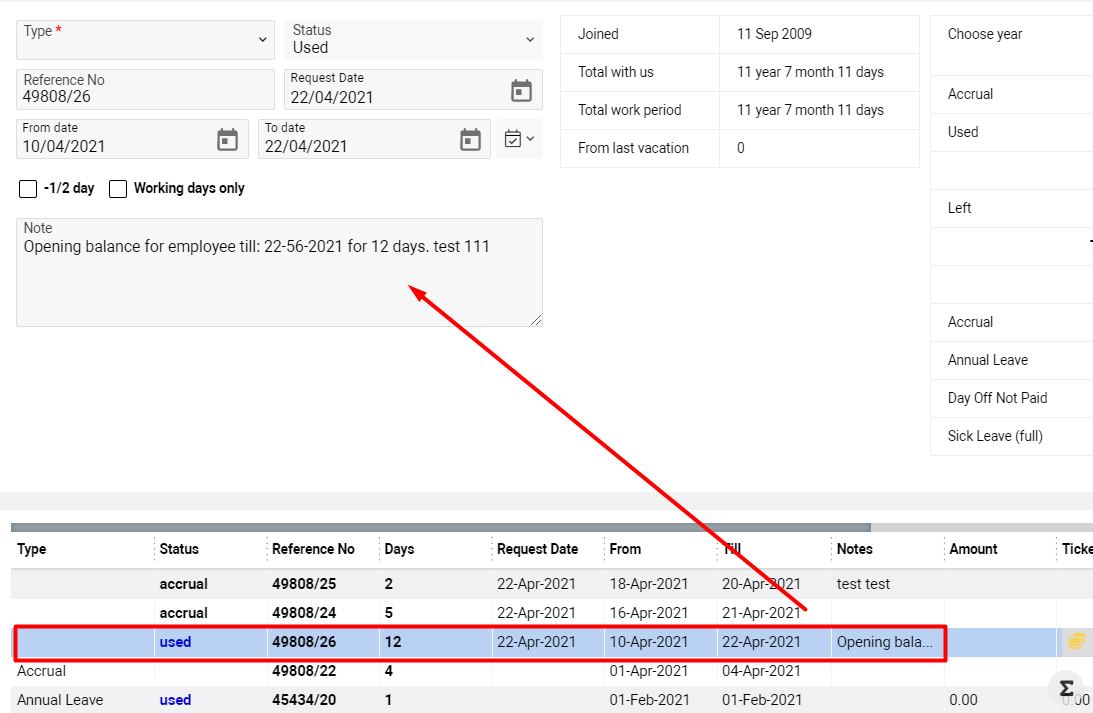
How to create balance
-
Click the Create balance button
-
Fill in the necessary fields and click the Apply button
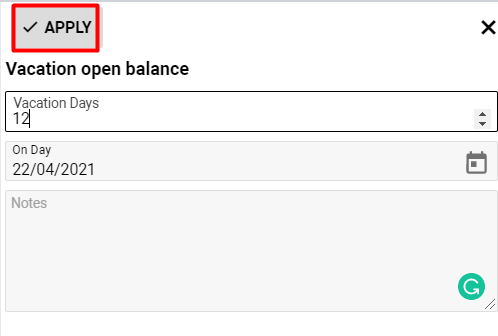
-
The new entry with the used status will be added to the list. Pay attention that the details will be displayed in the Note field
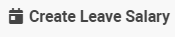
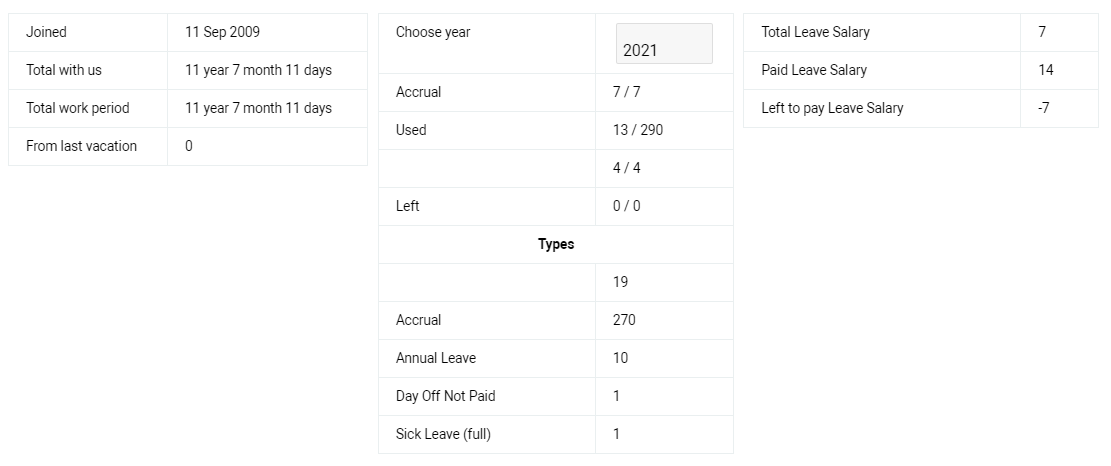
How to create leave salary
-
Click the Create Leave Salary button
-
Fill in the necessary fields and click the Apply button
-
Pay attention that in the Salary Amount field will be shown the nearest salary which was created on the Position&Salary tab.
The logic of the calculation of the Salary Amount value for LS creation sidebar: the value of the total salary divided by value from first_year_vacation global and multiplied by days from LS creation sidebar.
For example, the total salary is 1500, first_year_vacation global value 22, days 20.
Salary Amount will be (1500/22) * 20 = 1,363.64
-
The system restricts the creation of the LS in case the paid days more than the number of days worked by an employee.
The quantity of work days is calculated as SUM of the first-year vacation and next year vacation divided by the number of months worked by the employee minus 12 and divided by 12.
Formula: (first year vacation + next year vacation) * (months - 12) / 12)
-
Fields with additional information
NB: Pay attention that the error message will be shown in case a new entry is created during the period of an existing vacation

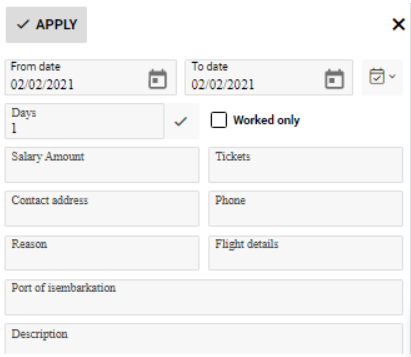
6. The Audit Qualifications tab
The element of the tab:
-
Qualifications selector
List Description:
-
Qualification – the name of the qualification
How to add new entry
-
Select the necessary option in the Qualifications selector
-
Click the Add button
7. The Position and Salary tab
How to create position
-
Click the New button

-
Click the Add button

Pay attention that the Position field is required

-
After the entry was created, new fields would be displayed in the interface. Pay attention that the Type and the Amount fields are required. Fill them and click the Update button

List description:
-
Position – the name of the position
-
Department – the name of the department
-
From – the start date
-
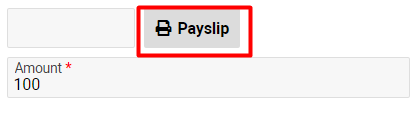
To see the salary statement report, click the Payslip button and the pdf file will be opened
8. The Bank Accounts tab
-
The list with all bank accounts is shown on this tab

9. The Statements tab
-
The list with statements is shown on this tab in case the employee is linked to it

10. The Jobs tab
-
The list with jobs is shown on this tab in case the employee is linked to it

11. The DTR tab
-
The list with employee’s activity is shown on this tab

12. The Passport Control tab
-
The passport information is shown on this tab in case the employee is linked to it

13. The Leave salary tab
-
The information with employee’s leave salary is shown

Permissions