First Method (Single AWB Invoice Creation):
-
Open the AWB:
-
From the AWB list, double-click on the AWB you want to invoice.
-
-
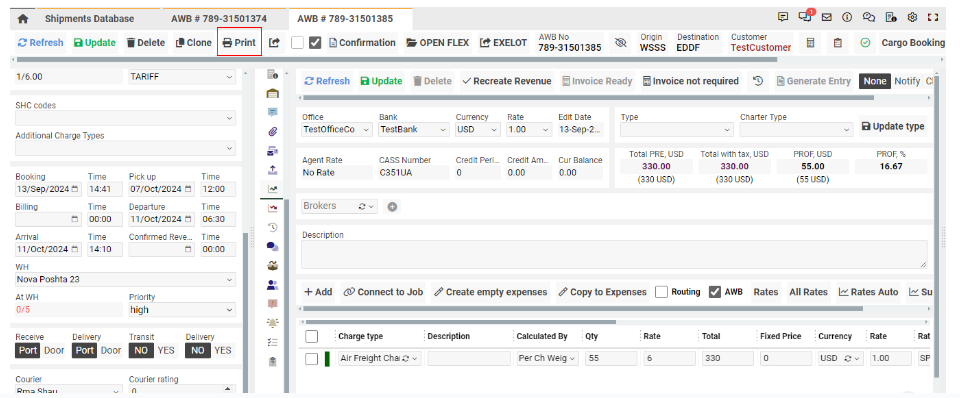
Navigate to the Revenue Tab:
-
By default, basic revenue items are added. You can modify or add more items as needed.
-
-
Insert Rates and Updating Pricing:
-
Add the rate per item (per kg/lbs) or a fixed price, if applicable, for each item and press "Create".
-
-
Once the lines are created, press Update to lock the figures and prevent further changes. The "Update revenue" button will disappear.
-
Invoicing Options: After updating, you have several options for generating invoices:
-
Option 1: Create Invoices for Each Line Individually:
-
Tick Connect at the end of the line.
-
-
-
Press Job, select Job Subtype, enter Bank details and Due Date, then press Create Invoice.
-
Option 2: Connect Line to Existing Invoice:
-
Tick Connect at the end of the line.
-
-
Press Job, insert the existing Job Number, and press Create.
-
Option 3: Create Invoice for All Items:
-
Create one invoice for all items by selecting Job Subtype, entering Bank details and Due Date, and pressing Create.
-
-
Review Jobs:
-
After jobs are created, you can see them connected to the revenue. By pressing the job number, you can open the Job itself.
-
Second Method (Multiple AWB Invoices Creation):
-
Follow steps from the First Method until you reach Update.
-
From the AWB List:
-
Option 1: Create One Invoice for All AWBs (Same Customer):
-
-
Select the AWBs from the list, and press Create entry for selected. This creates a single invoice for all AWBs from the same customer.

-
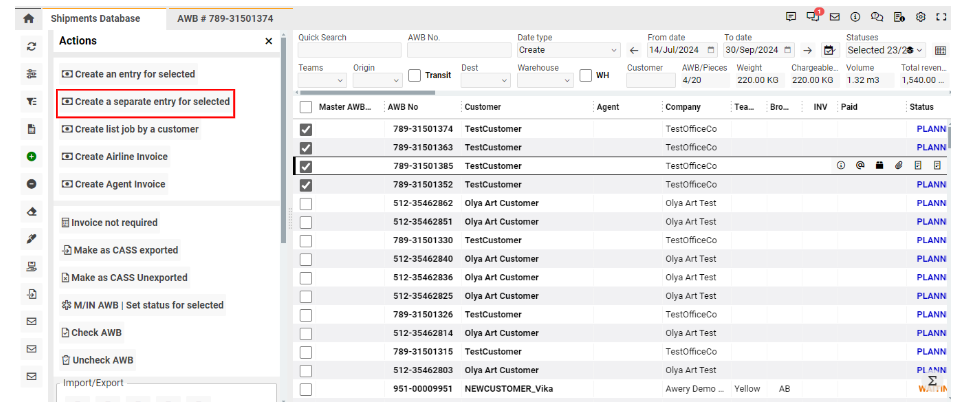
Option 2: Create Separate Invoices for Each AWB:
-
Select AWBs from the list, press Create separate entries for selected, and ensure the Make separate invoices tick is selected.
-
-
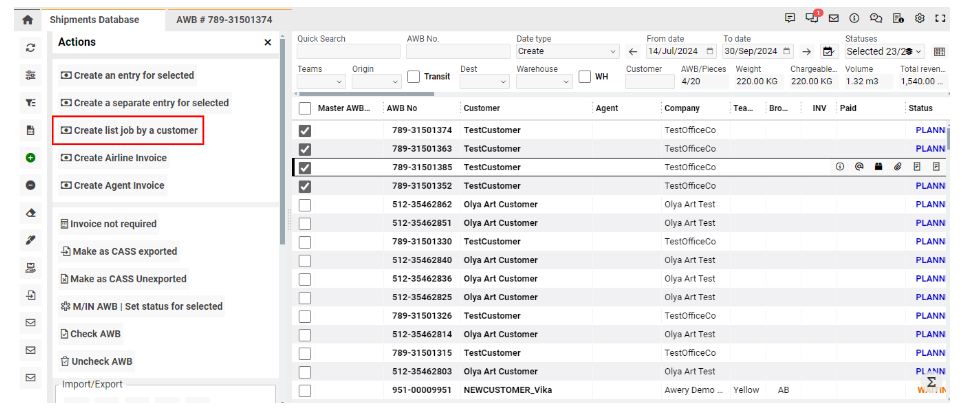
Option 3: Create a List of Jobs by Customers:
-
Select AWBs from the list, press Create list of jobs by customers, and this will create separate jobs for all chosen customers.
-
-
Job Creation and Review:
-
By clicking on the Print Icon, a pop-up will open, allowing you to open or print the job directly.
-