User Groups
Accessing User Groups
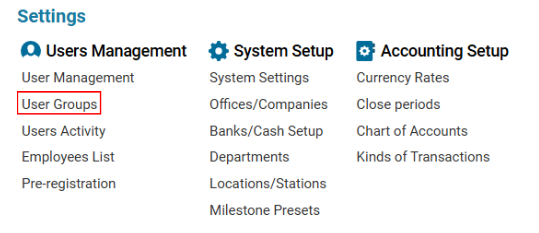
Navigate to the Settings section and under the Users Management Section click the “User Groups” Button.

Overview
The User Groups interface allows for the creation, editing, and management of user groups within the system. It also enables assigning specific permissions to groups, controlling their access to different parts of the system.
User Group Management
Creating a New User Group
If you are opening the User Groups page for the first time:
Fill in the Name and Description fields.
Click the SAVE button.
If you have already switched between different groups:
Click +NEW to create a new group.
Fill in the required details and click SAVE.
Deleting a User Group
Select the group you want to delete.
Click the DELETE button.
Cloning a User Group
Select the group you want to clone.
Click the CLONE button.
A new group will be created with the suffix "_clone" (e.g., admin_clone).
Permissions Management
Group Permission Tab
Displays a list of permissions assigned to the selected group.
Shows:
Page Name where the permission applies.
Permission Name.
Permission Description.
Copying Permissions to Another Group:
Select the permissions.
Choose the target group from the "Copy selected to" dropdown.
Click Copy.
New Permission Tab
Used to add or remove permissions from a group.
Adding a Permission:
Select the relevant page.
Click the red button (it will turn green, meaning the permission is added).
Removing a Permission:
Select the relevant page.
Click the green button (it will turn red, meaning the permission is removed).
Additional Features:
Friendly Groups: Shows other groups with the same permissions.
Users with Same Permissions: Displays users who have the same permissions as the selected group.
Additional Settings
Group Emails Tab
Manage emails linked to a user group.
Adding an Email:
Fill in the form and click Save Email.
Editing an Email:
Select an email, modify it, and save.
Deleting an Email:
Select an email and click DELETE EMAIL.
Group Exclude Companies Tab
Excludes specific companies from being visible to the user group.
Adding a Company to Exclusion:
Select the company from the Company selector.
Click ADD TO EXCLUDE.
Once excluded, the company will not be visible to users in this group.
Users Tab
Displays all users belonging to the selected group, along with:
Login.
Name.
Email.
Assigned Group Name.
Removing a User from the Group:
Click Deassign User in the user’s row.
