Update Import Flight Details
Summary
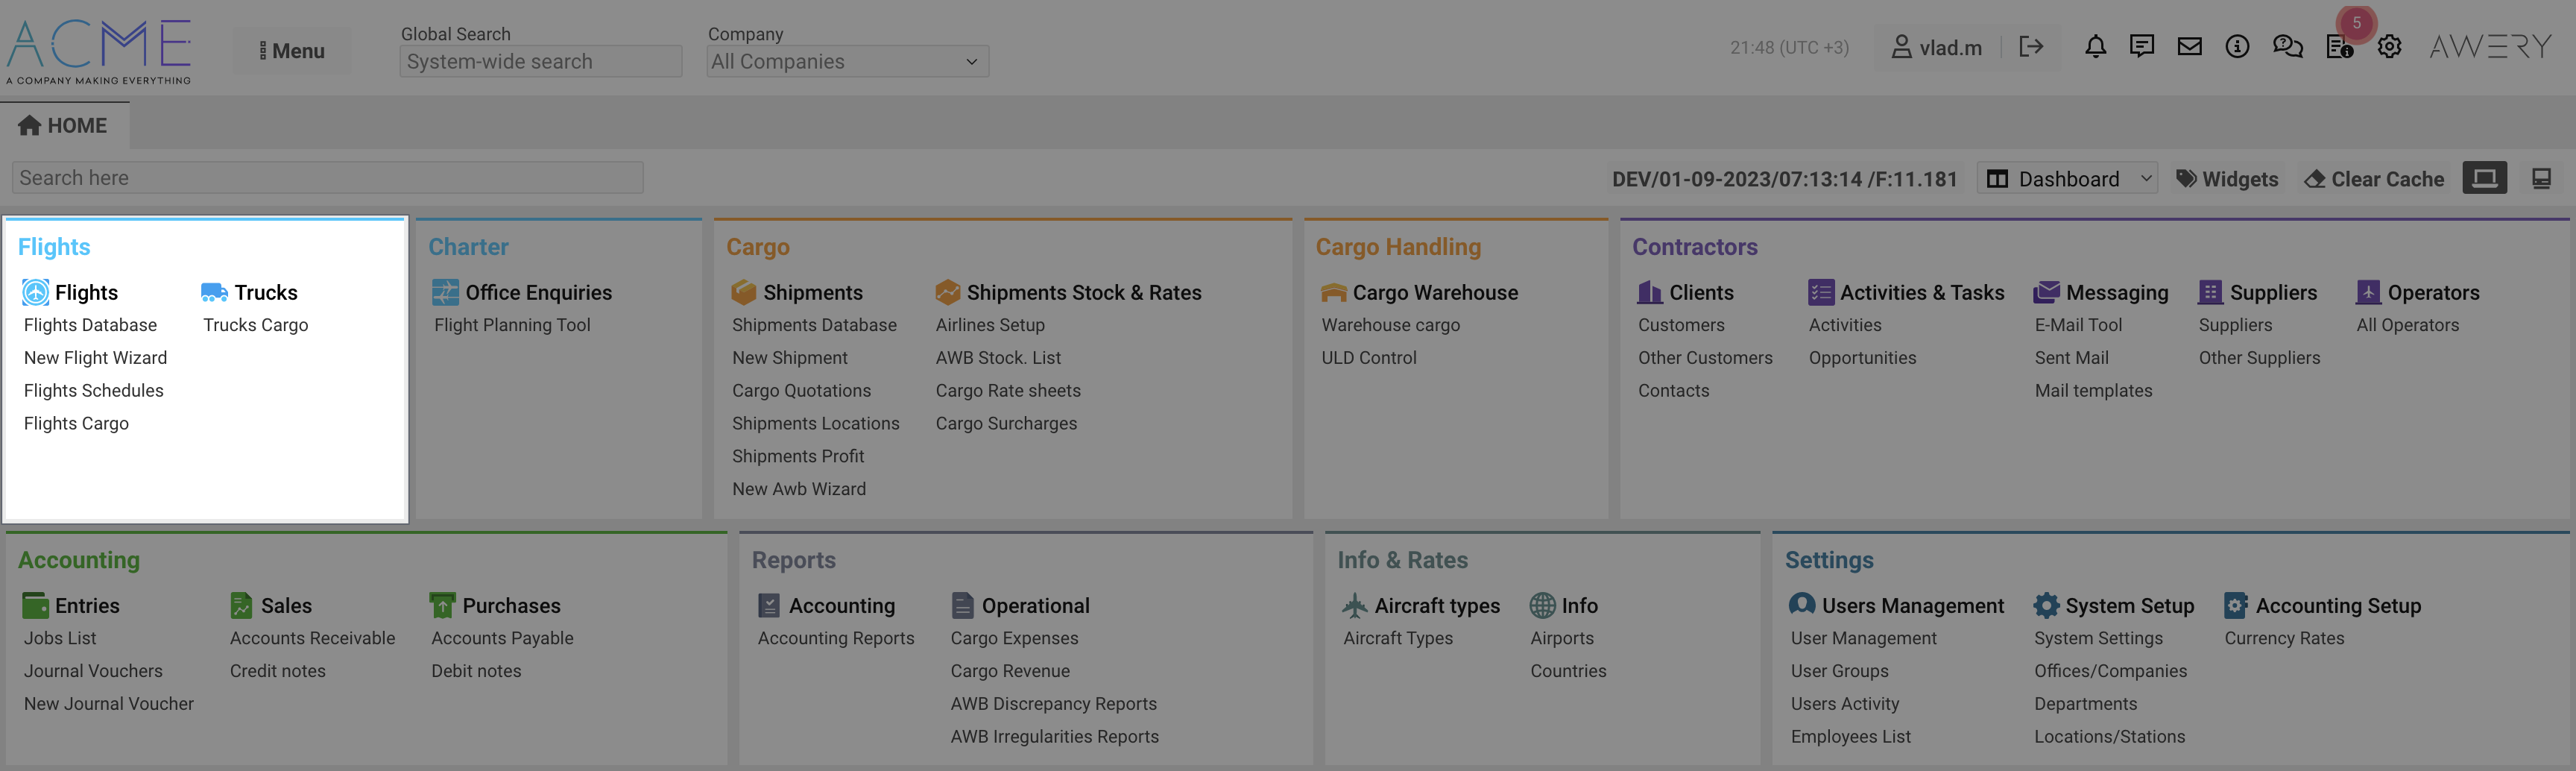
Despite the fact that the flight details management interface in AWERY ERP can be opened from several different related interfaces, in order to quickly find the desired flight, we recommend using the "Flights" section, which can be opened directly from the home page.
By default, the “Flights” section includes:
-
Flights
-
Flights Database
-
New Flight Wizard
-
Flights Schedules
-
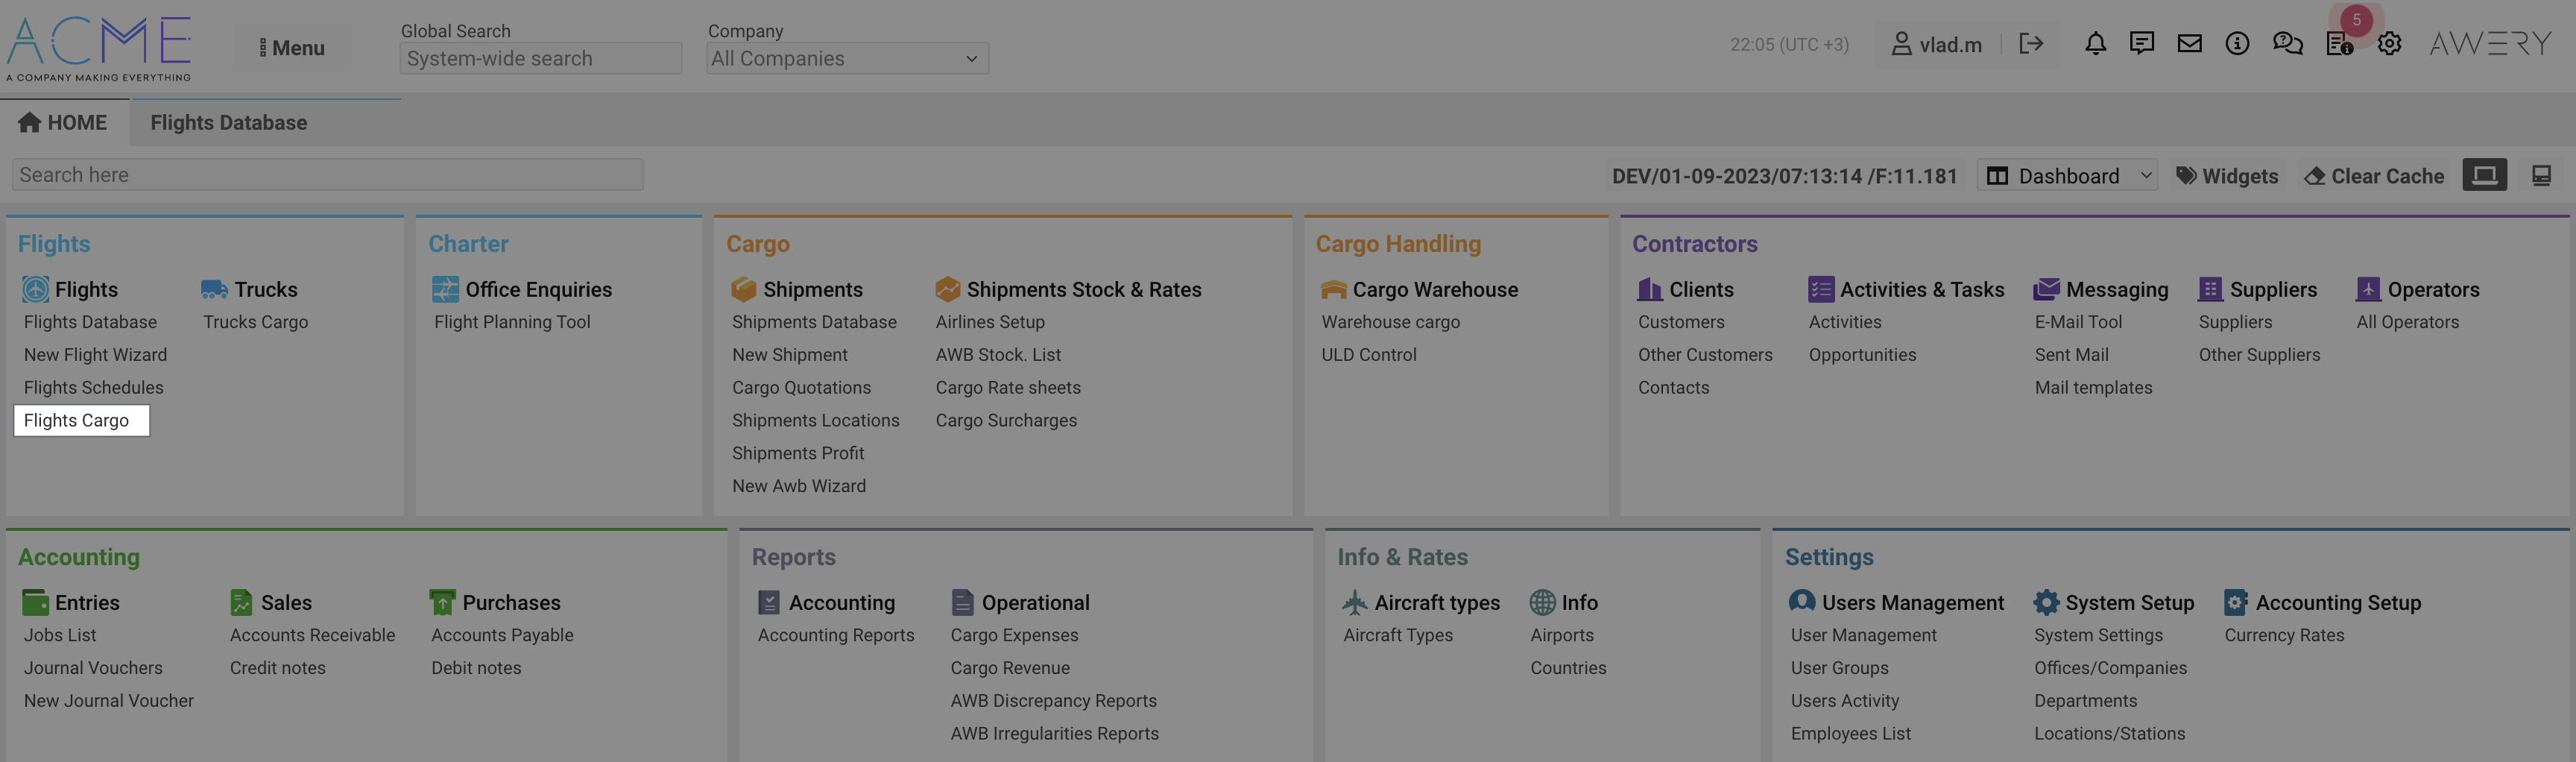
Flights Cargo
-
-
Trucks
-
Trucks Cargo
-
More information can be found at the following link: Flights.
We recommend using the "Flights Cargo" page in this guide as it provides more relevant information that is linked to general flight and shipping information at the same time.
Update of general flight information
All pages that contain lists of information, such as "Flights Cargo", are developed in one design code, where the interface is divided into three components:
-
A block of basic filters, necessary in order to make a selection of records that interest you.
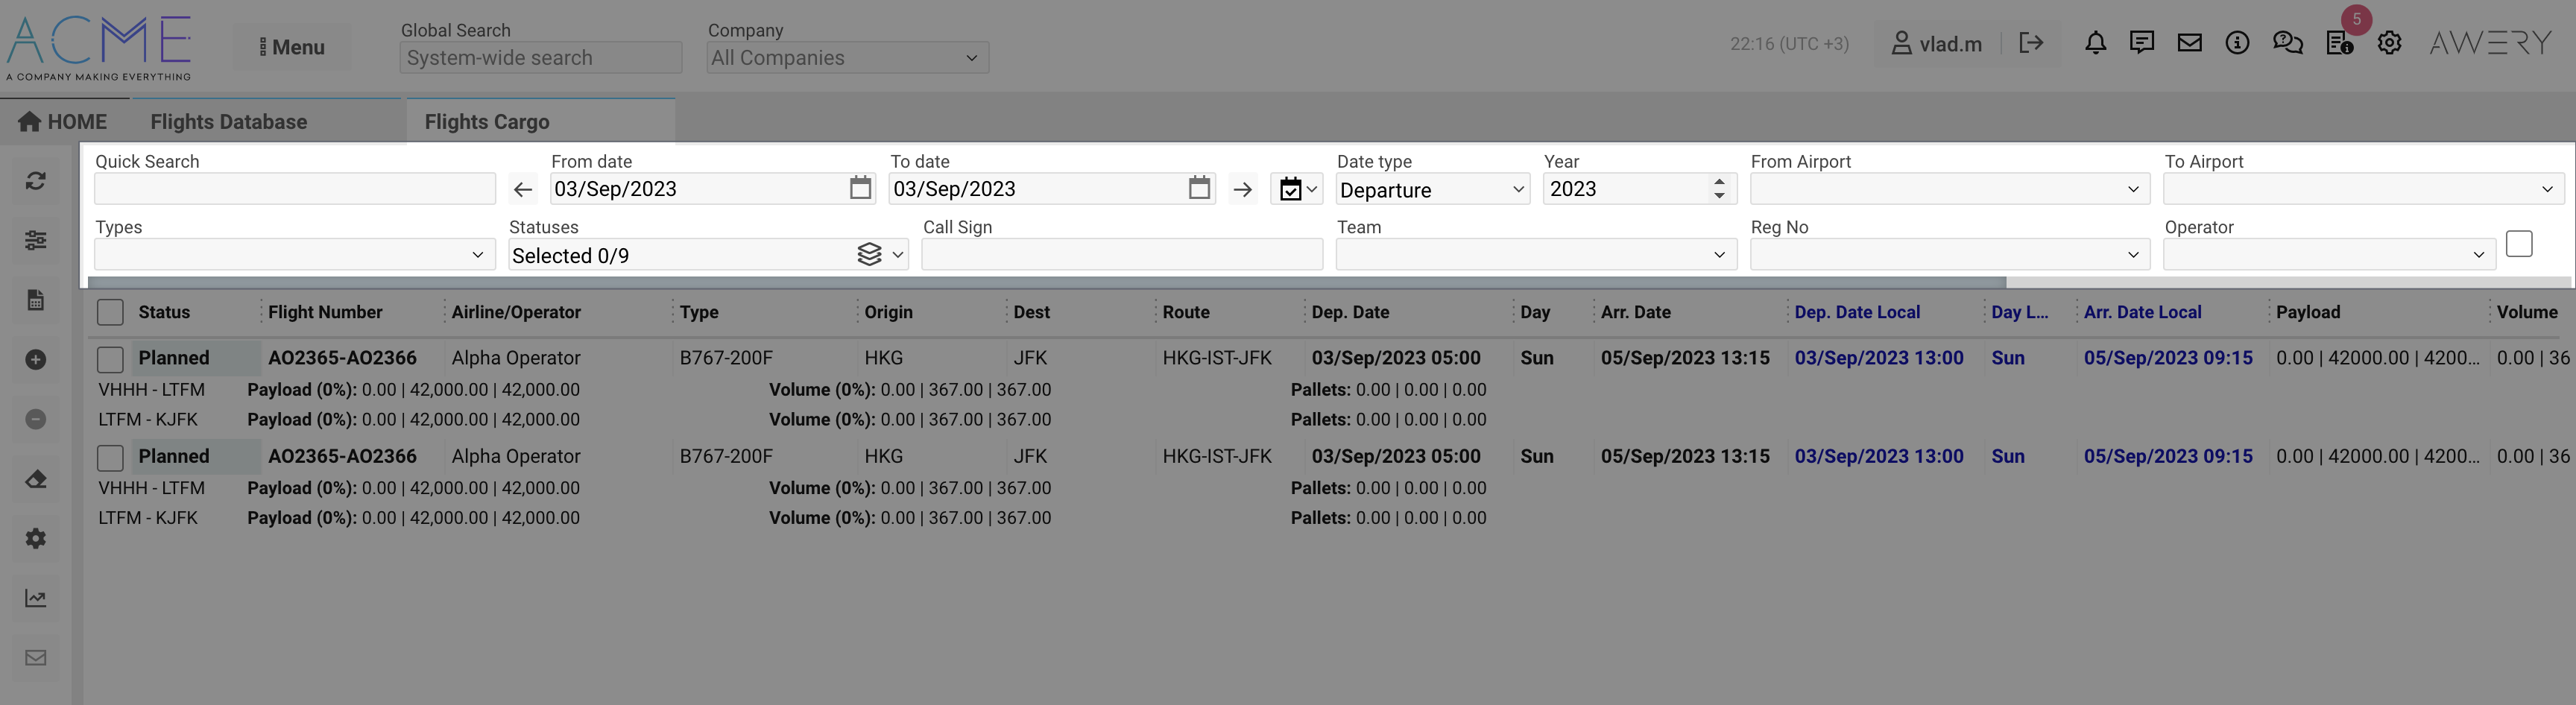
-
An additional bar, which mainly contains buttons for downloading reports, additional filters and additional tools for manipulating information at this interface level
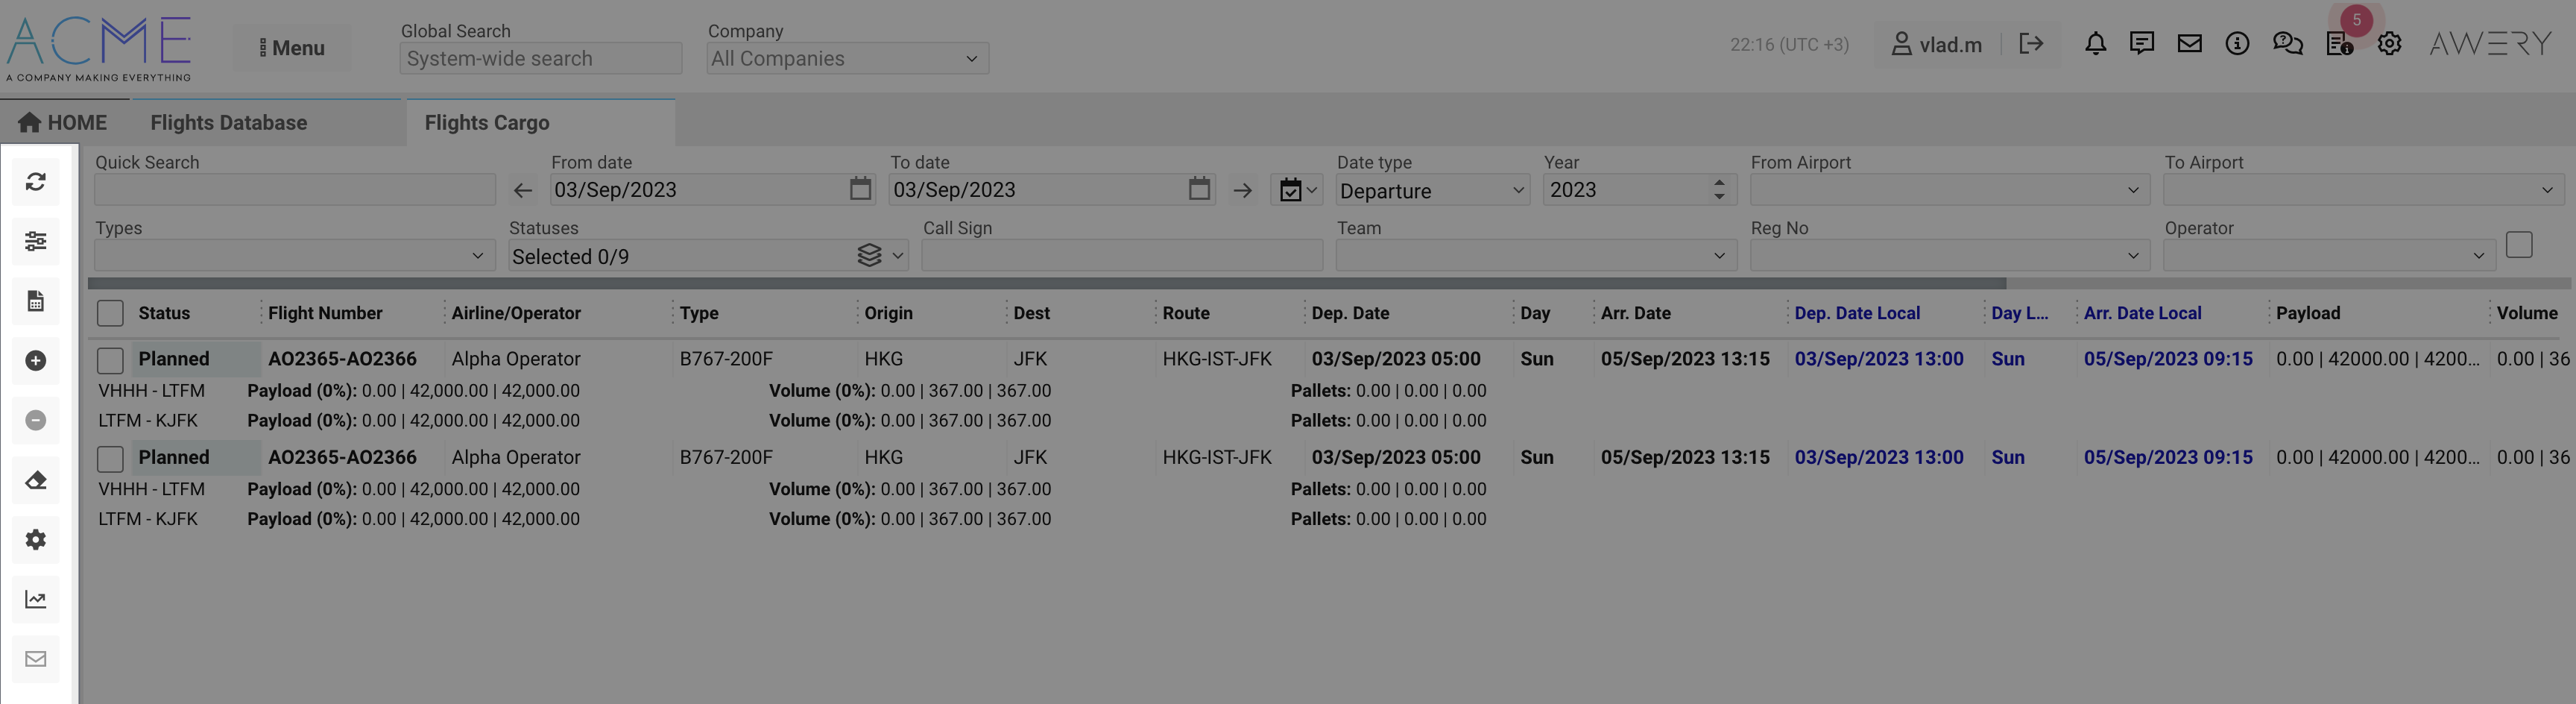
-
Main tabular part
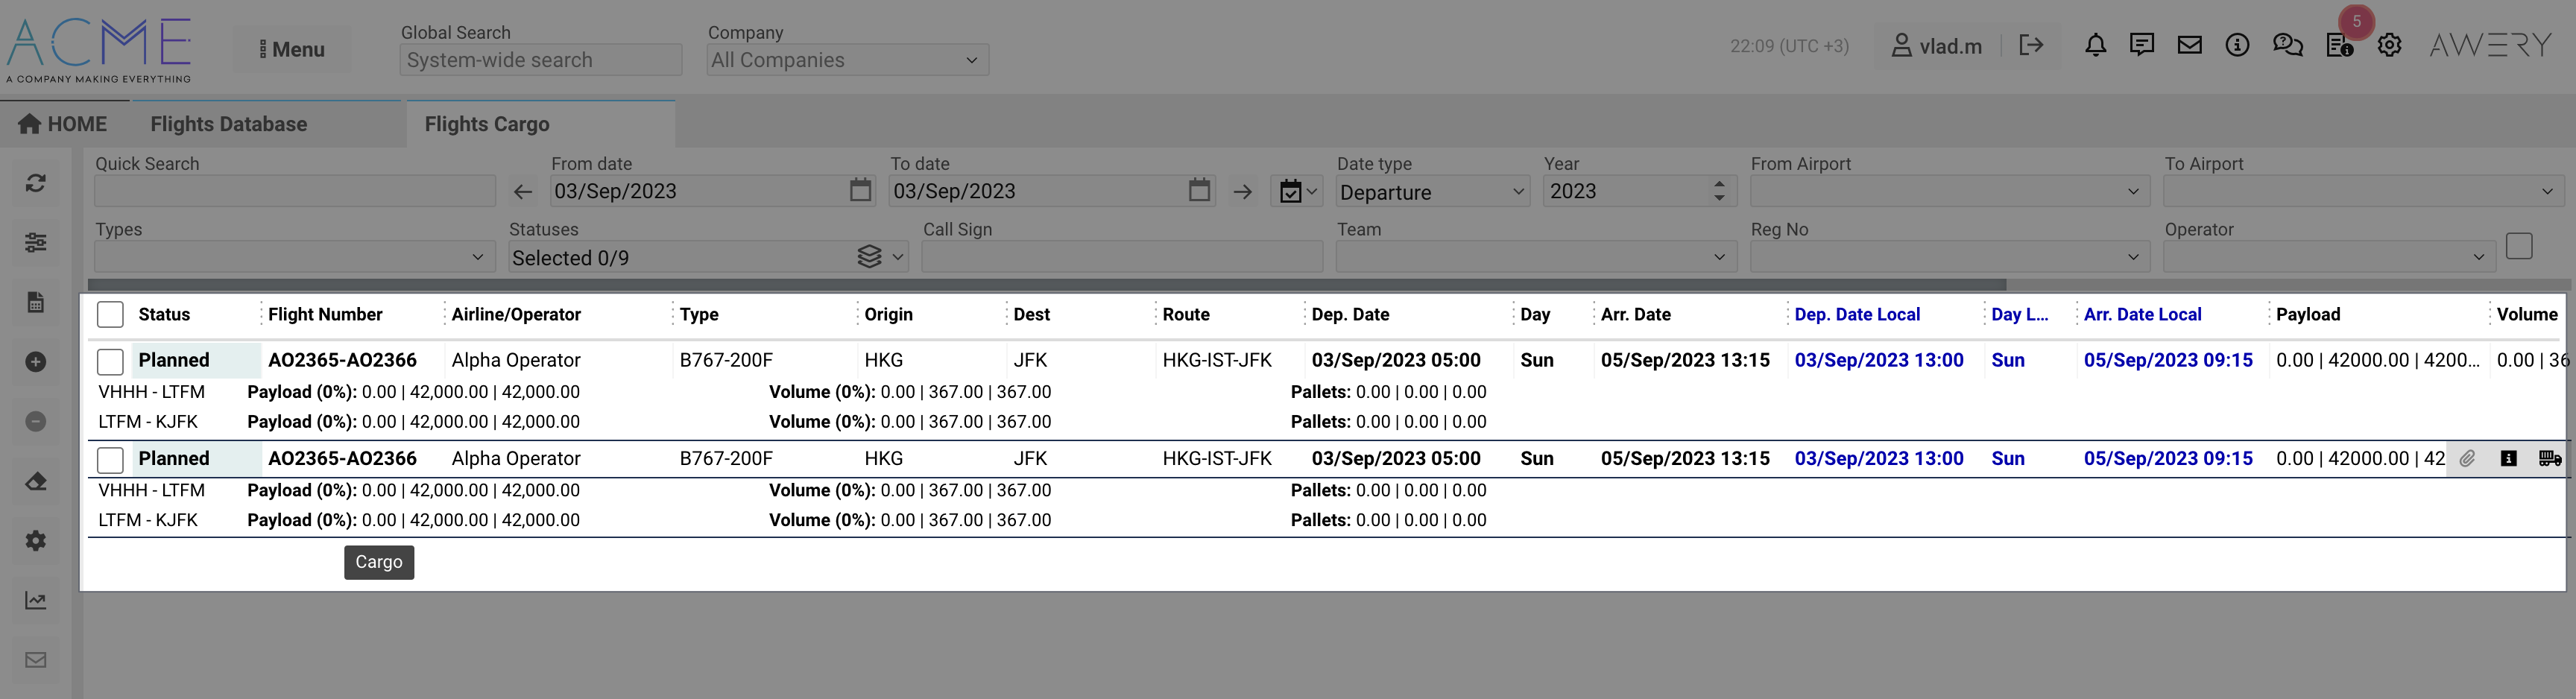
After you have identified the required flight in the main tabular section in the flight record line, double-click, after which the system will open the flight details handling page.
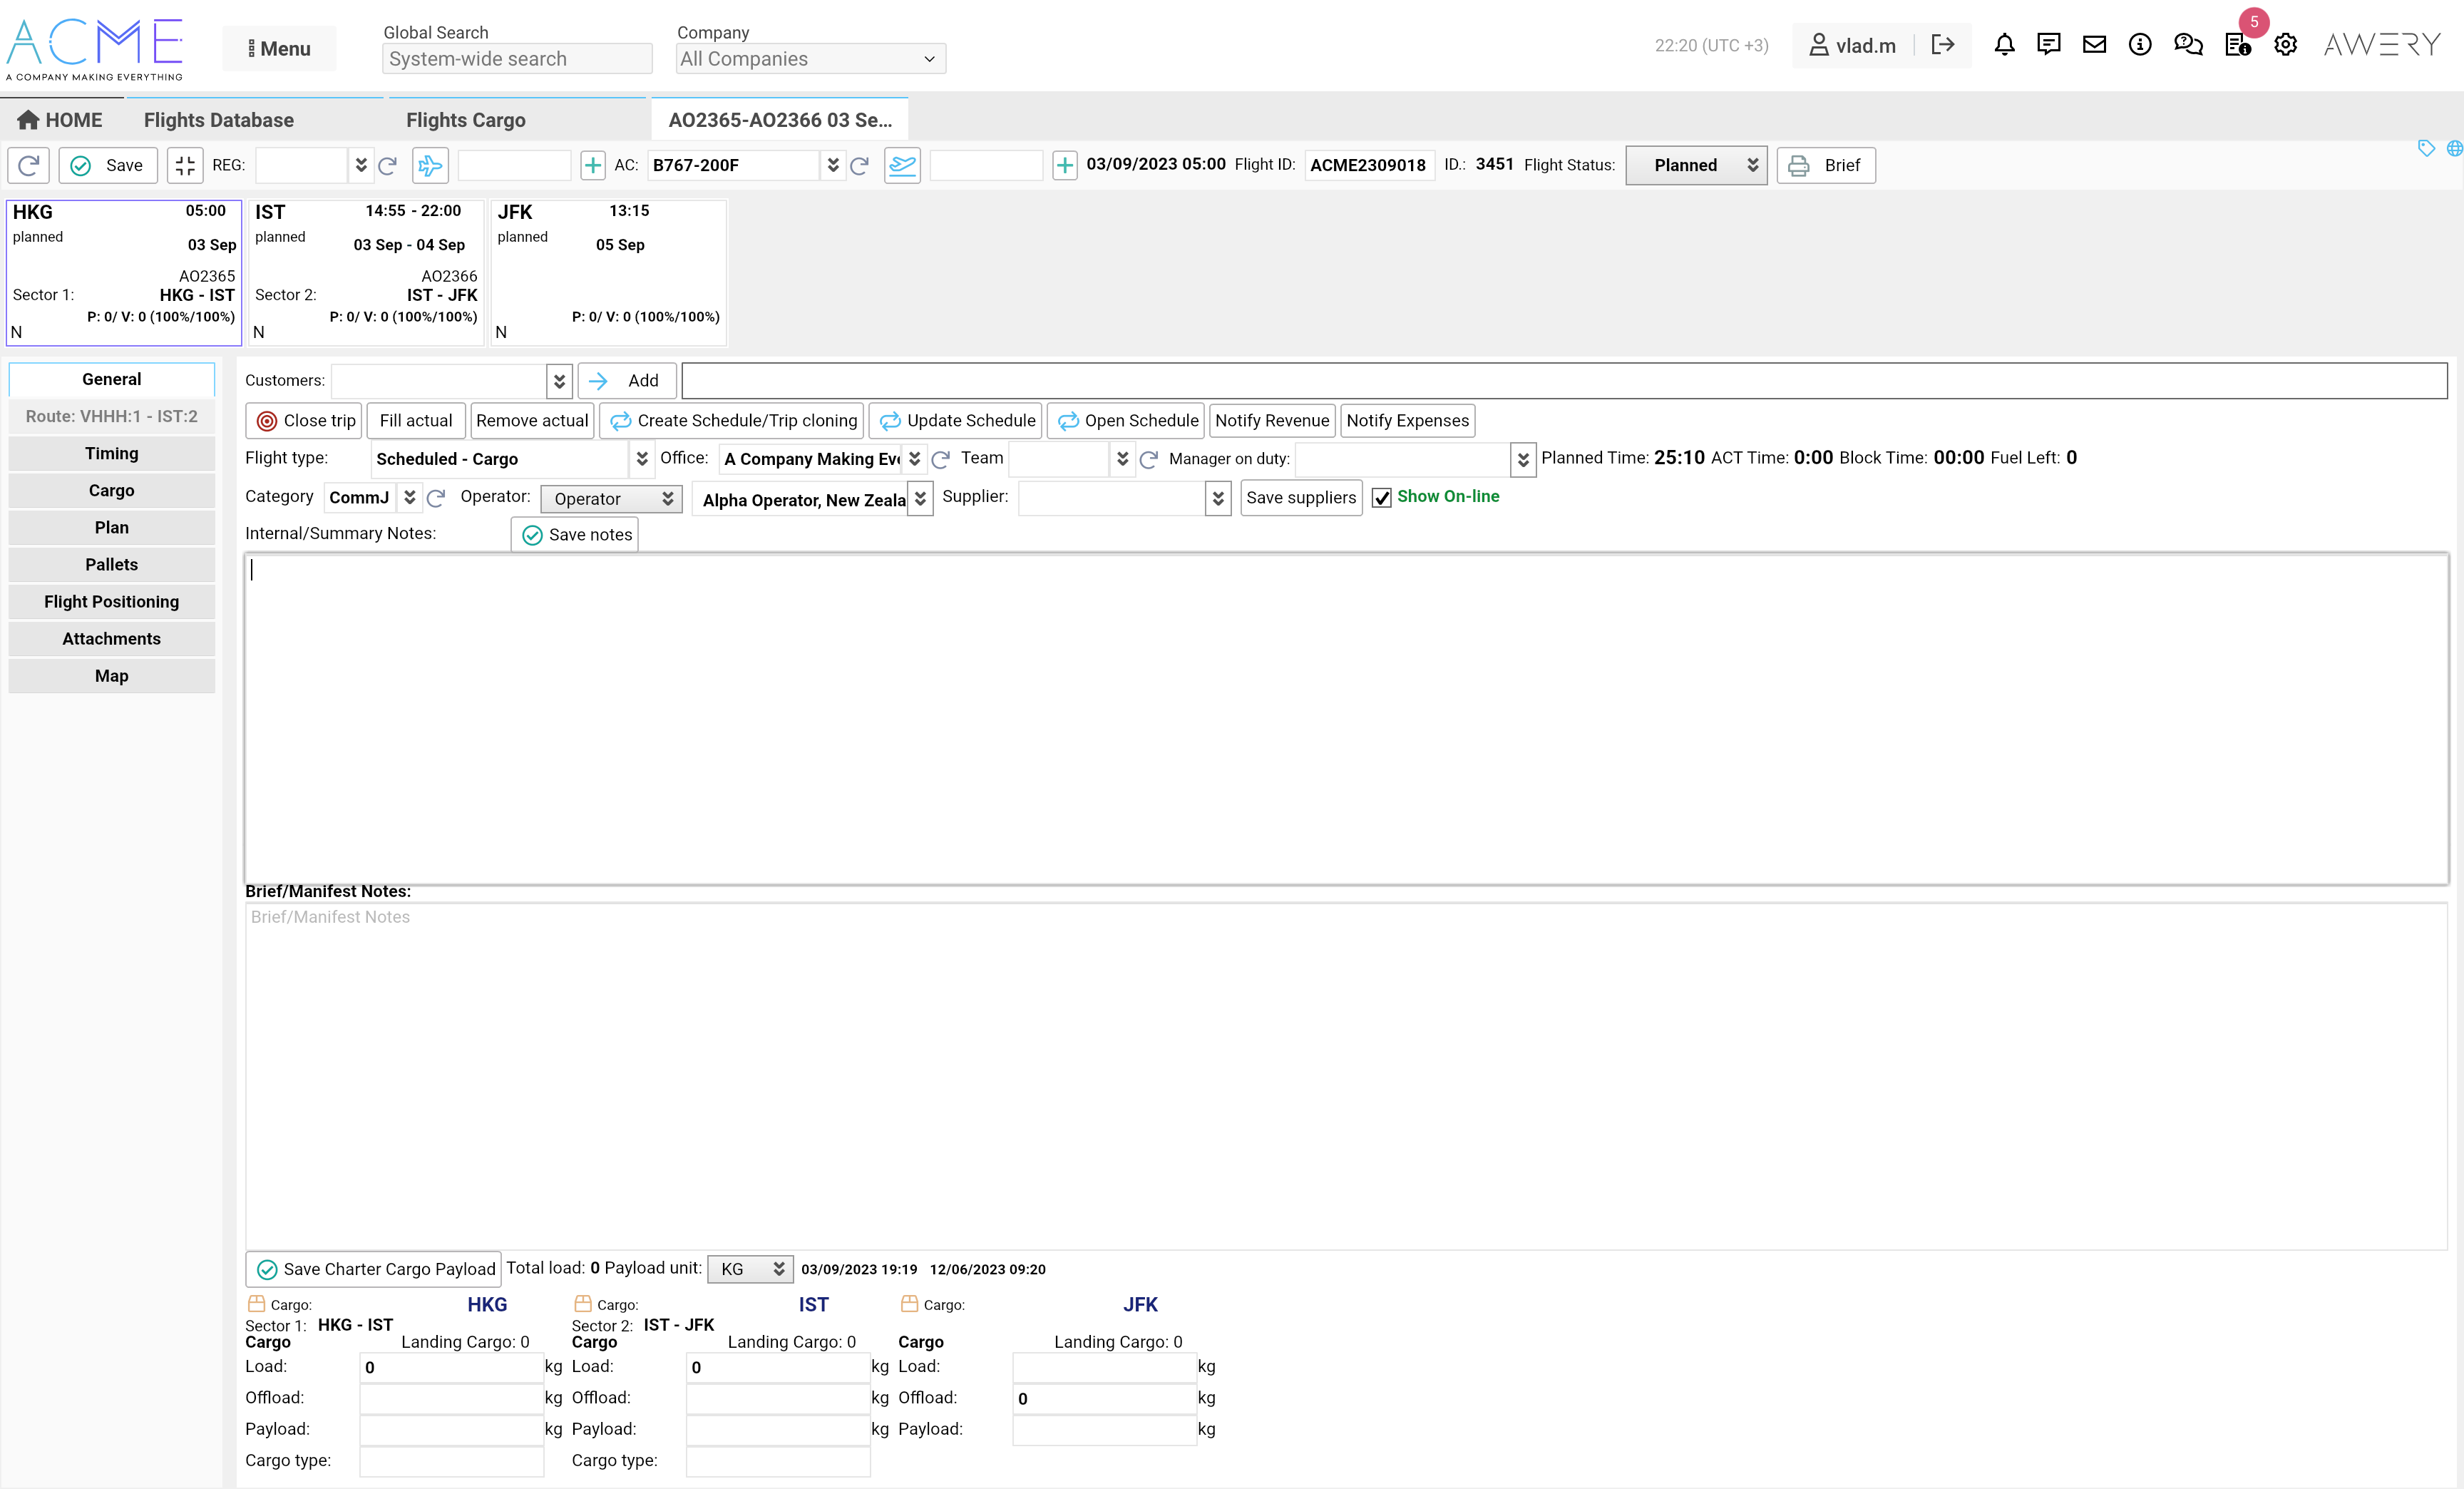
Update Flight timings and waypoints related information
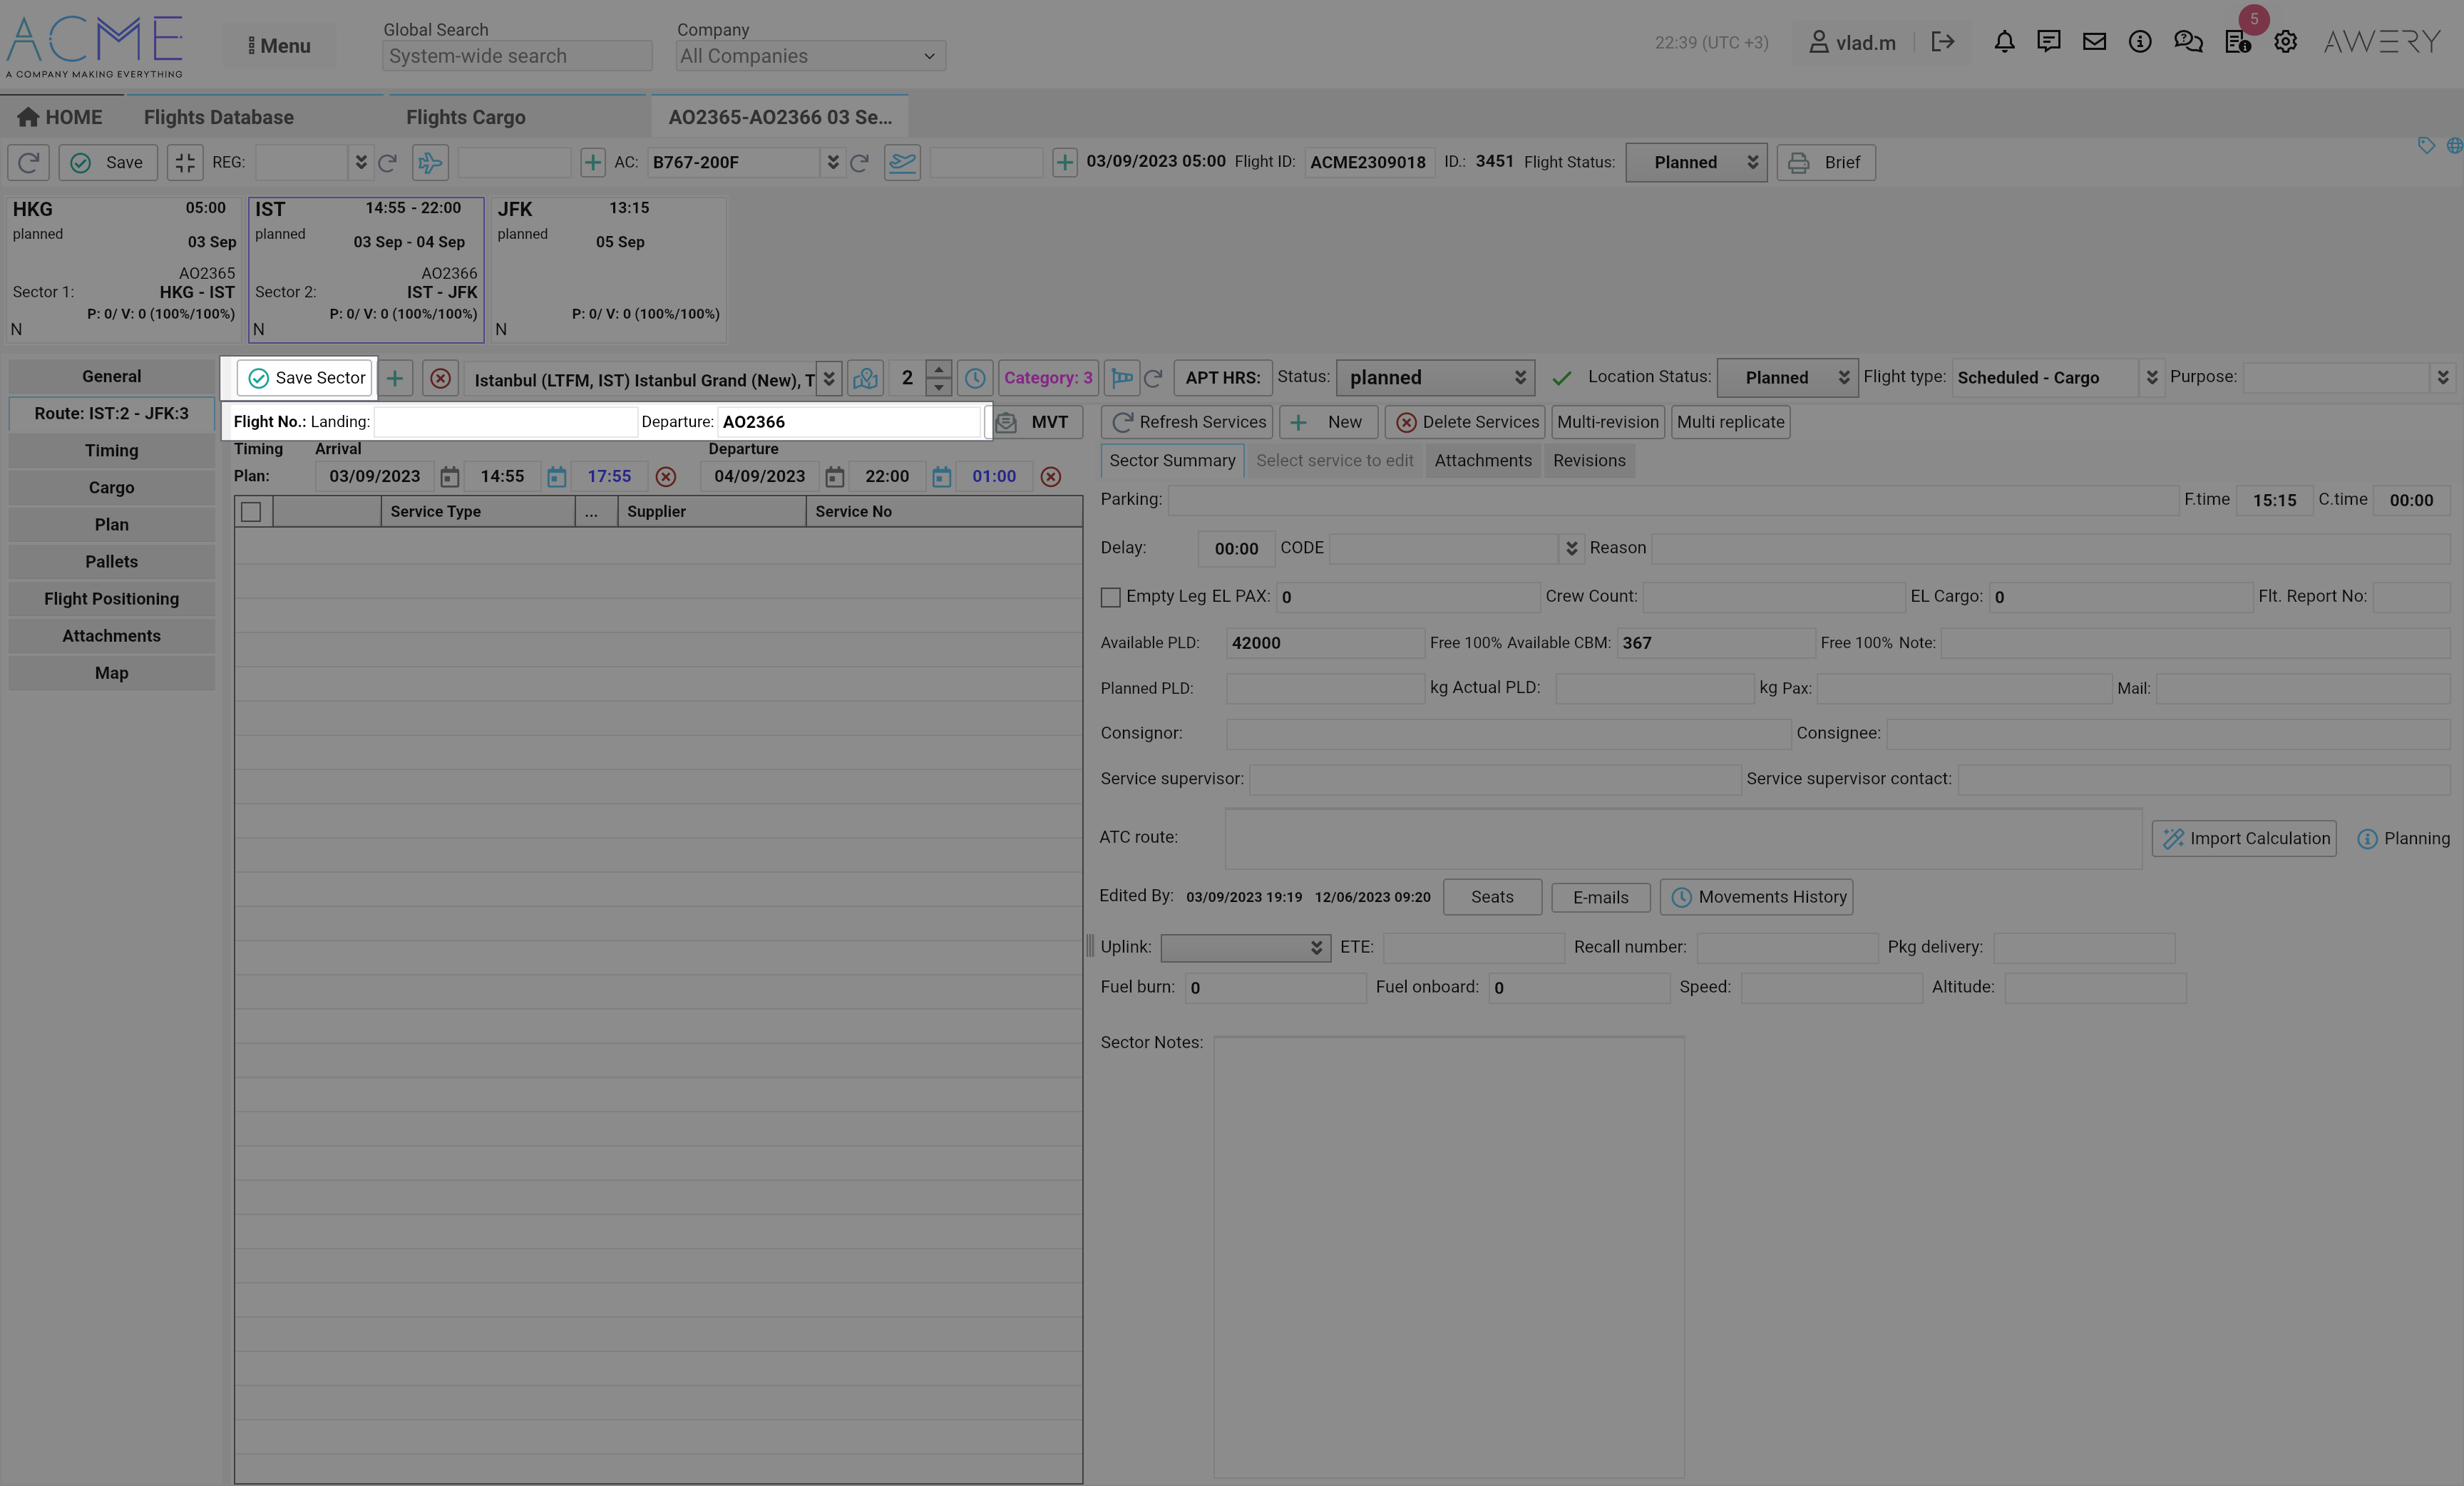
To update information about flight dates, you need to select a specific flight waypoint (by clicking on the square block symbolizing the flight waypoint), after which the system will open the "Route" tab, where the main part of the tab contains information about flight times, flight number, available payload, delays, Sector notes and more.
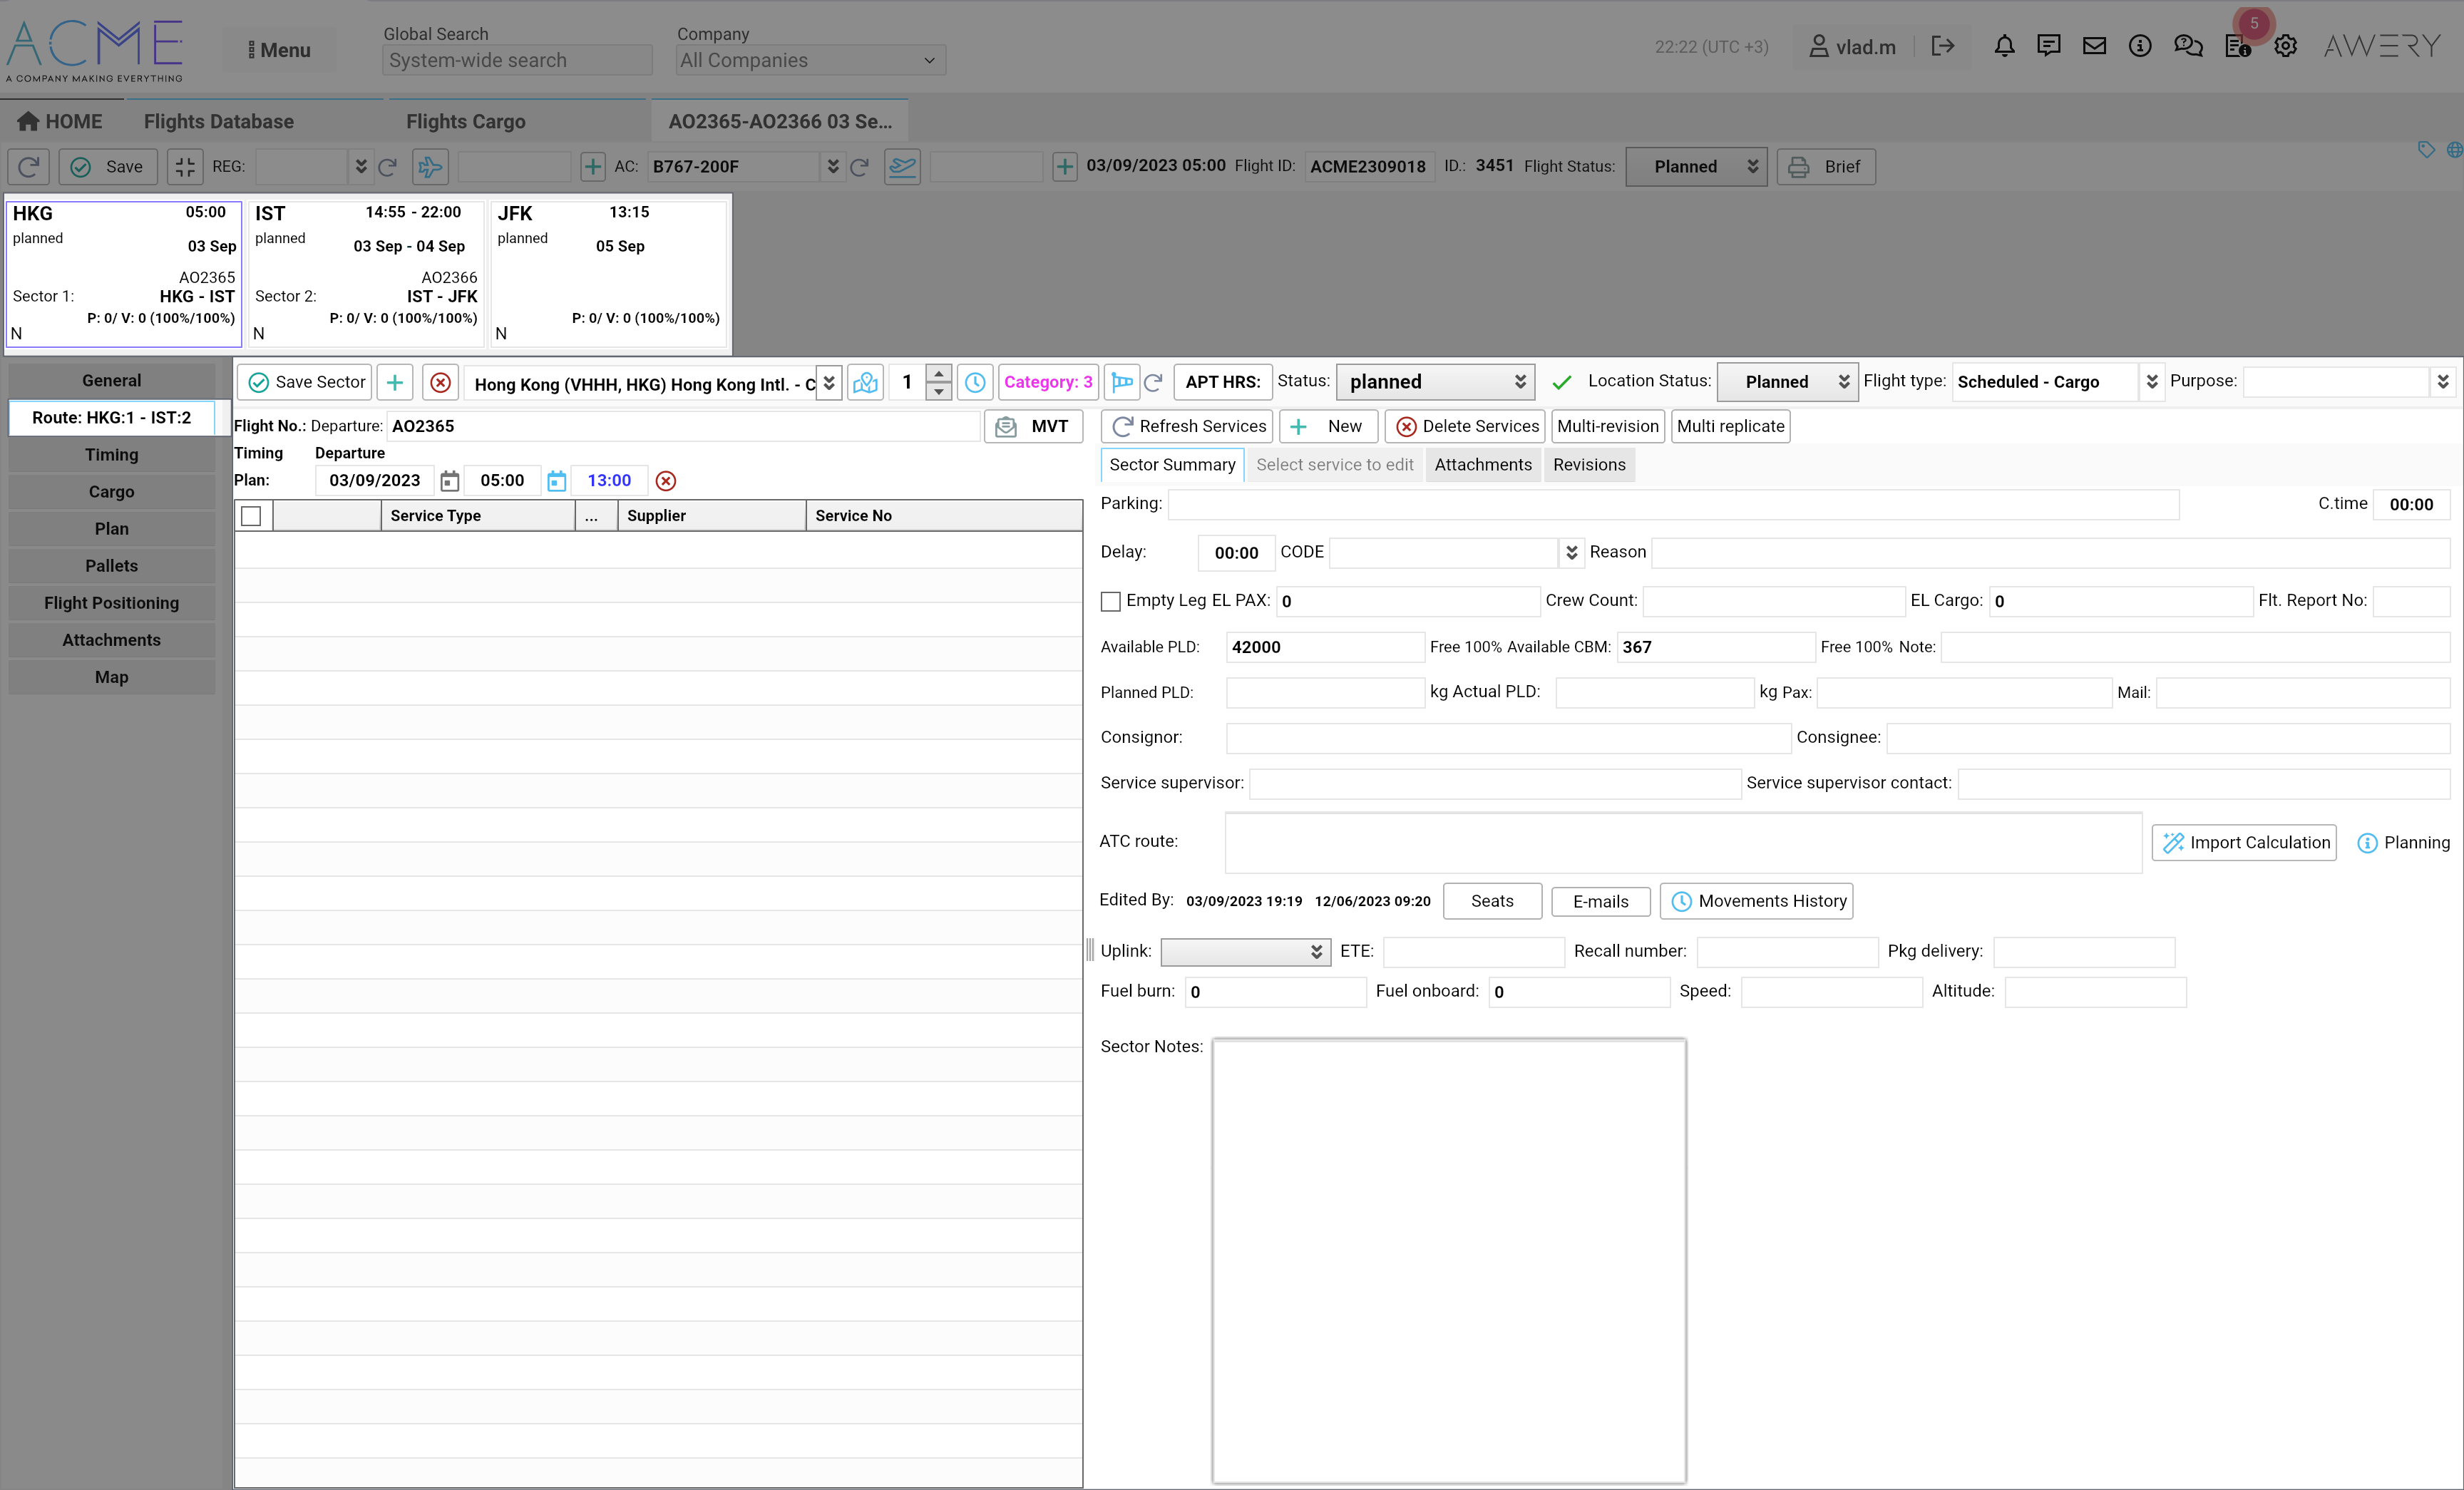
Times
Each waypoint contains information about the date of departure and arrival (in this case, the first and last waypoints will contain information about the date of departure and arrival, respectively).
Remarks:
-
The blue date-time picker indicates the local time of the airport, while the black date indicates the time in UTC format.
-
Be careful with the time change. For example, if you set the departure date of this waypoint later than the departure date of the next one, the system will issue an alert and will not allow you to do so.
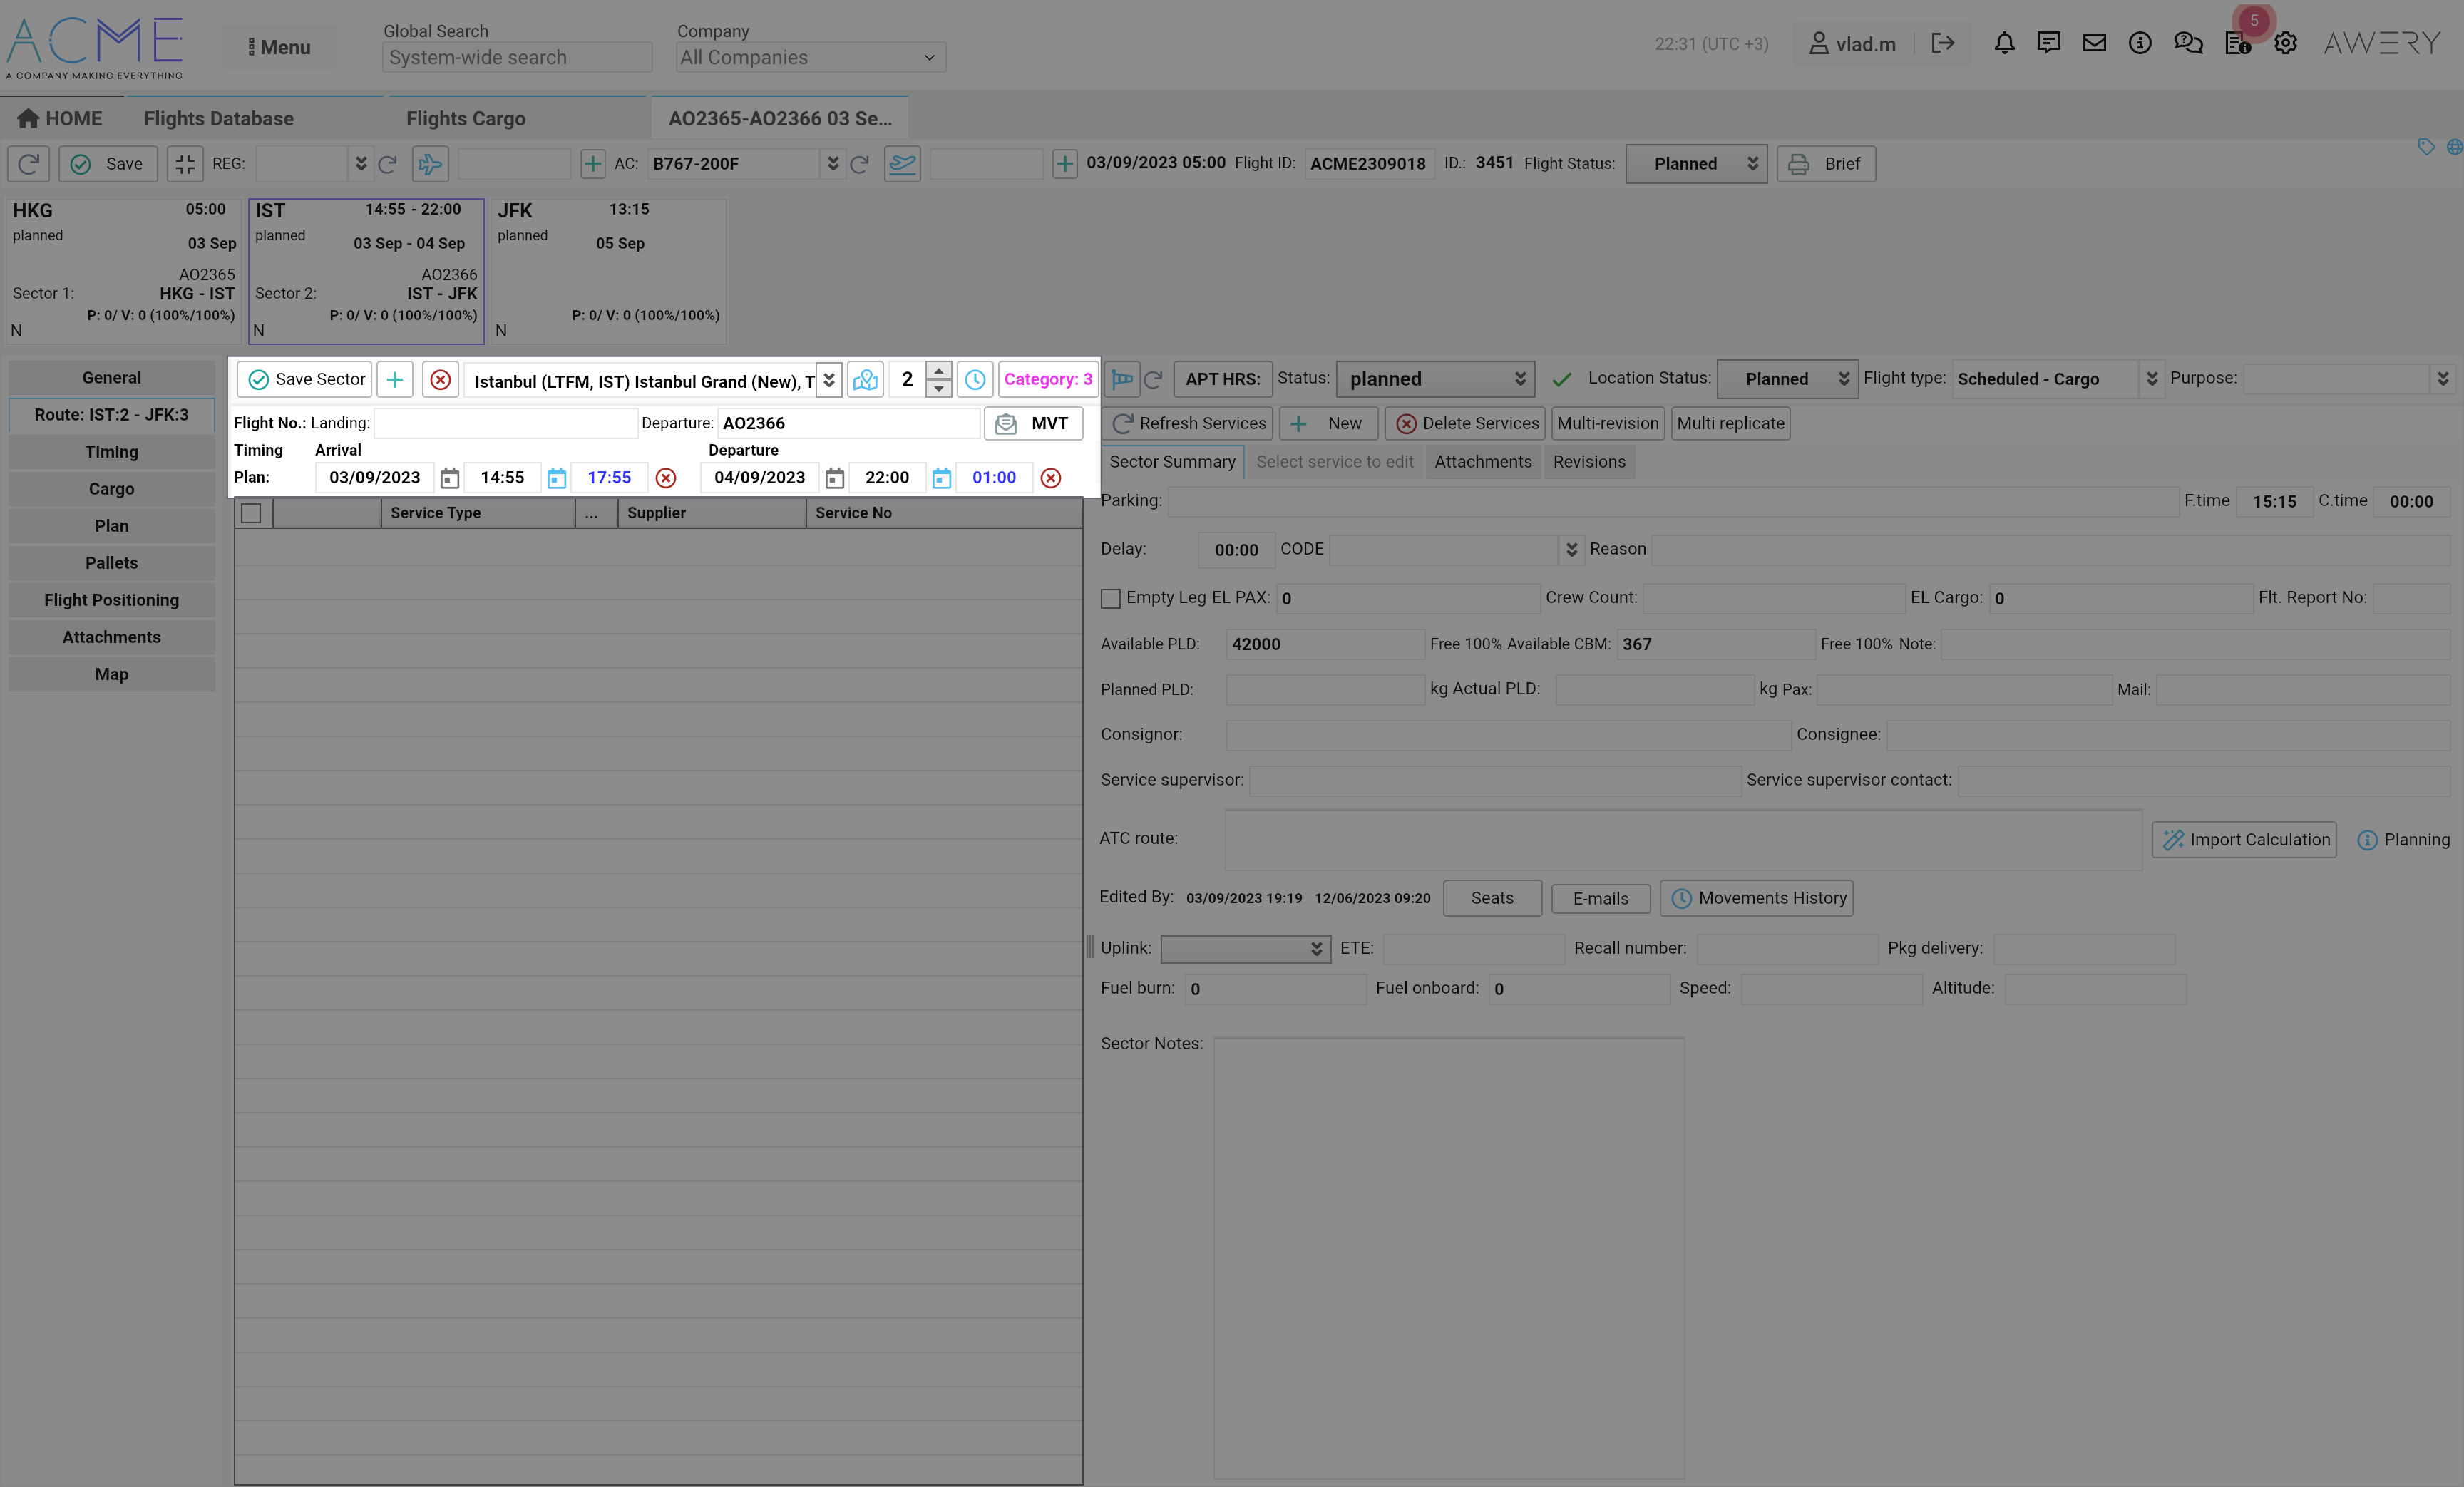
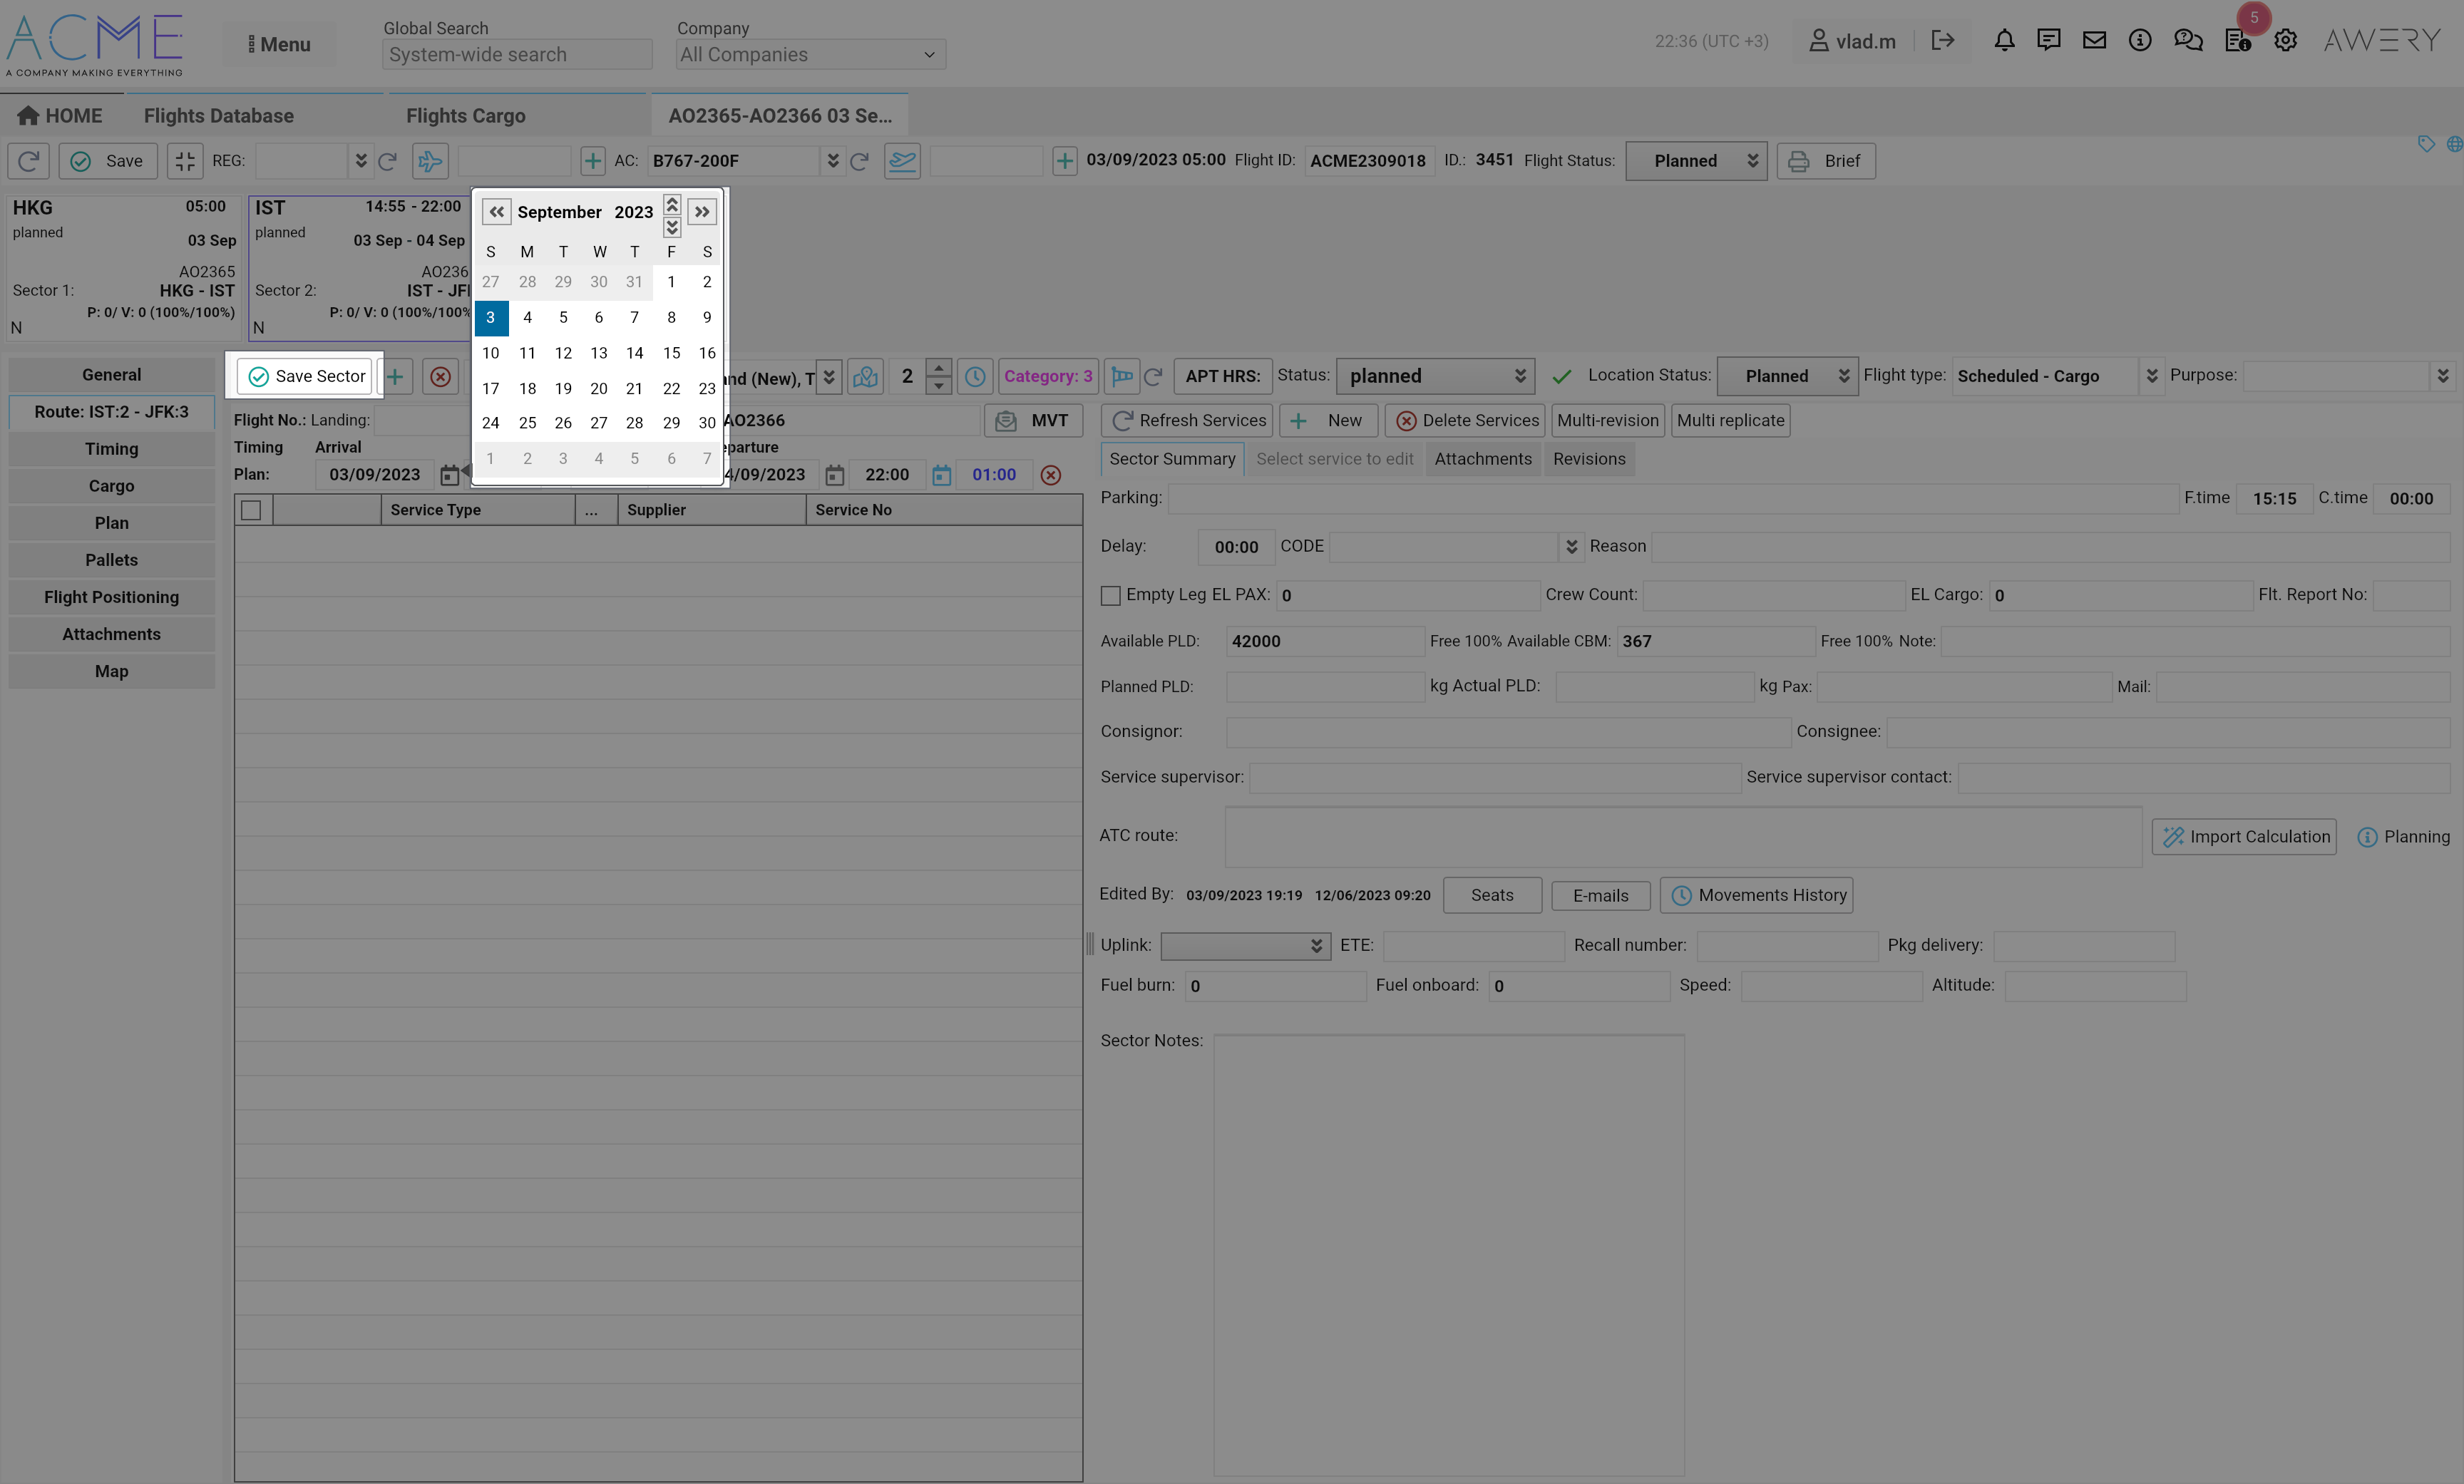
To update the information, use the date-time picker component to set a new date and click on the "Save sector" button. The system may need a short amount of time to update the data.
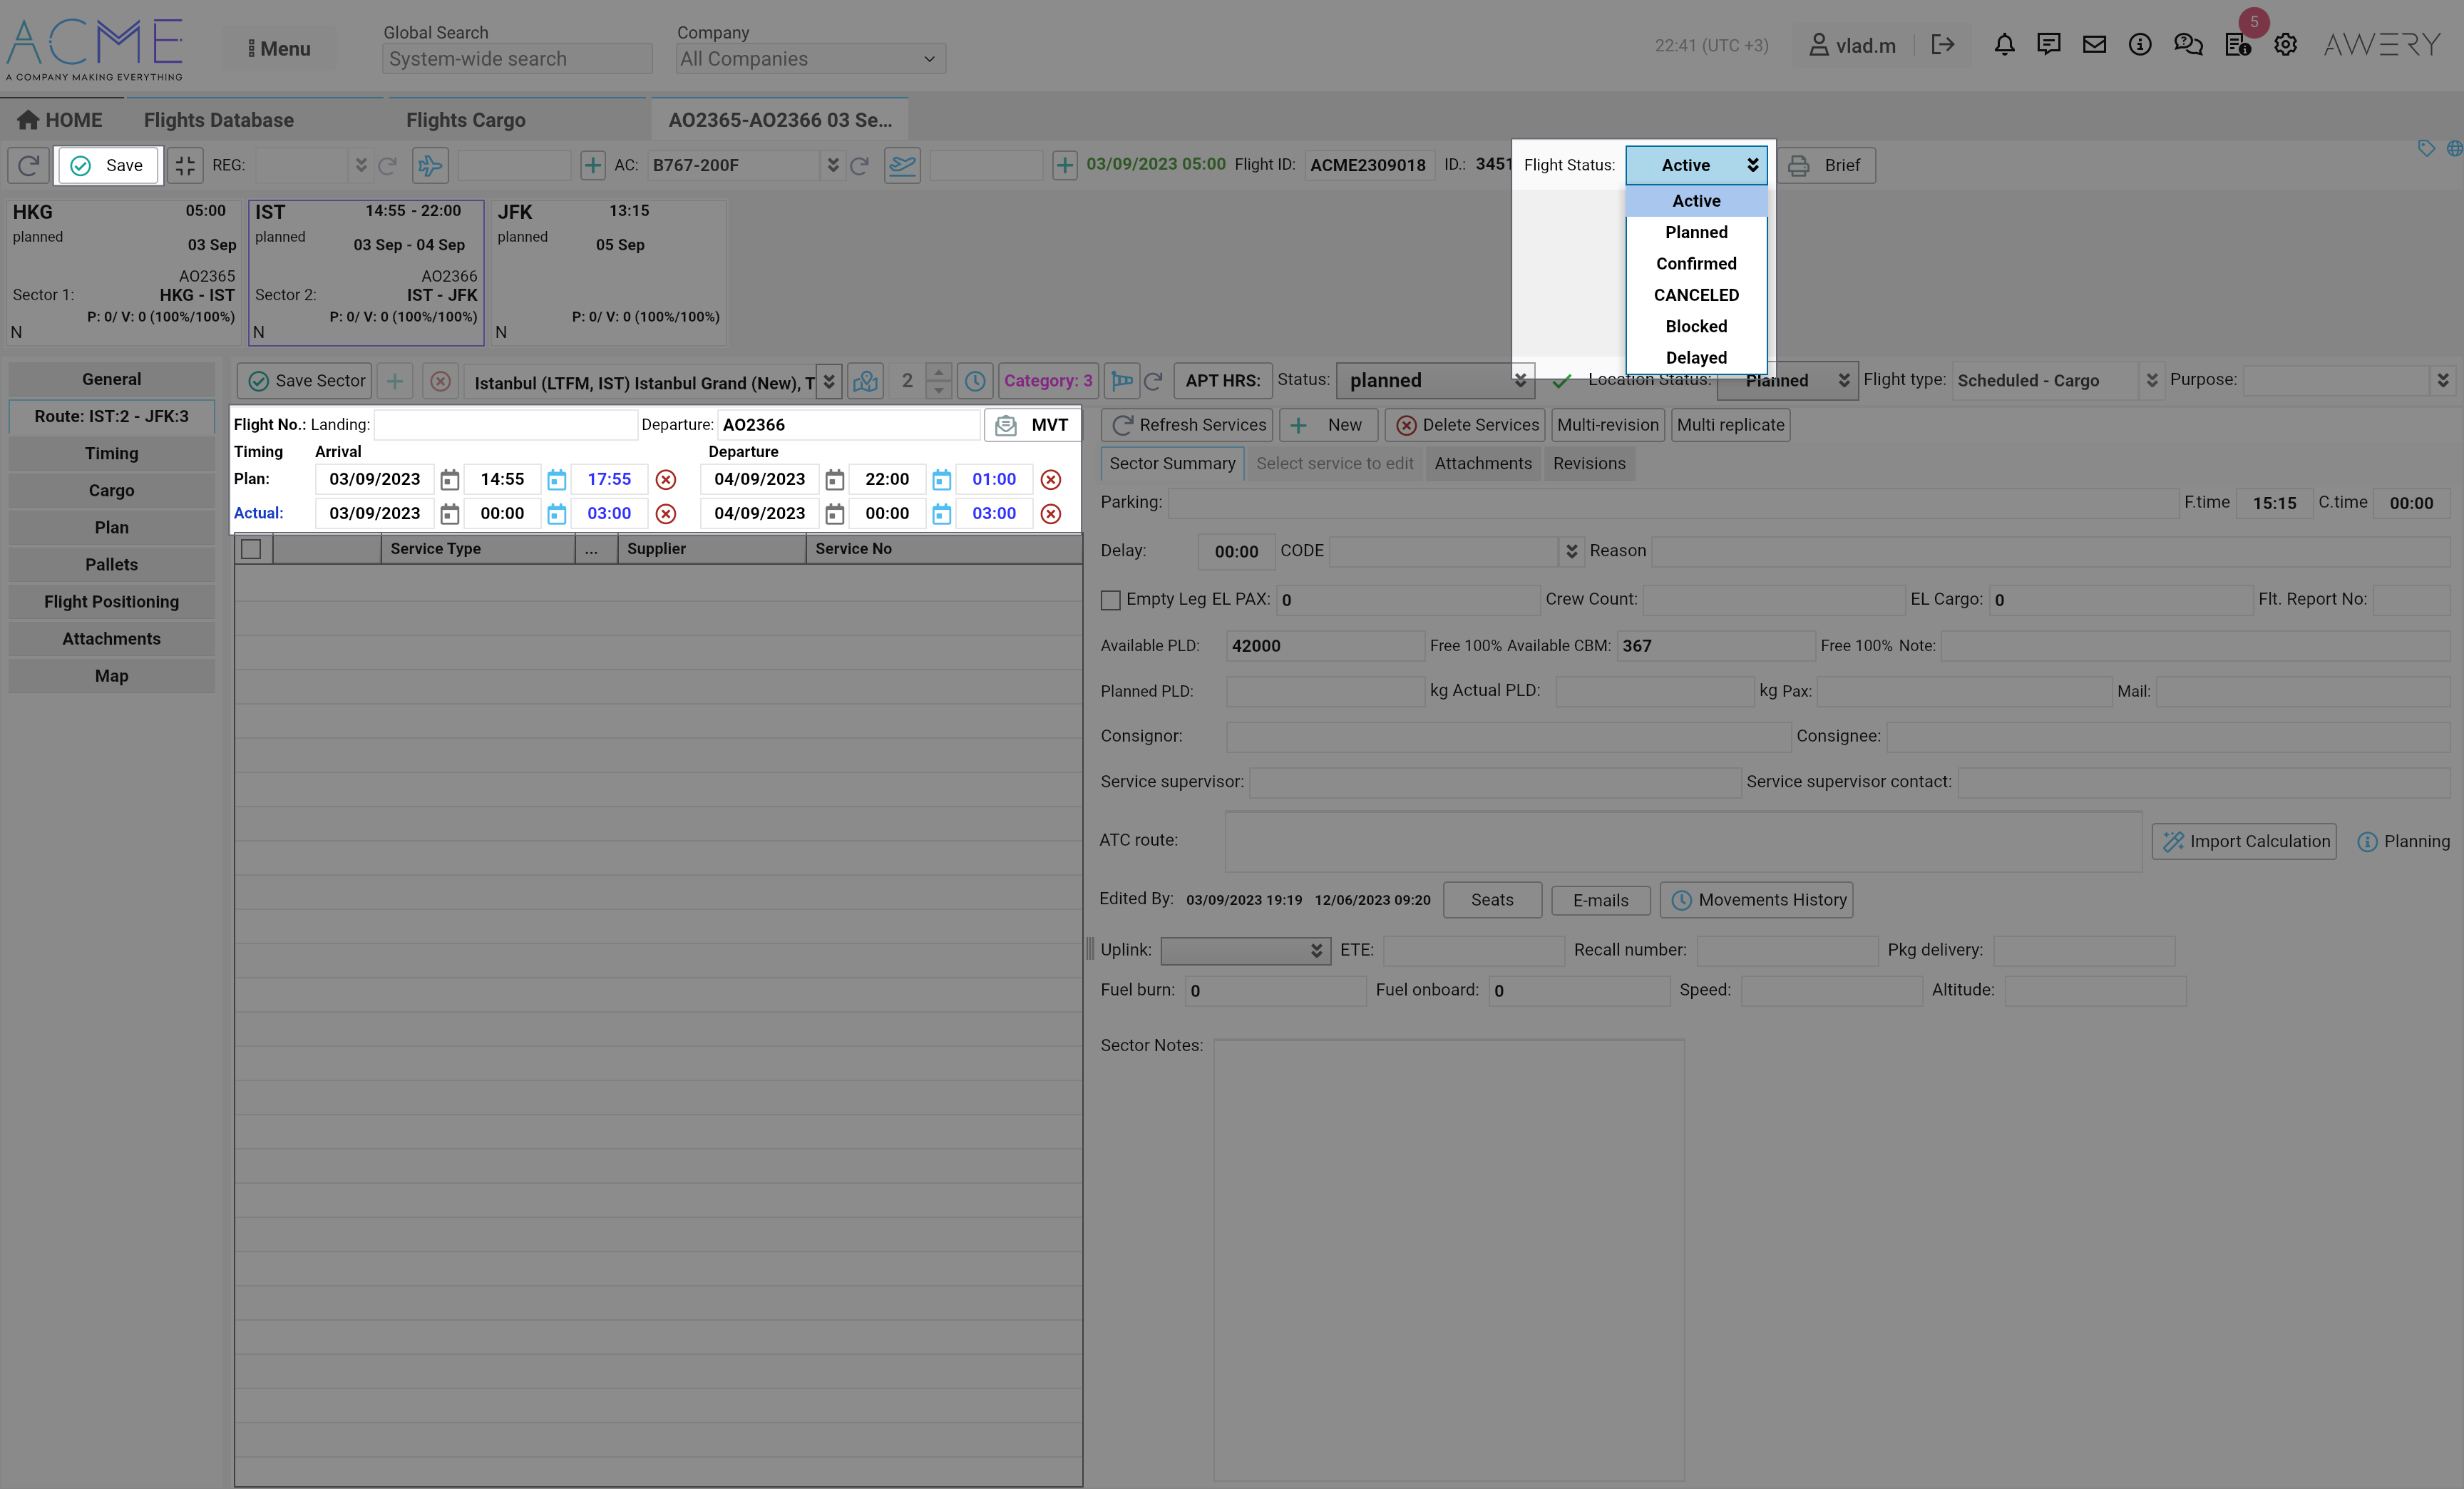
To set the actual departure or arrival time, the Flight must be in "Active" status. After that, additional data-time pickers will become available for operation.
If the flight is not yet in this status, it can be manually updated using the appropriate selector. Select the status and click on the save button to update the details of the entire flight.
Flight Number
By analogy with times, for each waypoint, you can set the number of departure or arrival signs. Update the value, click on the "save sector" button.
Remark:
-
We recommend that you do not set the arrival call sign so that incoming FFM messages can be processed correctly.
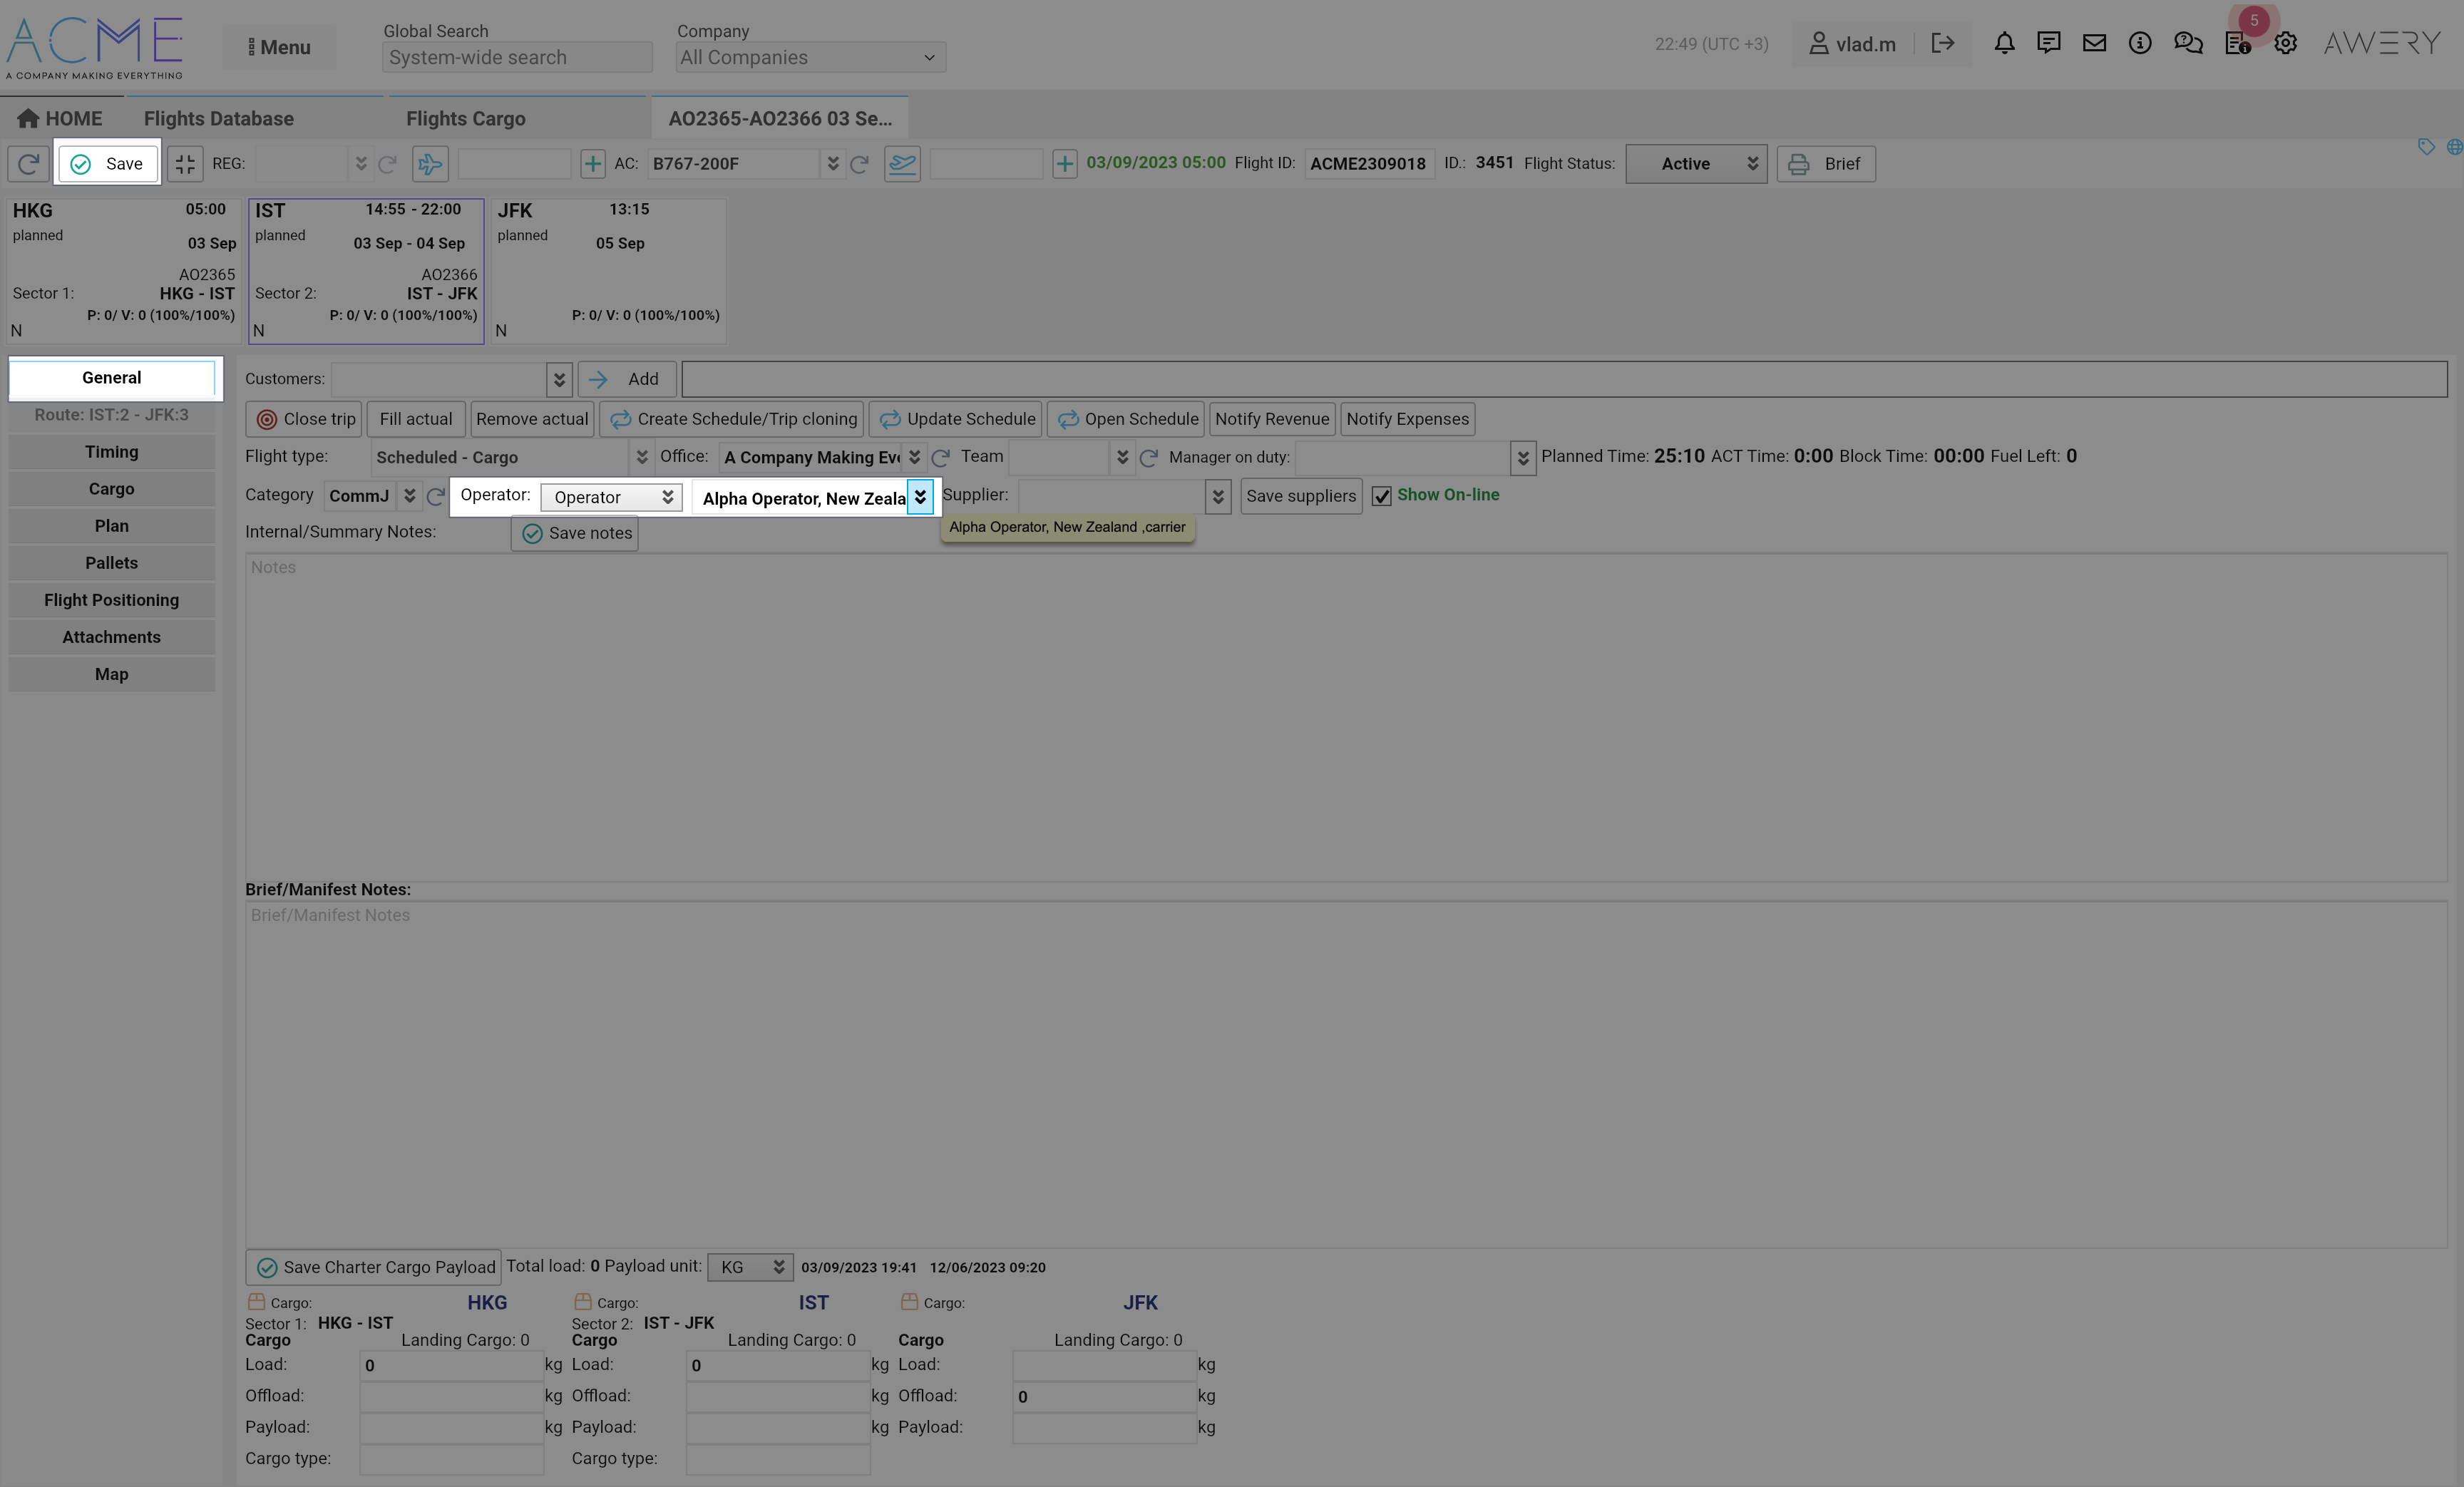
Airline
The carrier on the flight can be updated from the "General" tab of the flight.
Select a new option in the "Operator" selector with an "Operator" type and click on the "Save" button.
Update Import Cargo Manifest
Summary
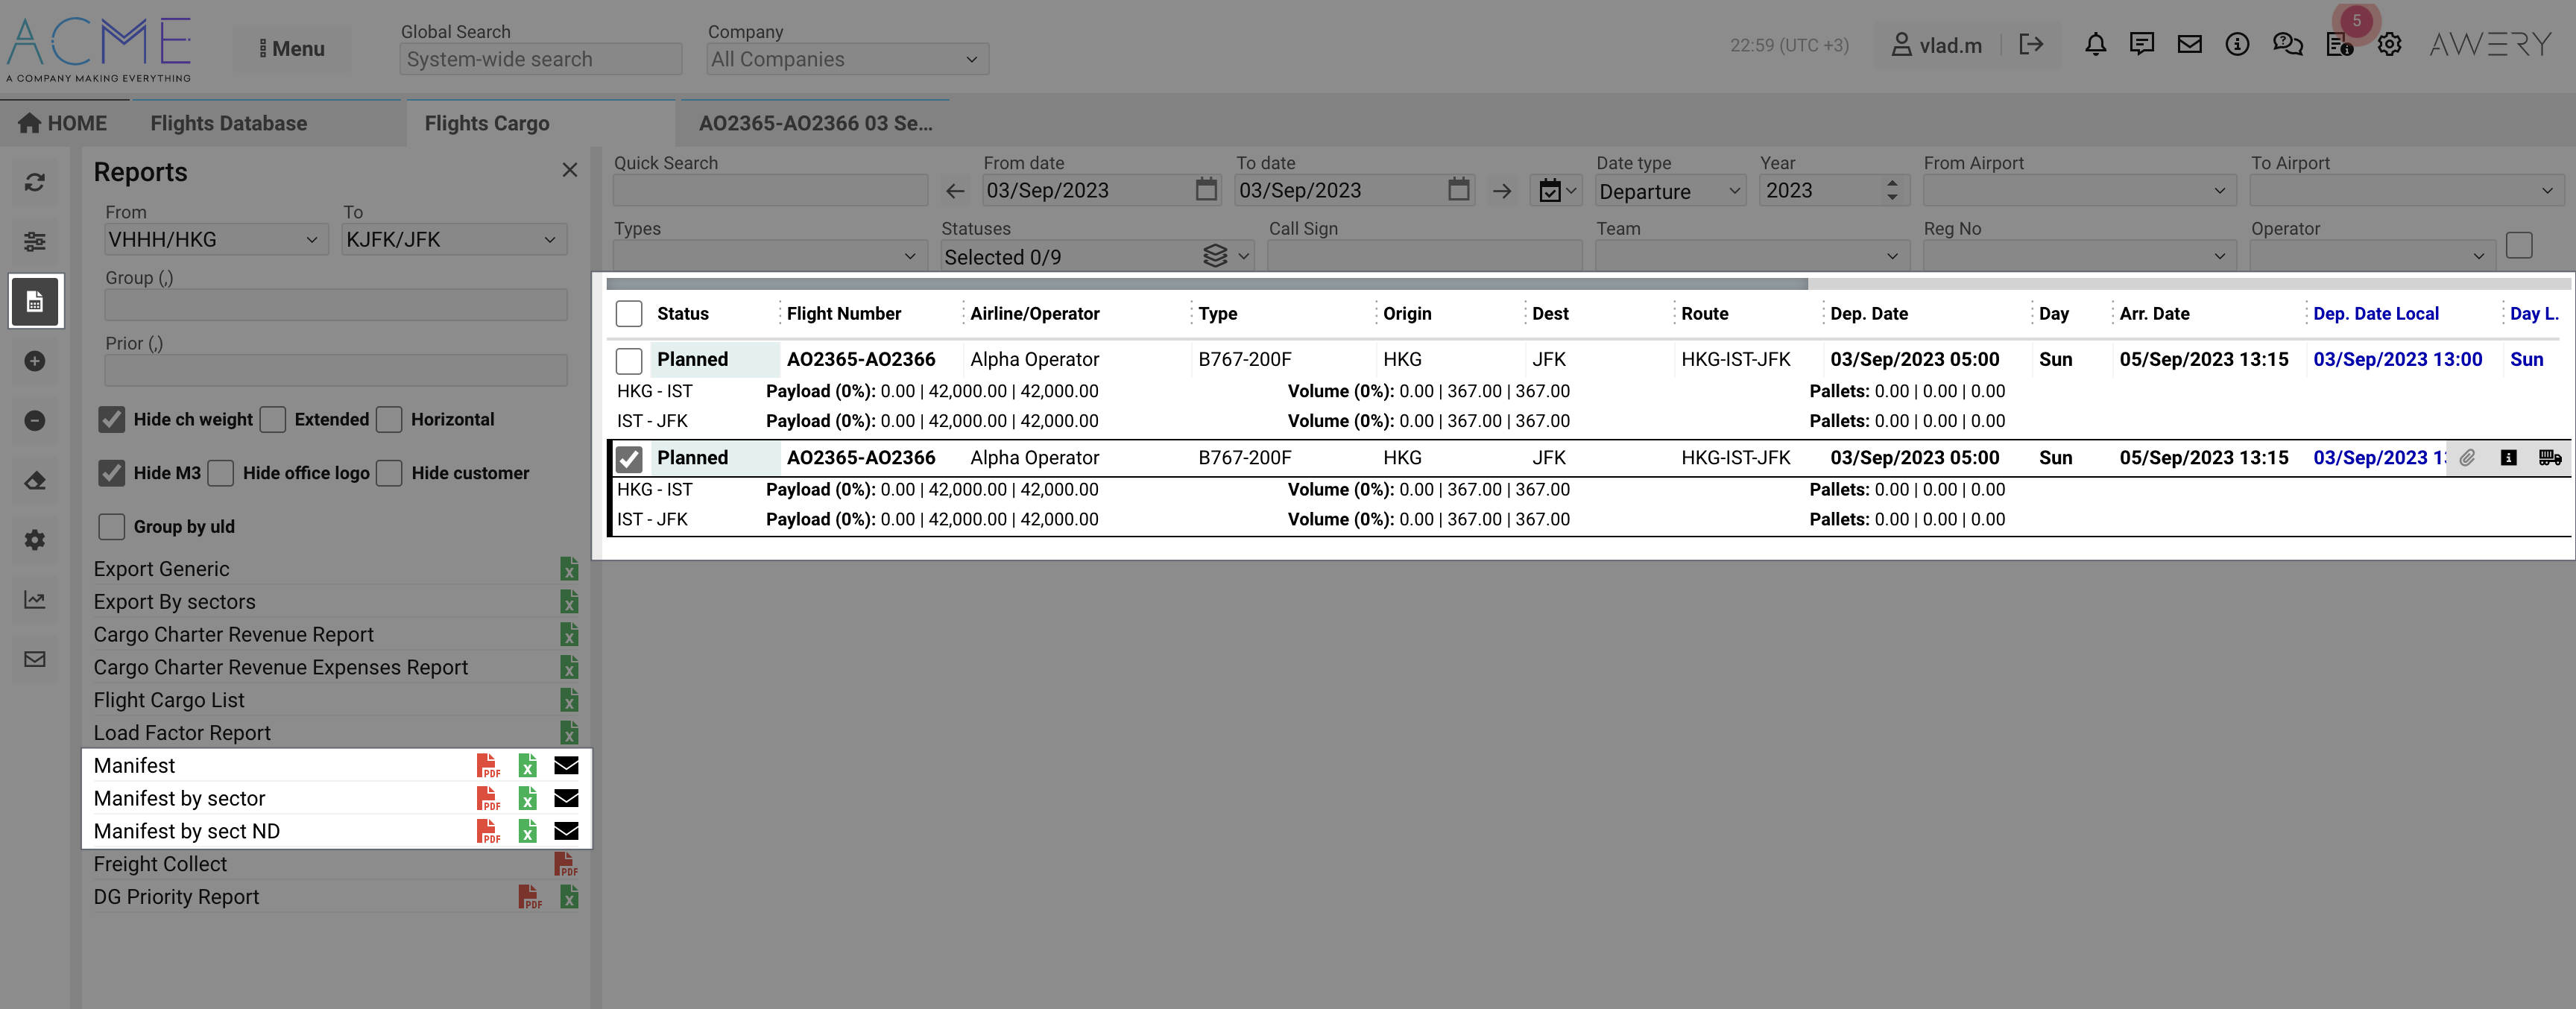
The different forms of manifest itself can be generated from the system from two places
-
From the cargo sub-tab (from specific Flight interface) by clicking on the “Manifest” button.

-
From "Reports" section of side-bar (from list of Flights interface) by selecting 1 or more flights and clicking on the of the "Manifest" button.
But the information for the manifest can be updated from a lot of places.
-
As processing FFM messages in the system.
-
As an update of AWB details from the specific Flight interface.
-
As an update ofAWB details from the specific AWB interface.
Update Manifest from FFM
After receiving a valid FFM message, all information will be displayed on the "FFM" page, which can be opened by clicking the button of the same name.
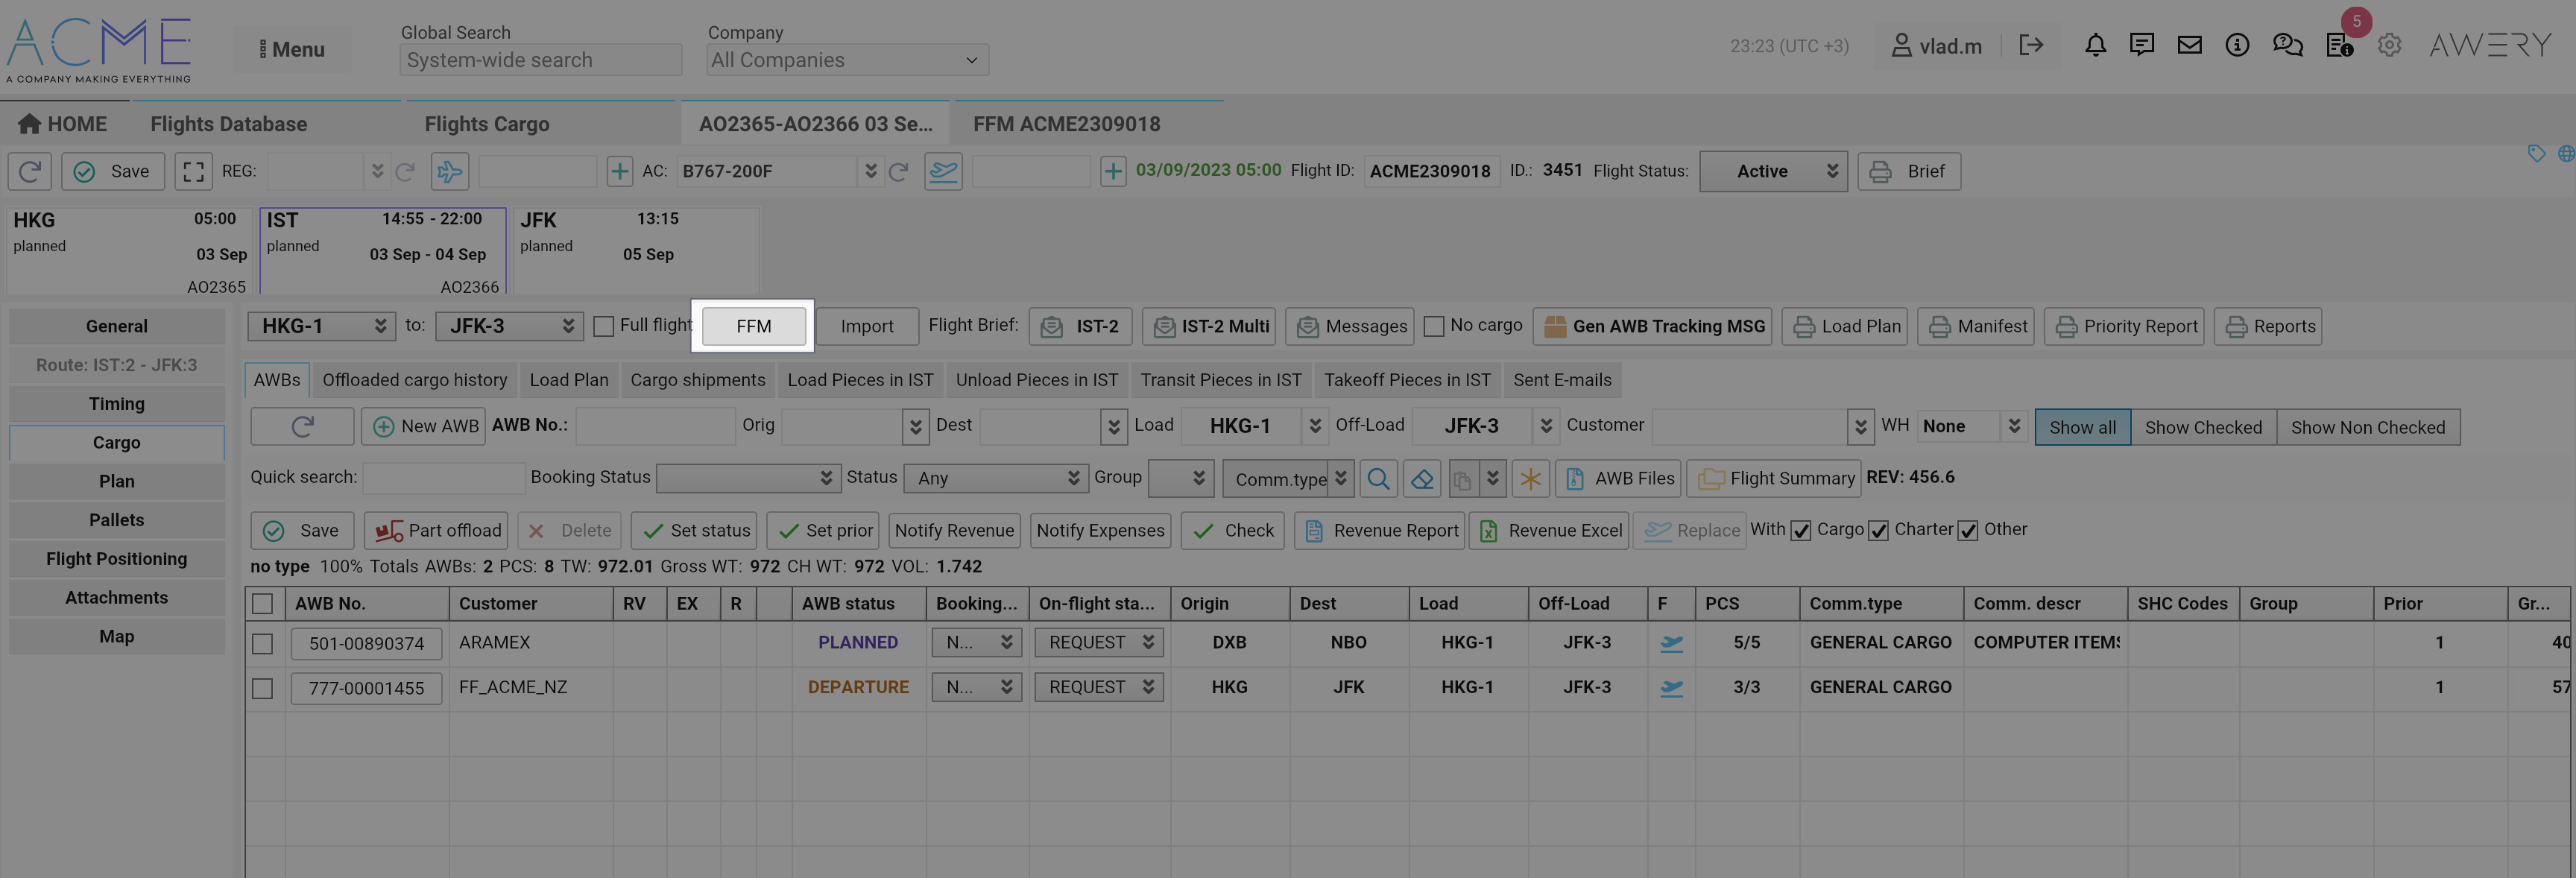
On the page you will see all the recognised information comparing to the information in the system
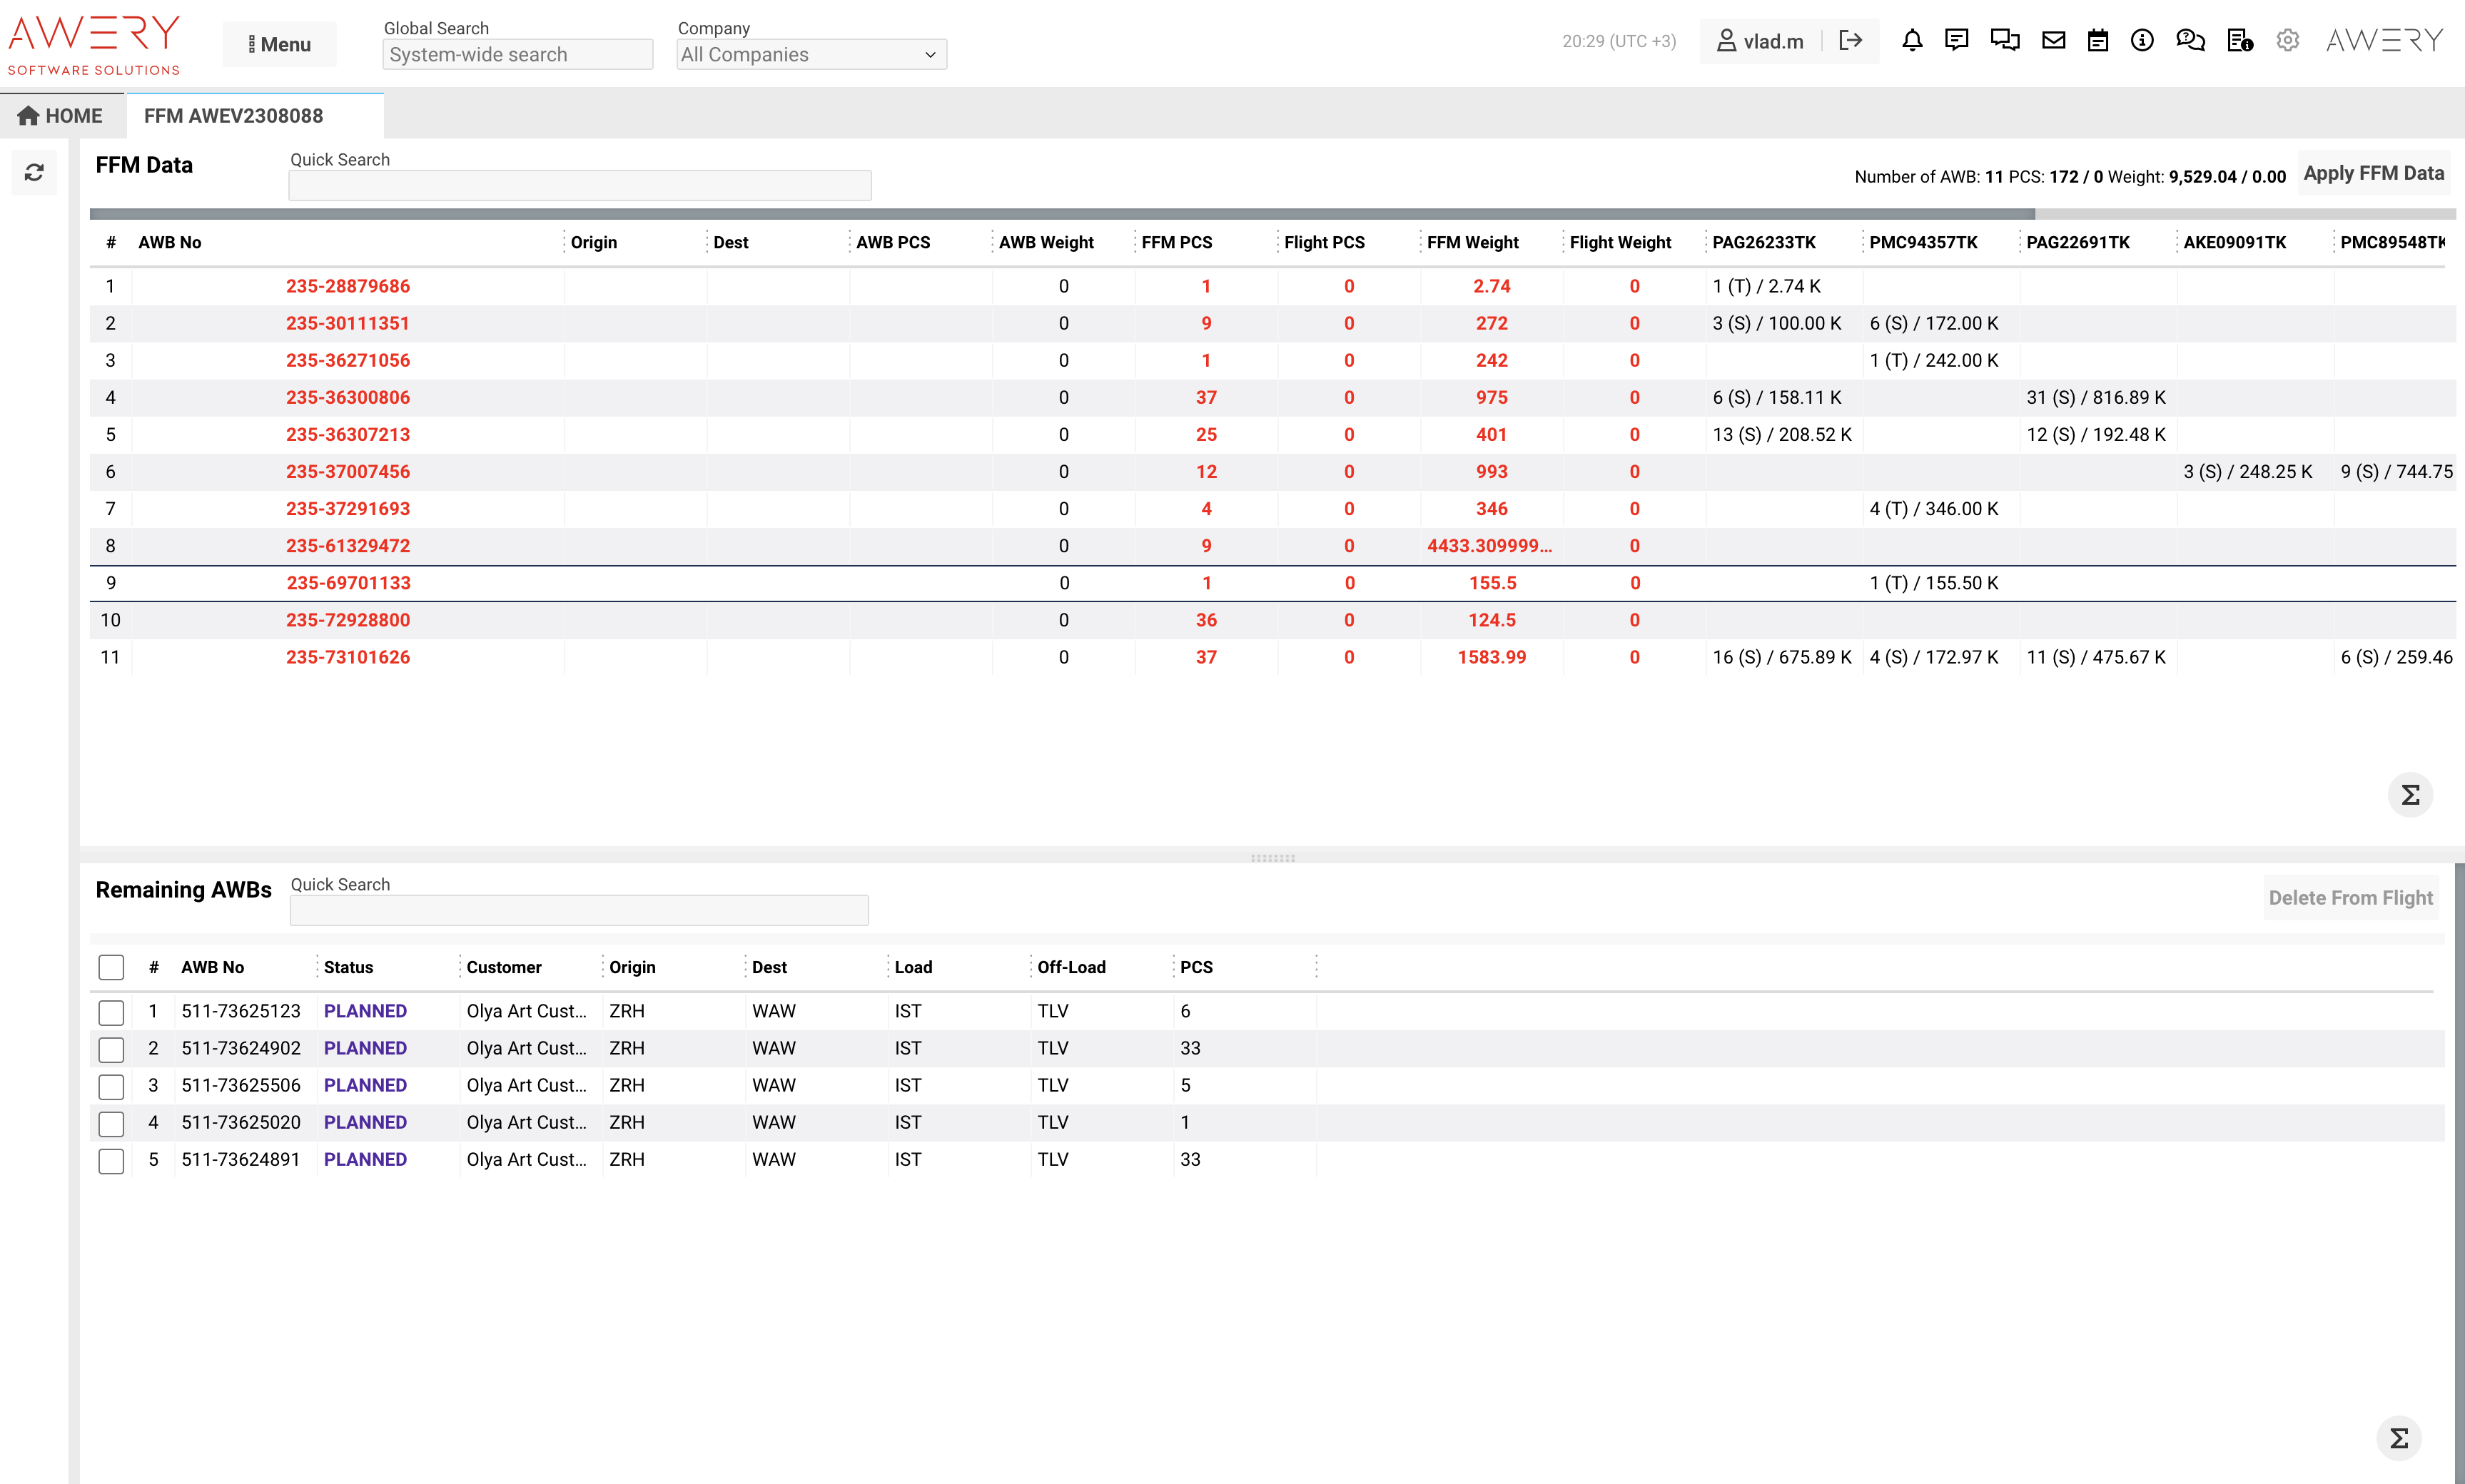
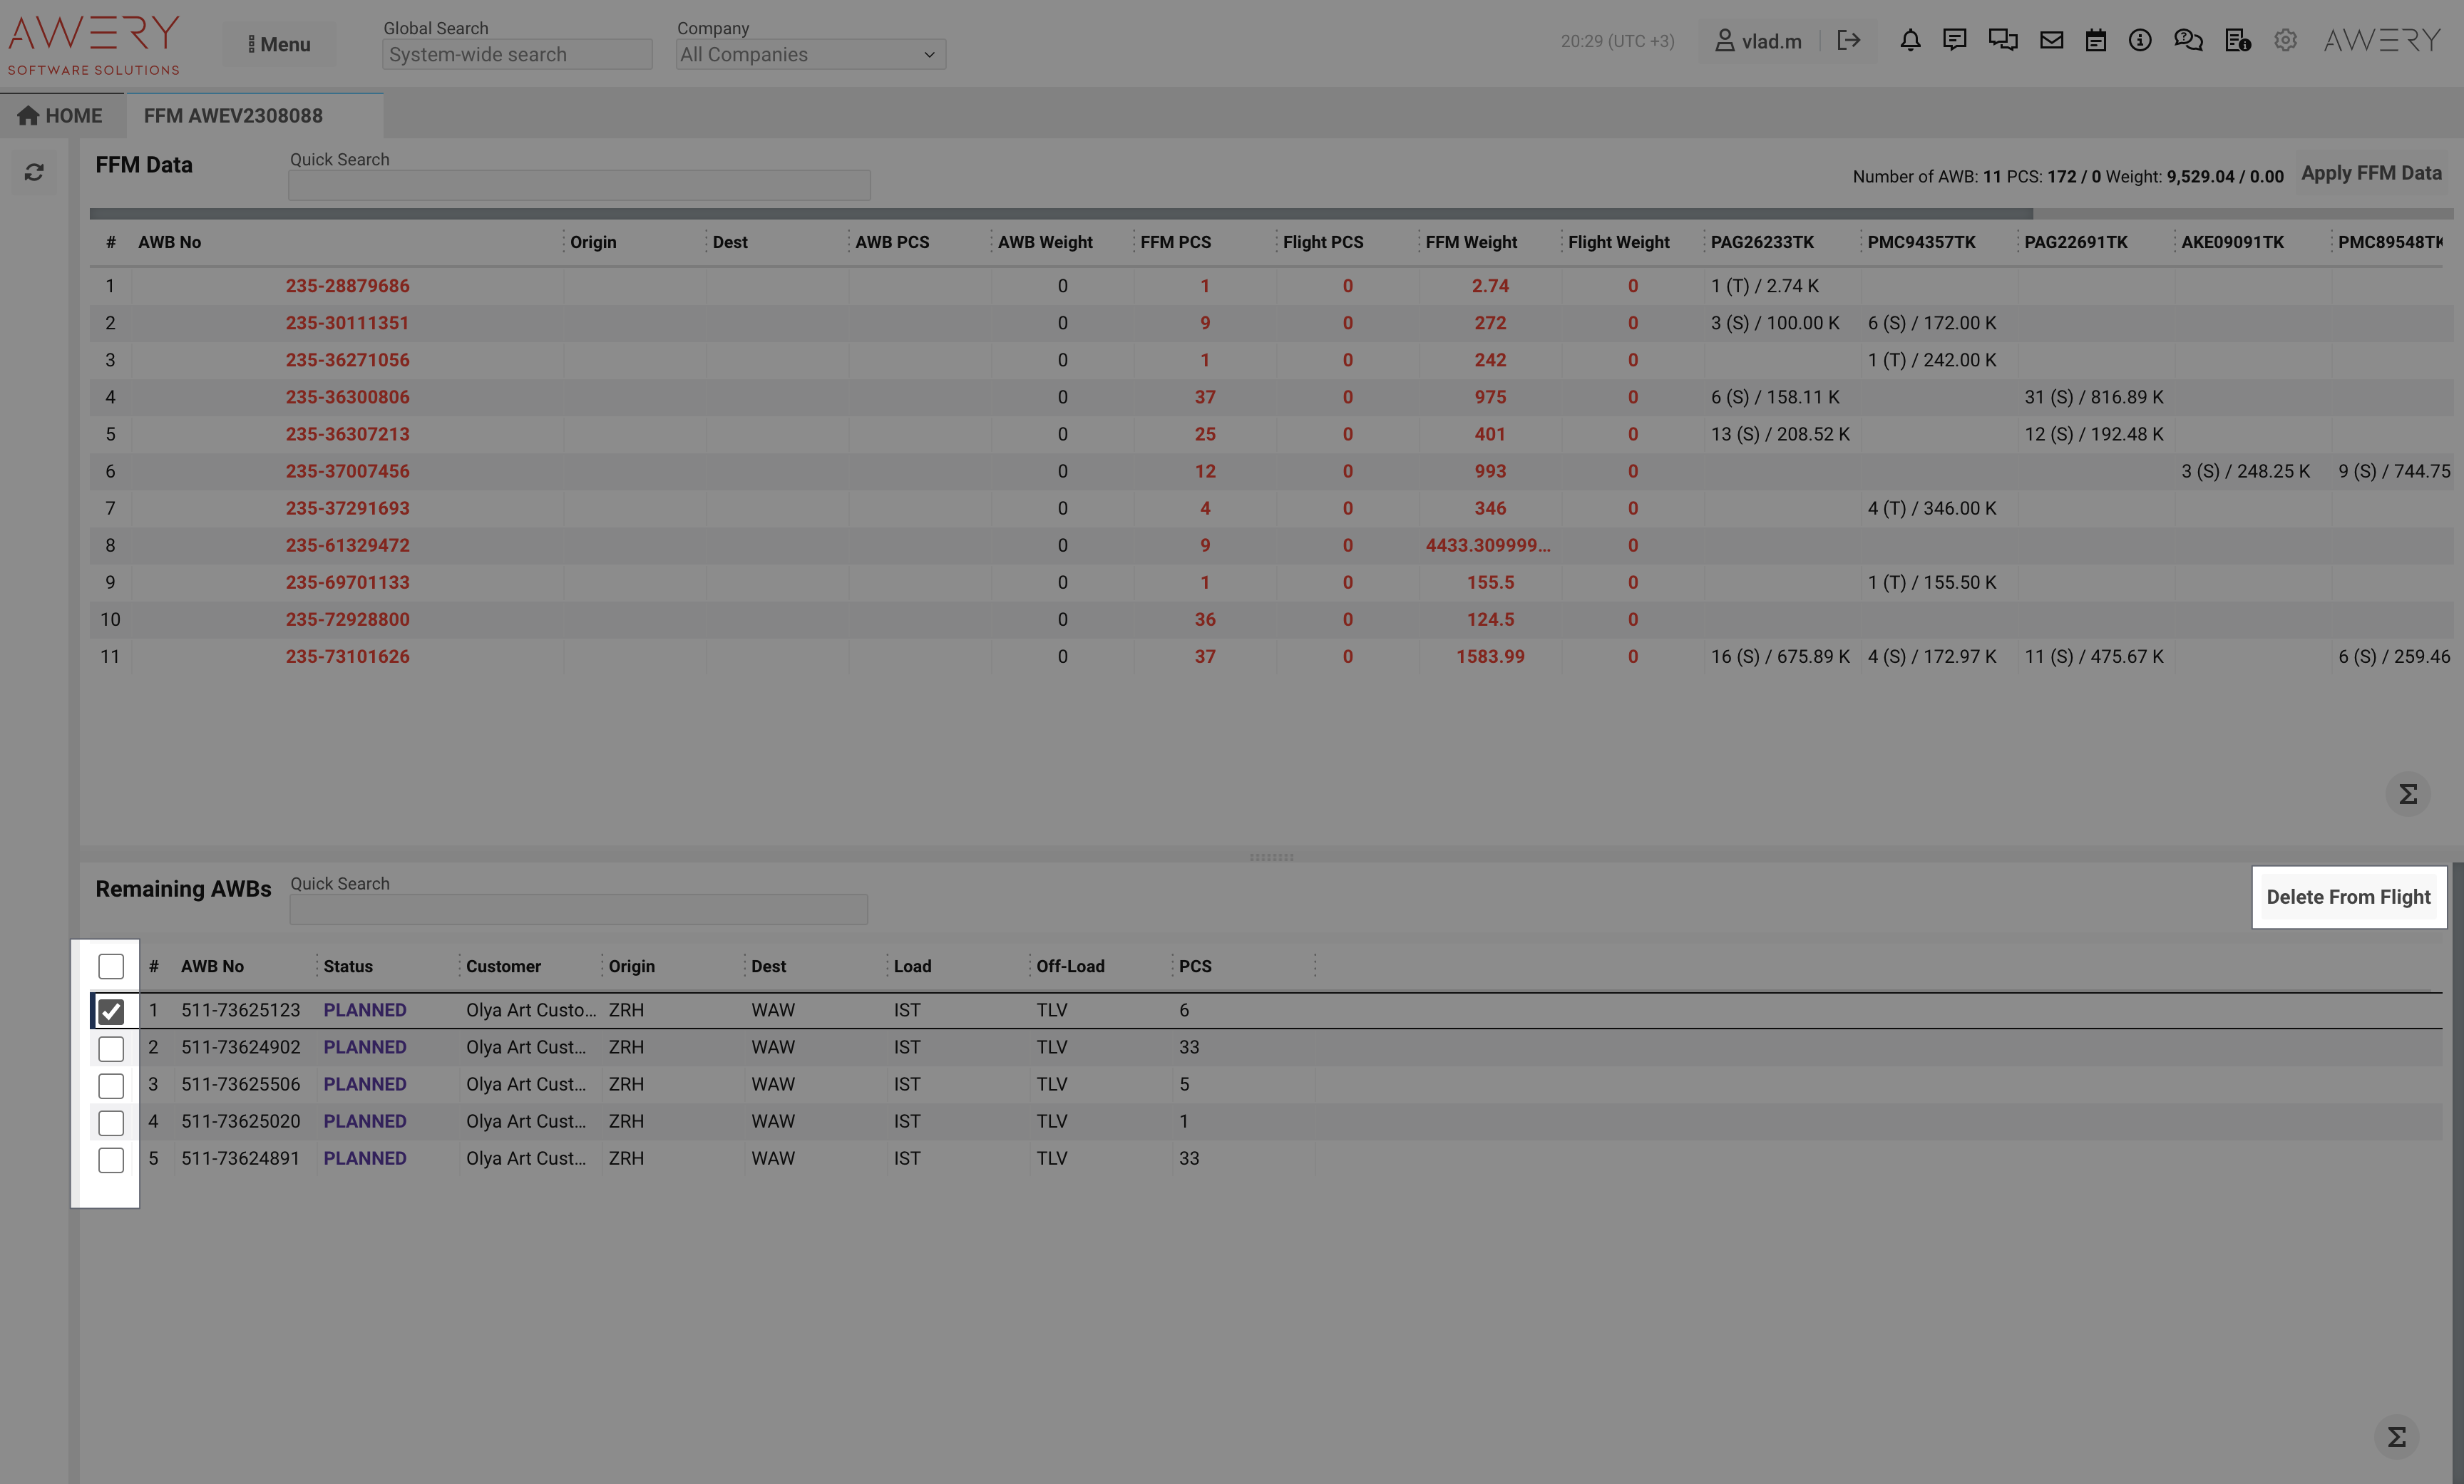
On the bottom table you will see AWBs on the flight, but not in the FFM with ability to delete such if necessary
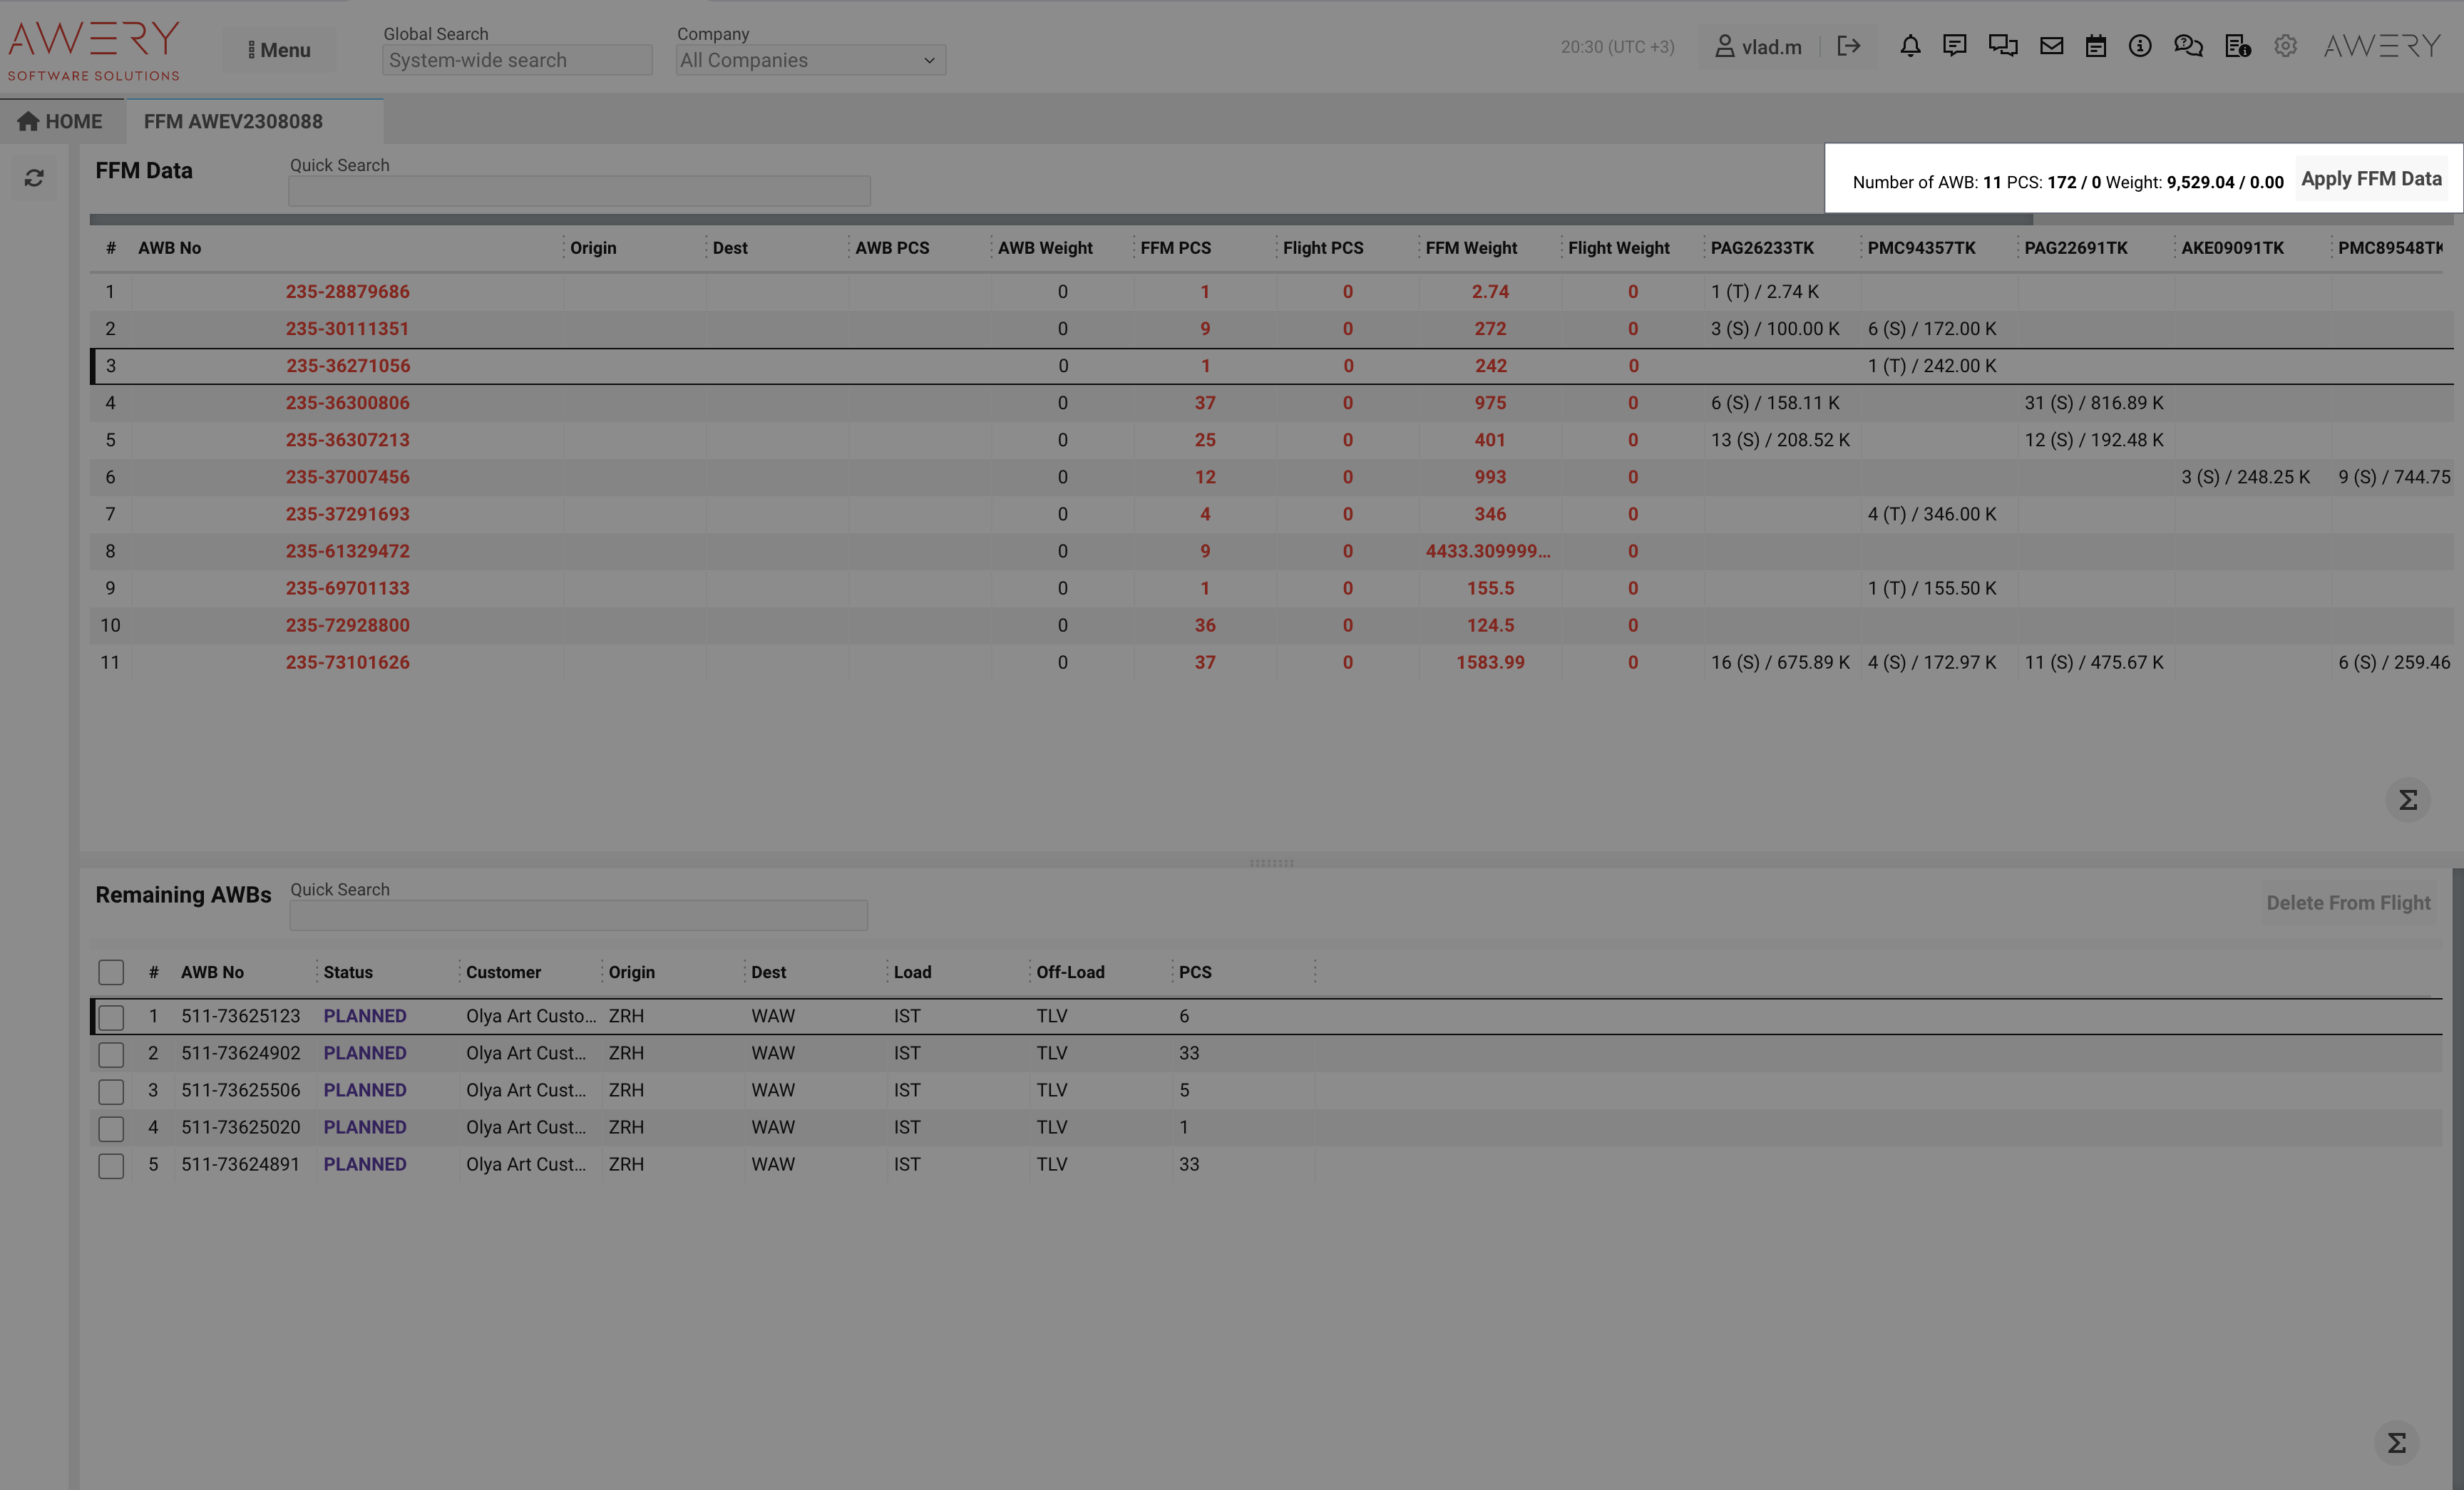
Via "Apply FFM Data" button the system will try to create or update AWBs on the Flight to get the same information as received from FFM.
Update Manifest from specific Flight level
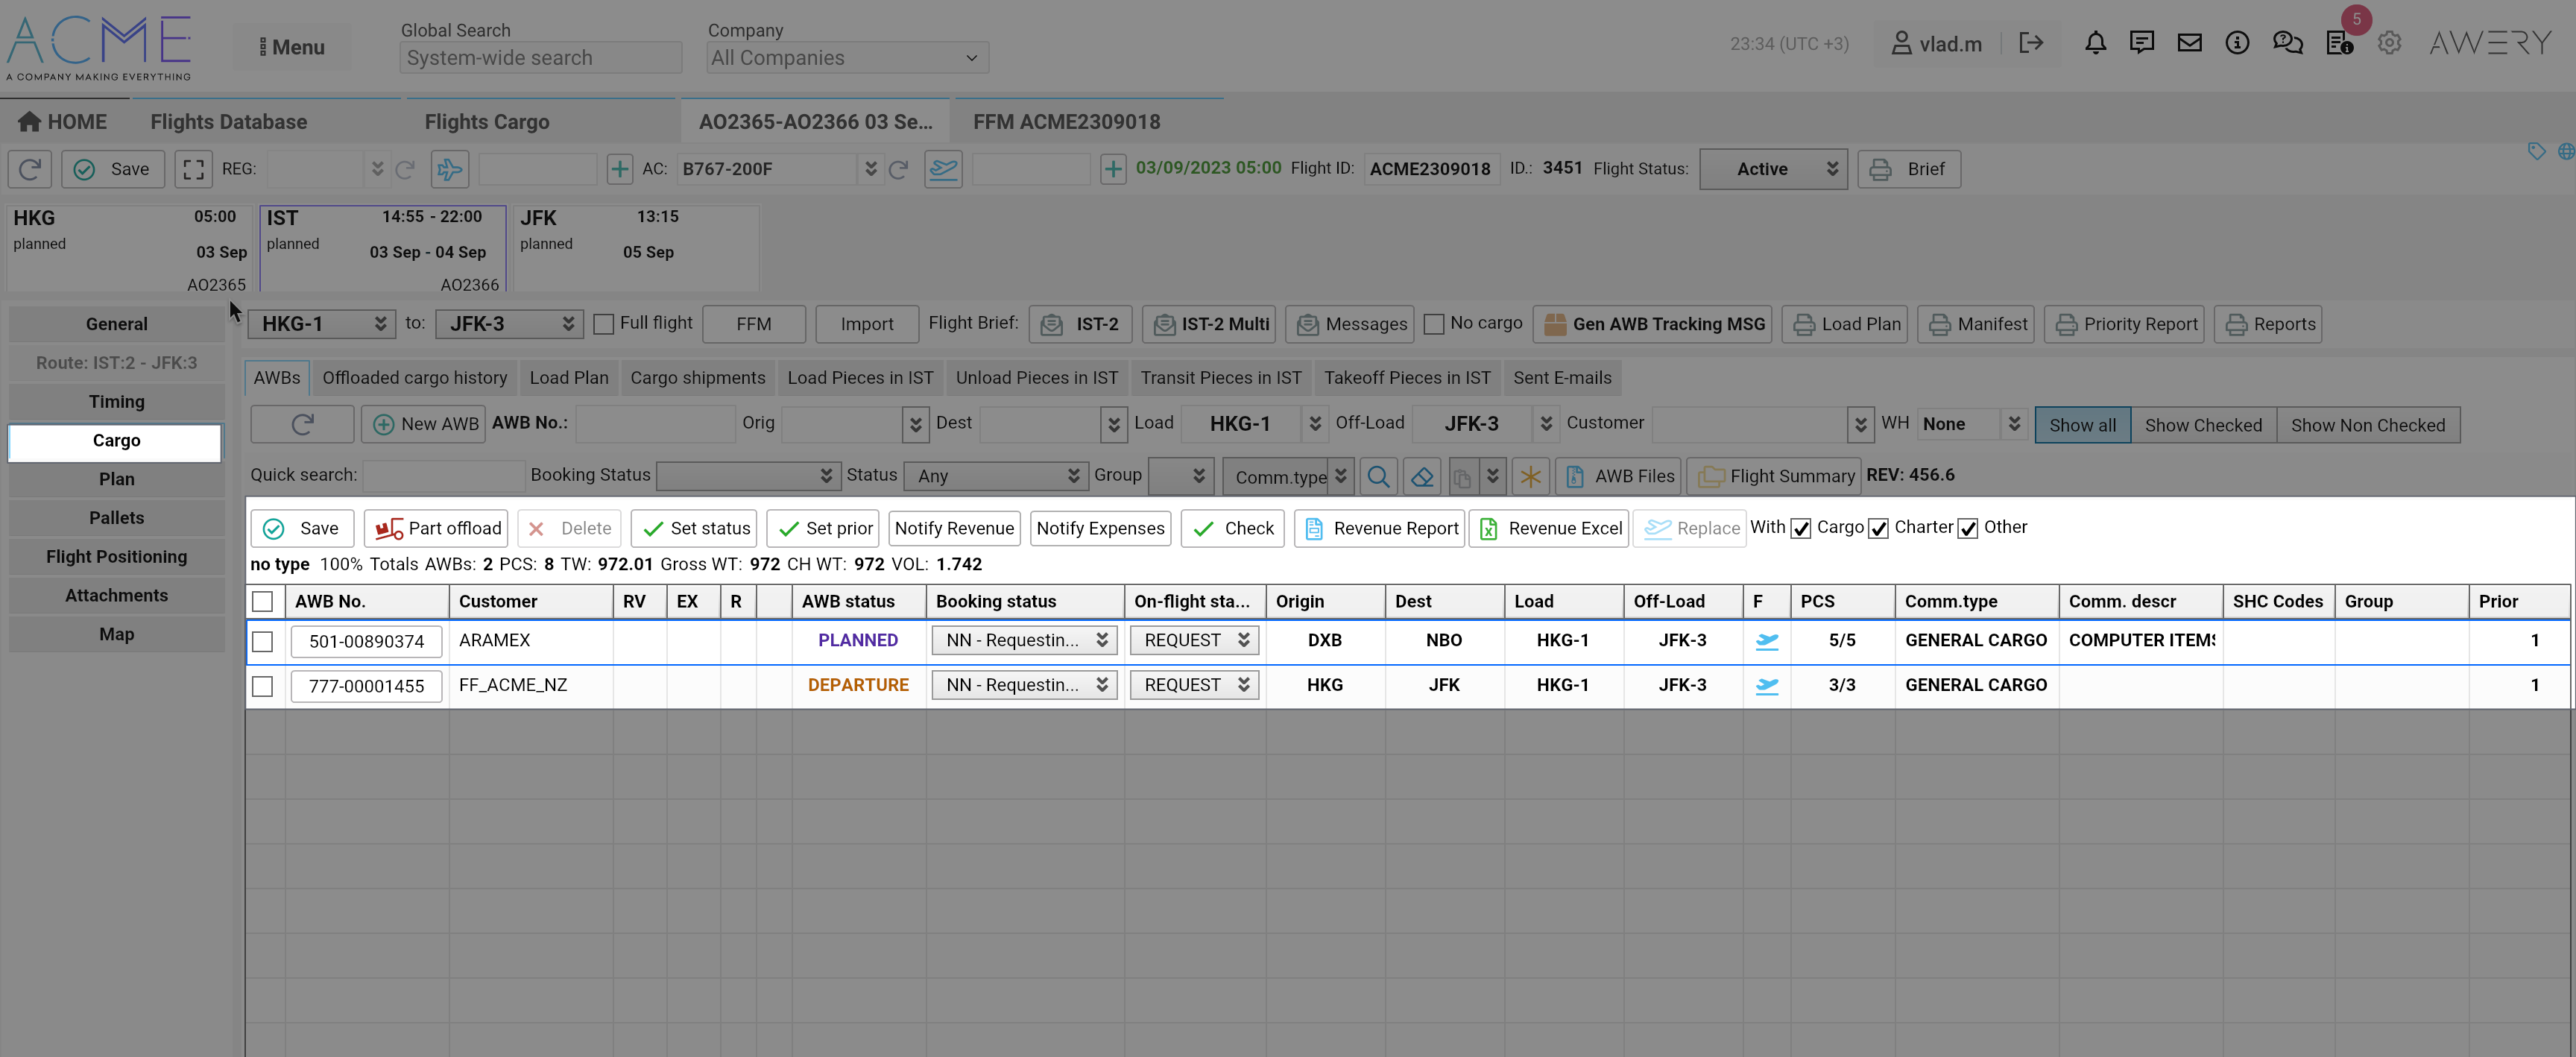
Certain information needed to generate the manifest report can be edited on the "cargo" sub-tab at the level of a specific flight.
You can update:
-
Main status of AWB.
-
AWB booking status (allocation code from FFR and FFA messages).
-
AWB on-flight status (status that determines AWB status on a particular flight).
-
AWB loading and unloading waypoints.
-
A priority.
-
Loading Group
-
Flight notes for a specific AWB
Select or enter a new or corrected value for each Shipment or for their list and click on the "Save" button.
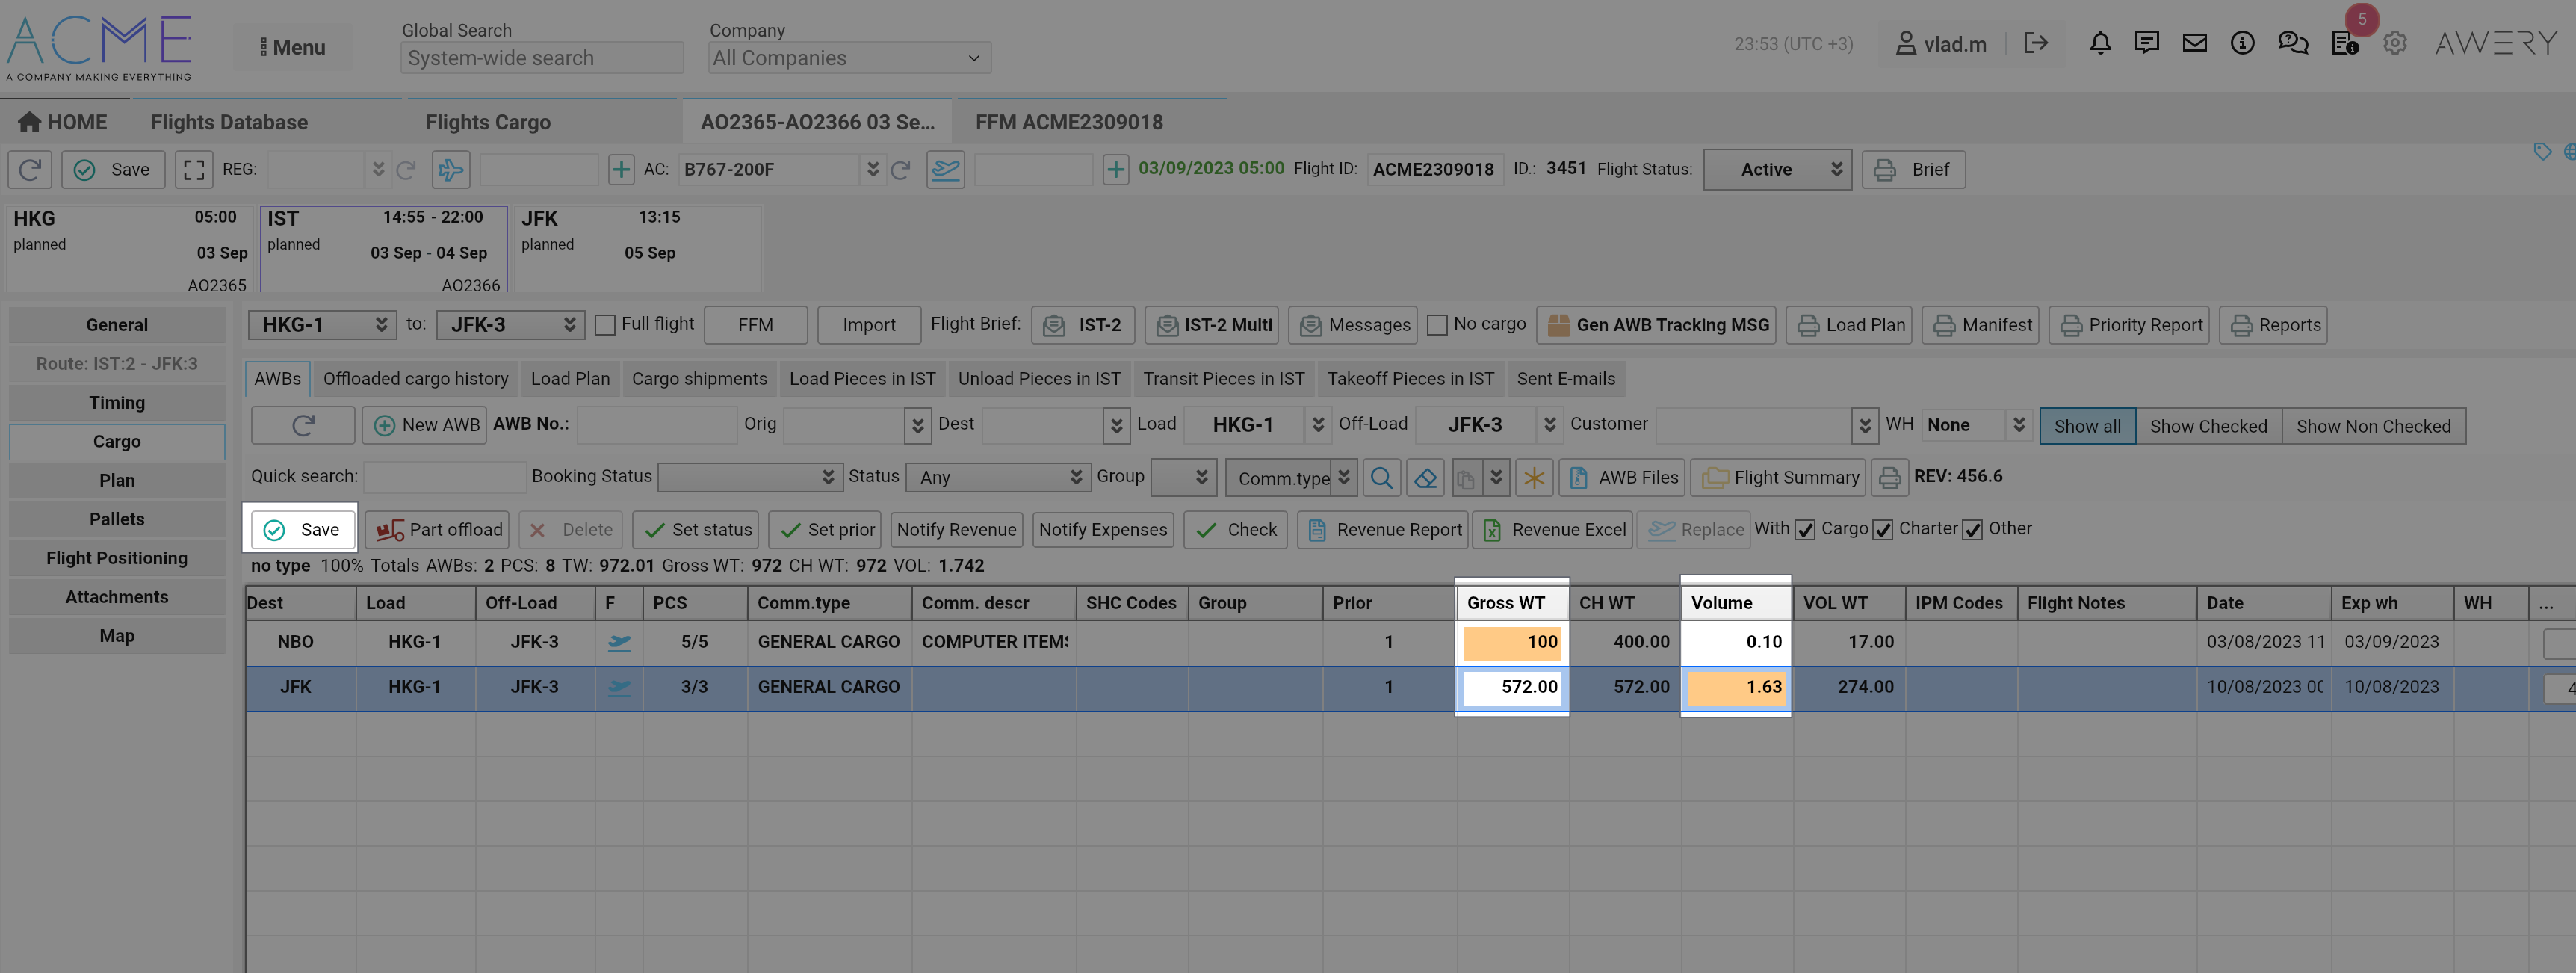
Information such as number of pieces, weight or volume per flight for a particular airline can be changed in several ways.
-
By entering custom values for weight and/or volume.
You can double-click on a cell in the proper column, enter a new value and click on the "Save" button. if everything was changed successfully, the value will be highlighted in orange as being saved only at the level of this one flight only.
-
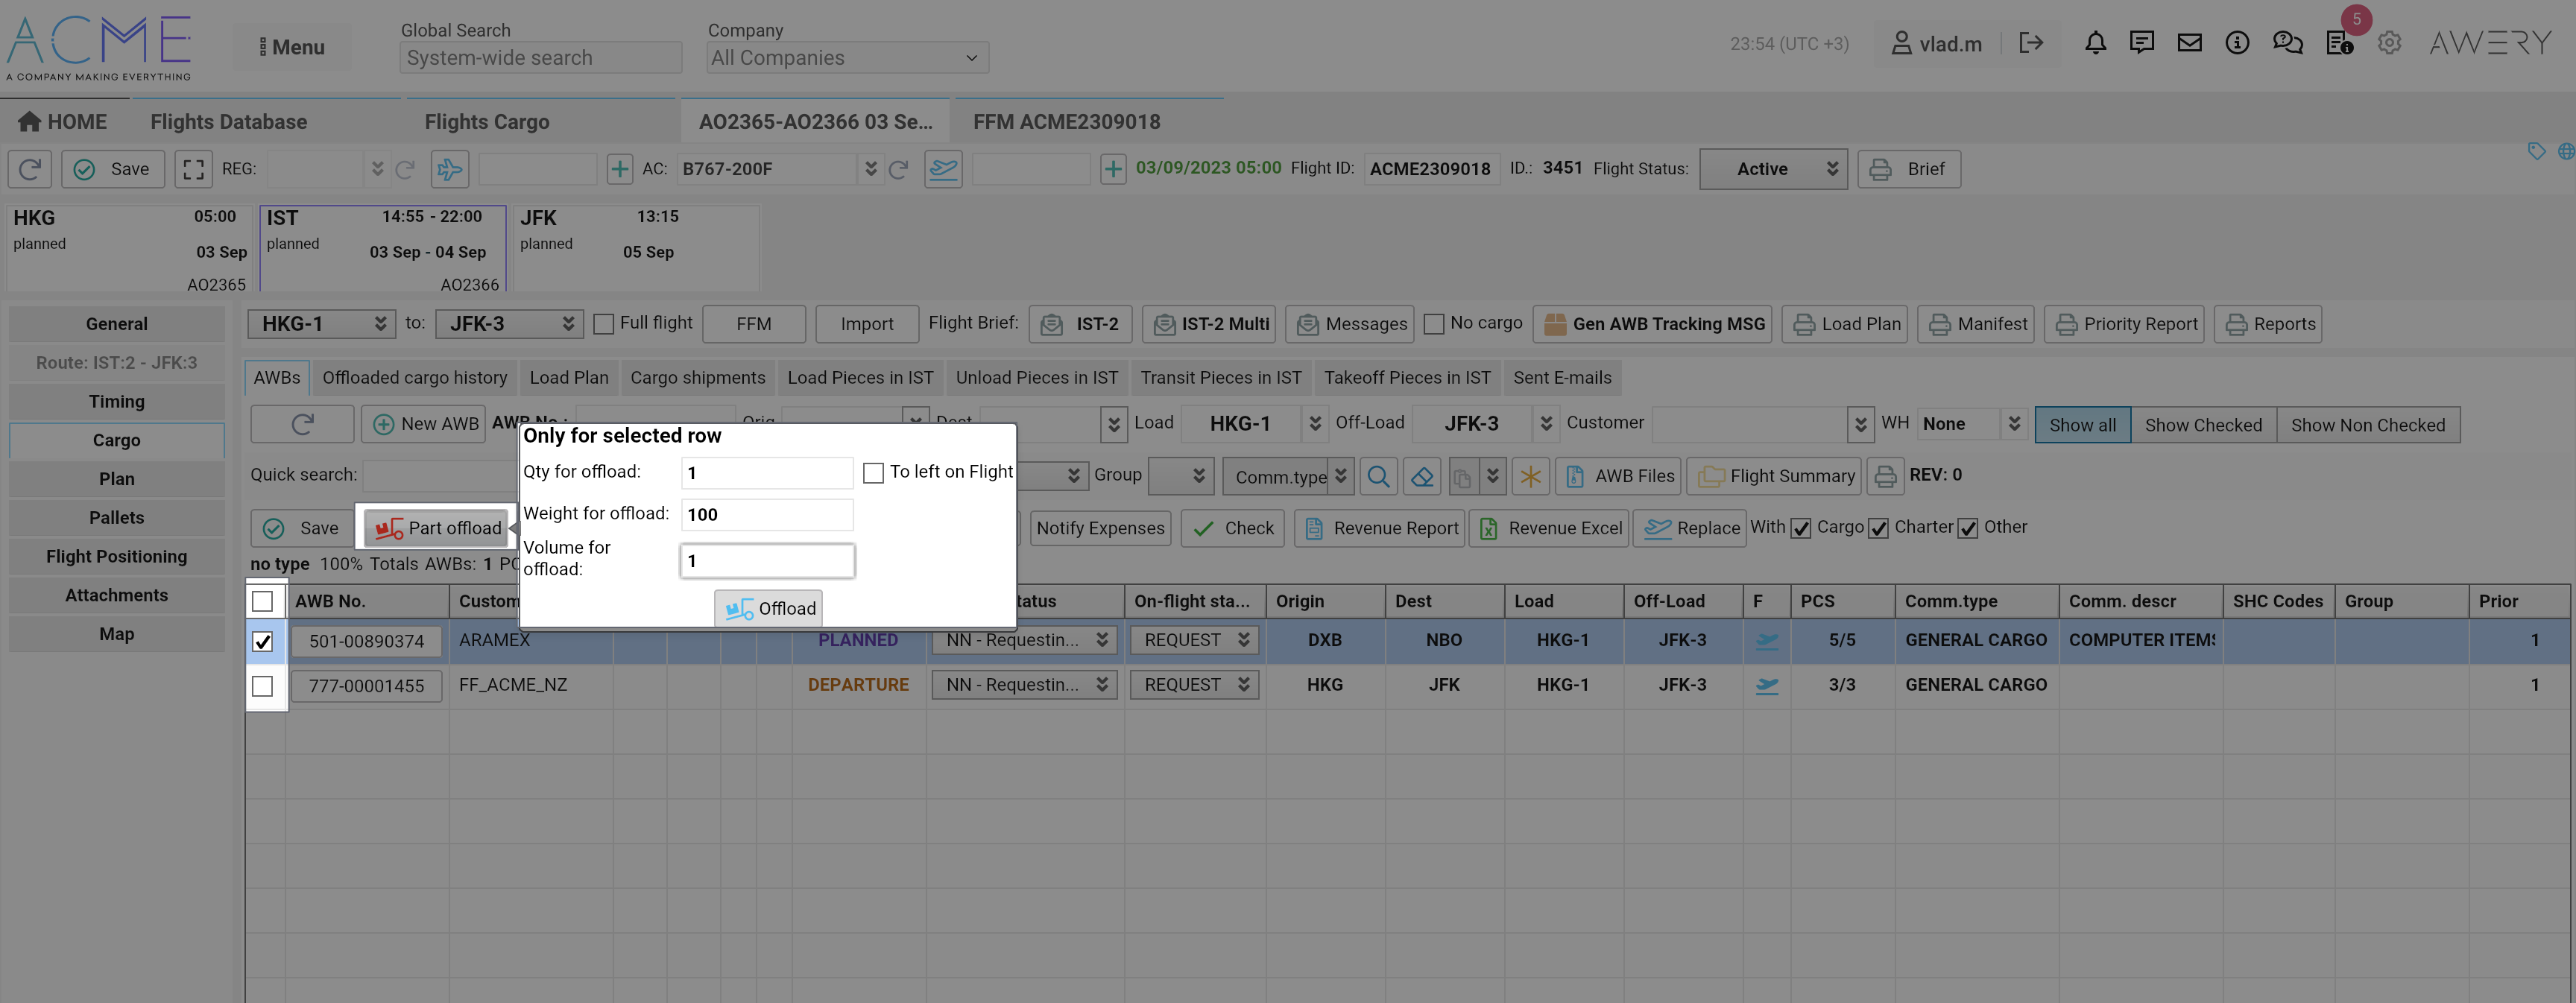
By Partial offloading.
Select AWB, fill in the quantity of weight, pieces and volume that you need to leave on the flight or unload (operating with the check-box "To left on Flight") and click on "Offload". After that, the system automatically partially downloads some AWB messages according to the entered data.
-
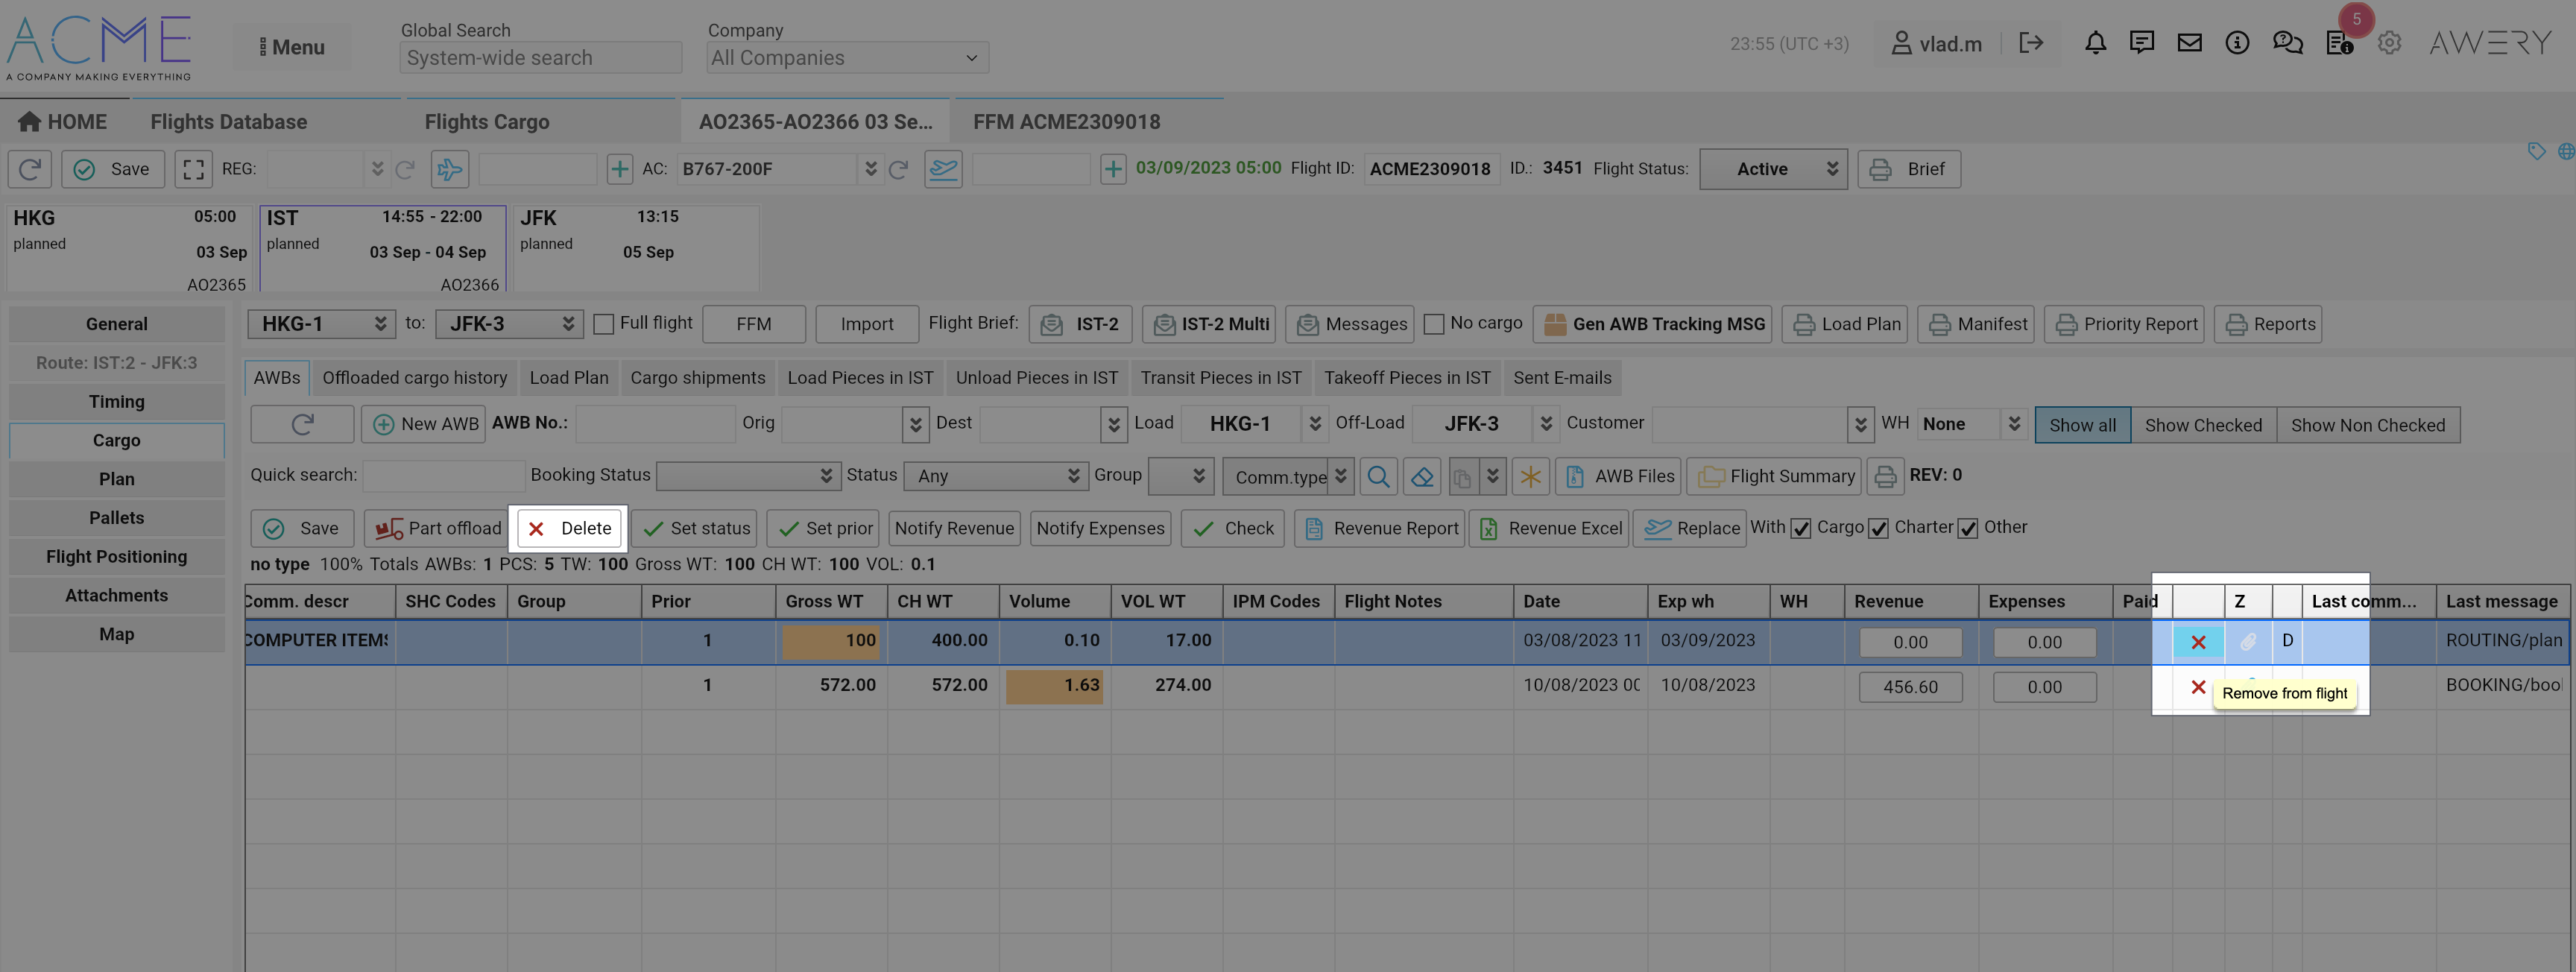
Complete removal of cargo from the flight
You can either click on the cross button at the end of the line of a certain AWB, or select one or more AWBs using the checkboxes and click on the "Delete" button
Update Manifest from specific AWB level
The "Cargo" block moves the plane of information editing precisely from the point of view of one or more AWBs.
As mentioned earlier, you will also be able to edit certain data related to the flight(s) of the shipments.
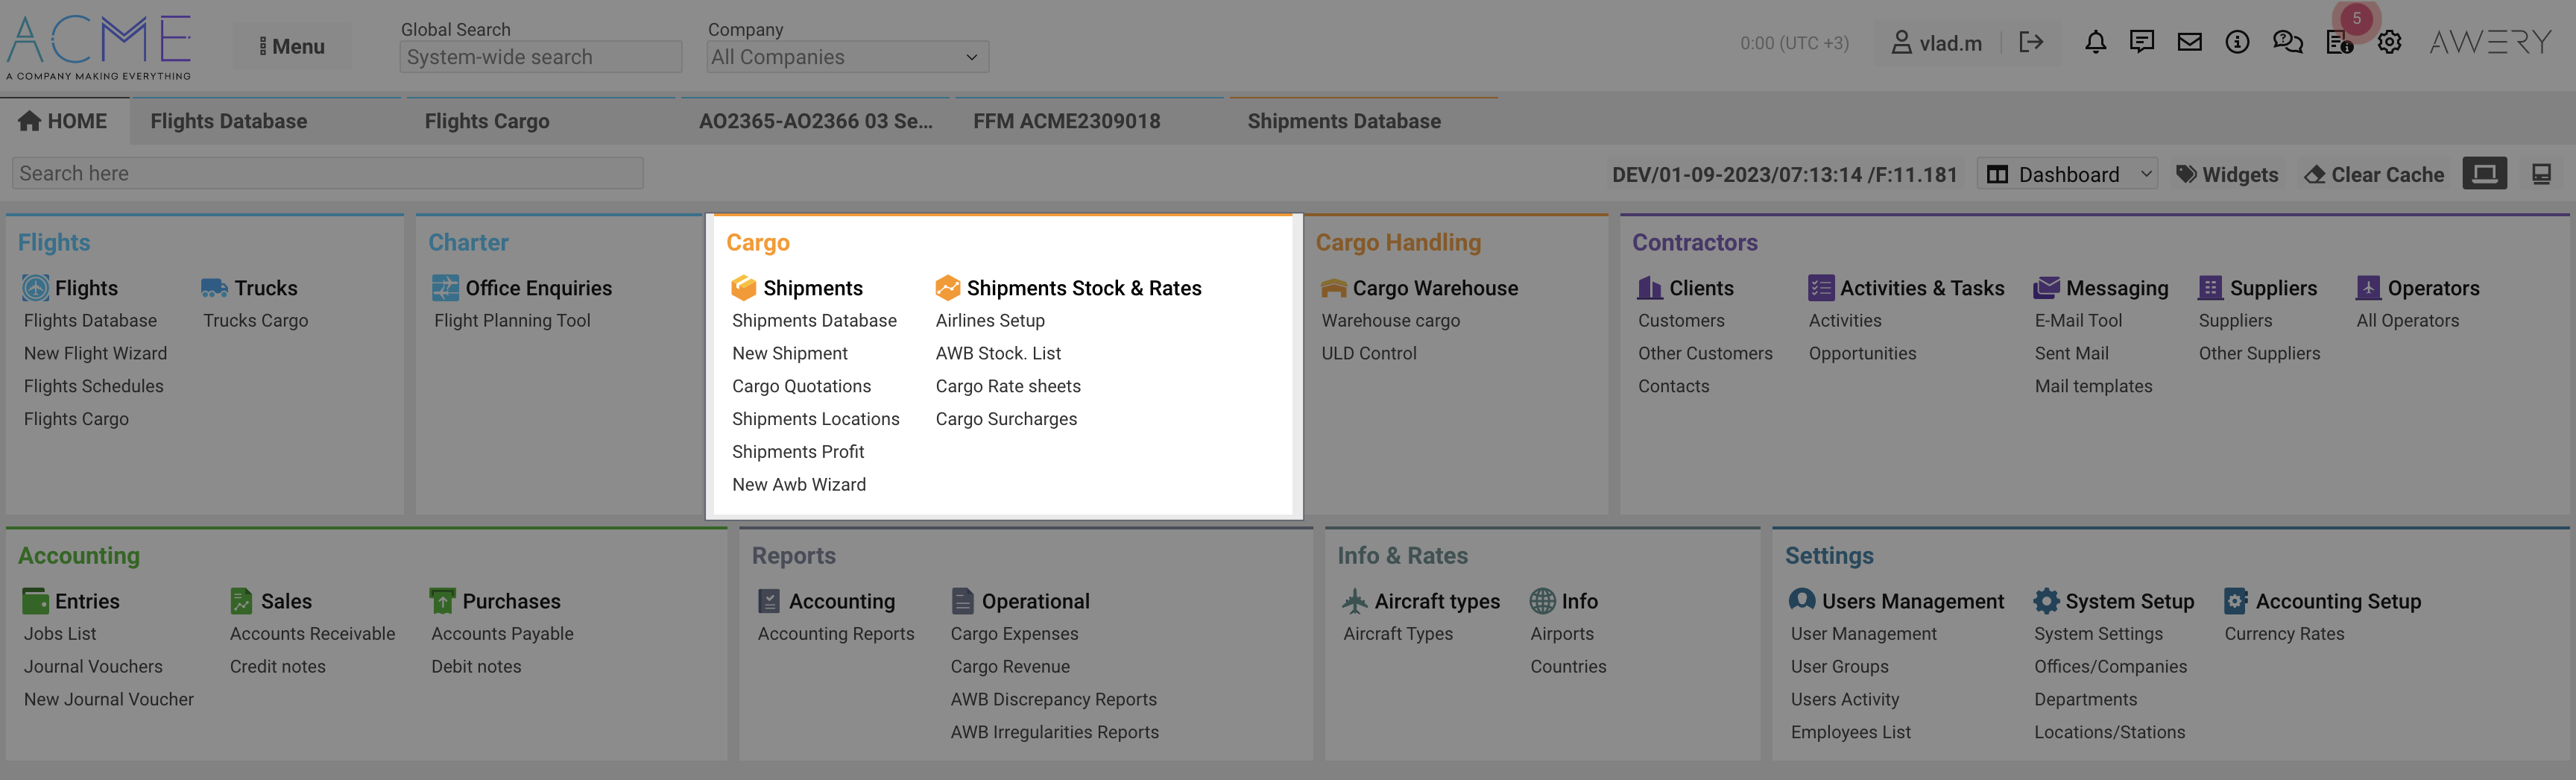
In the cargo block - find the "Shipments Database" item to view the list of deliveries in the system.
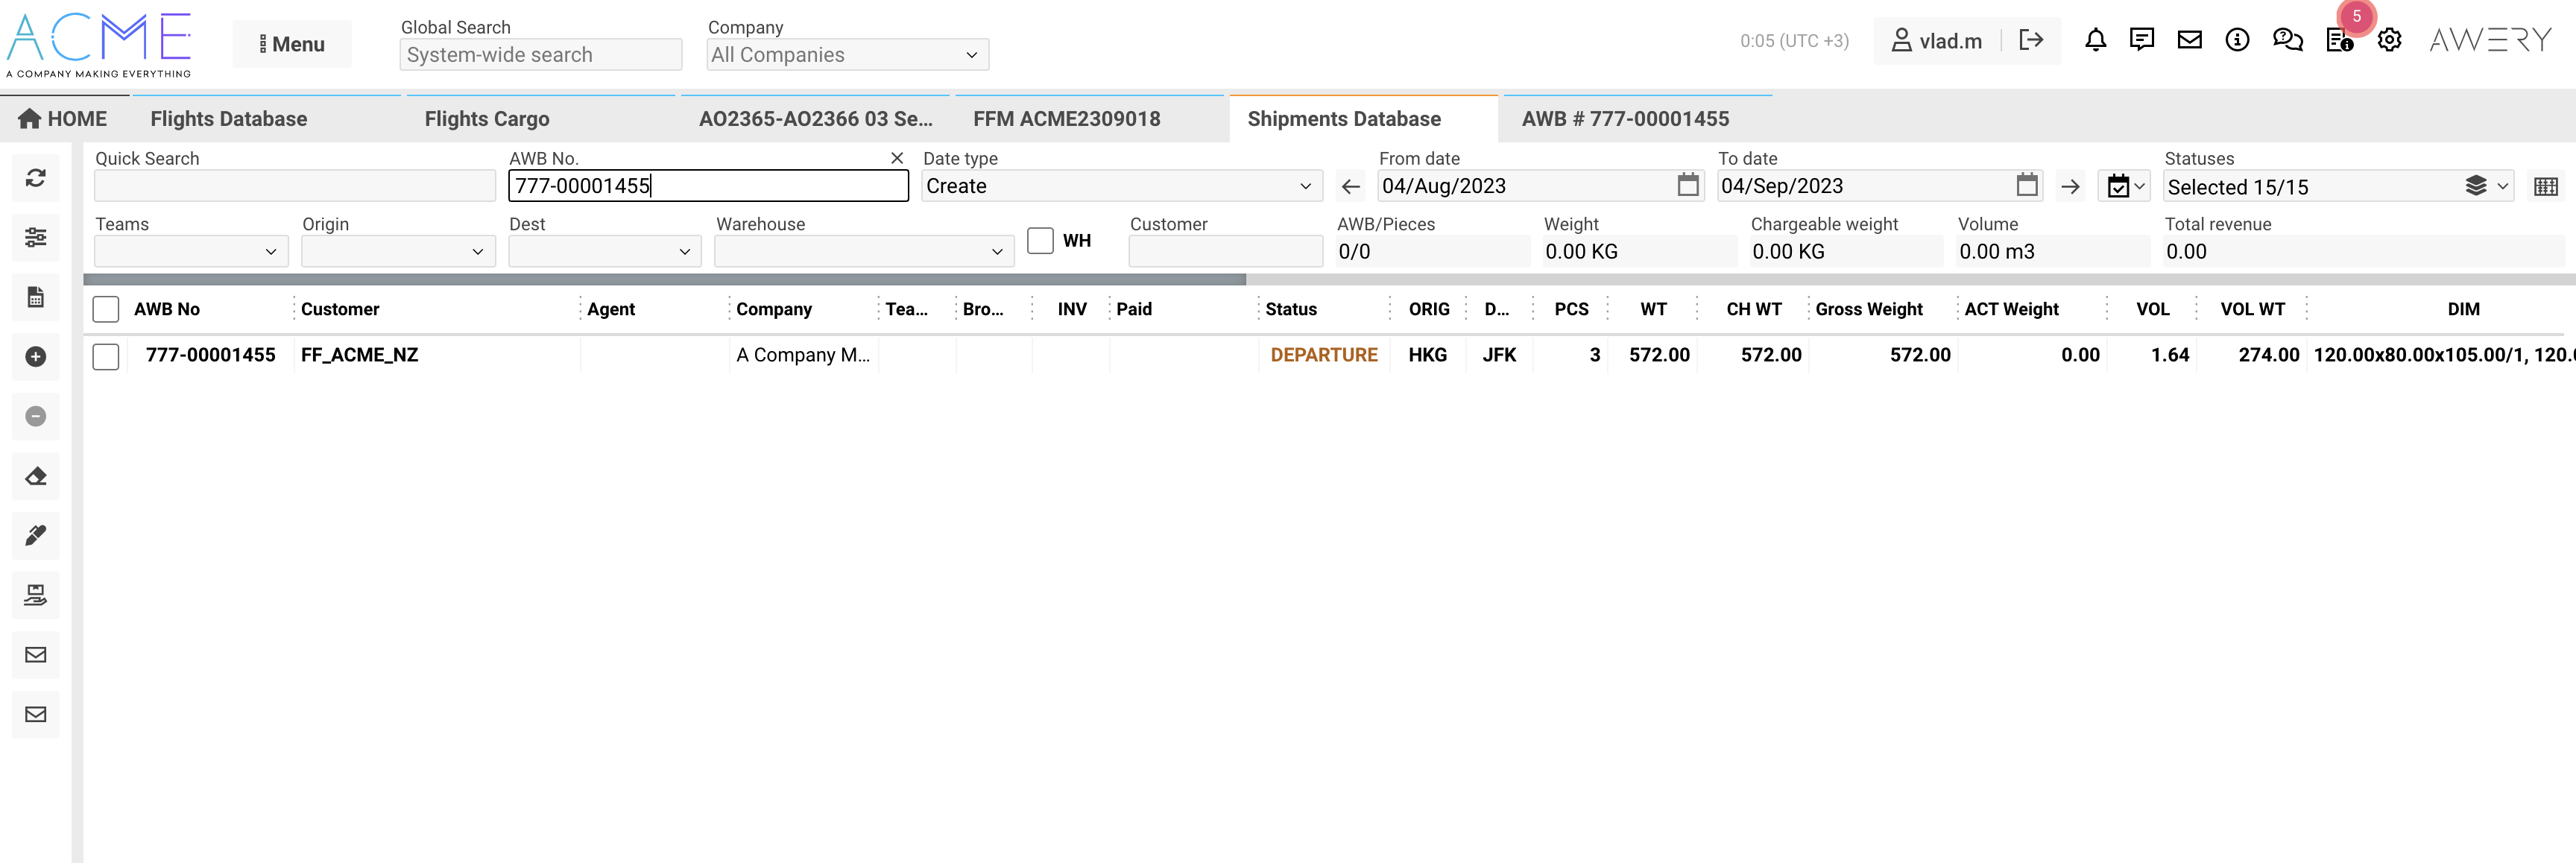
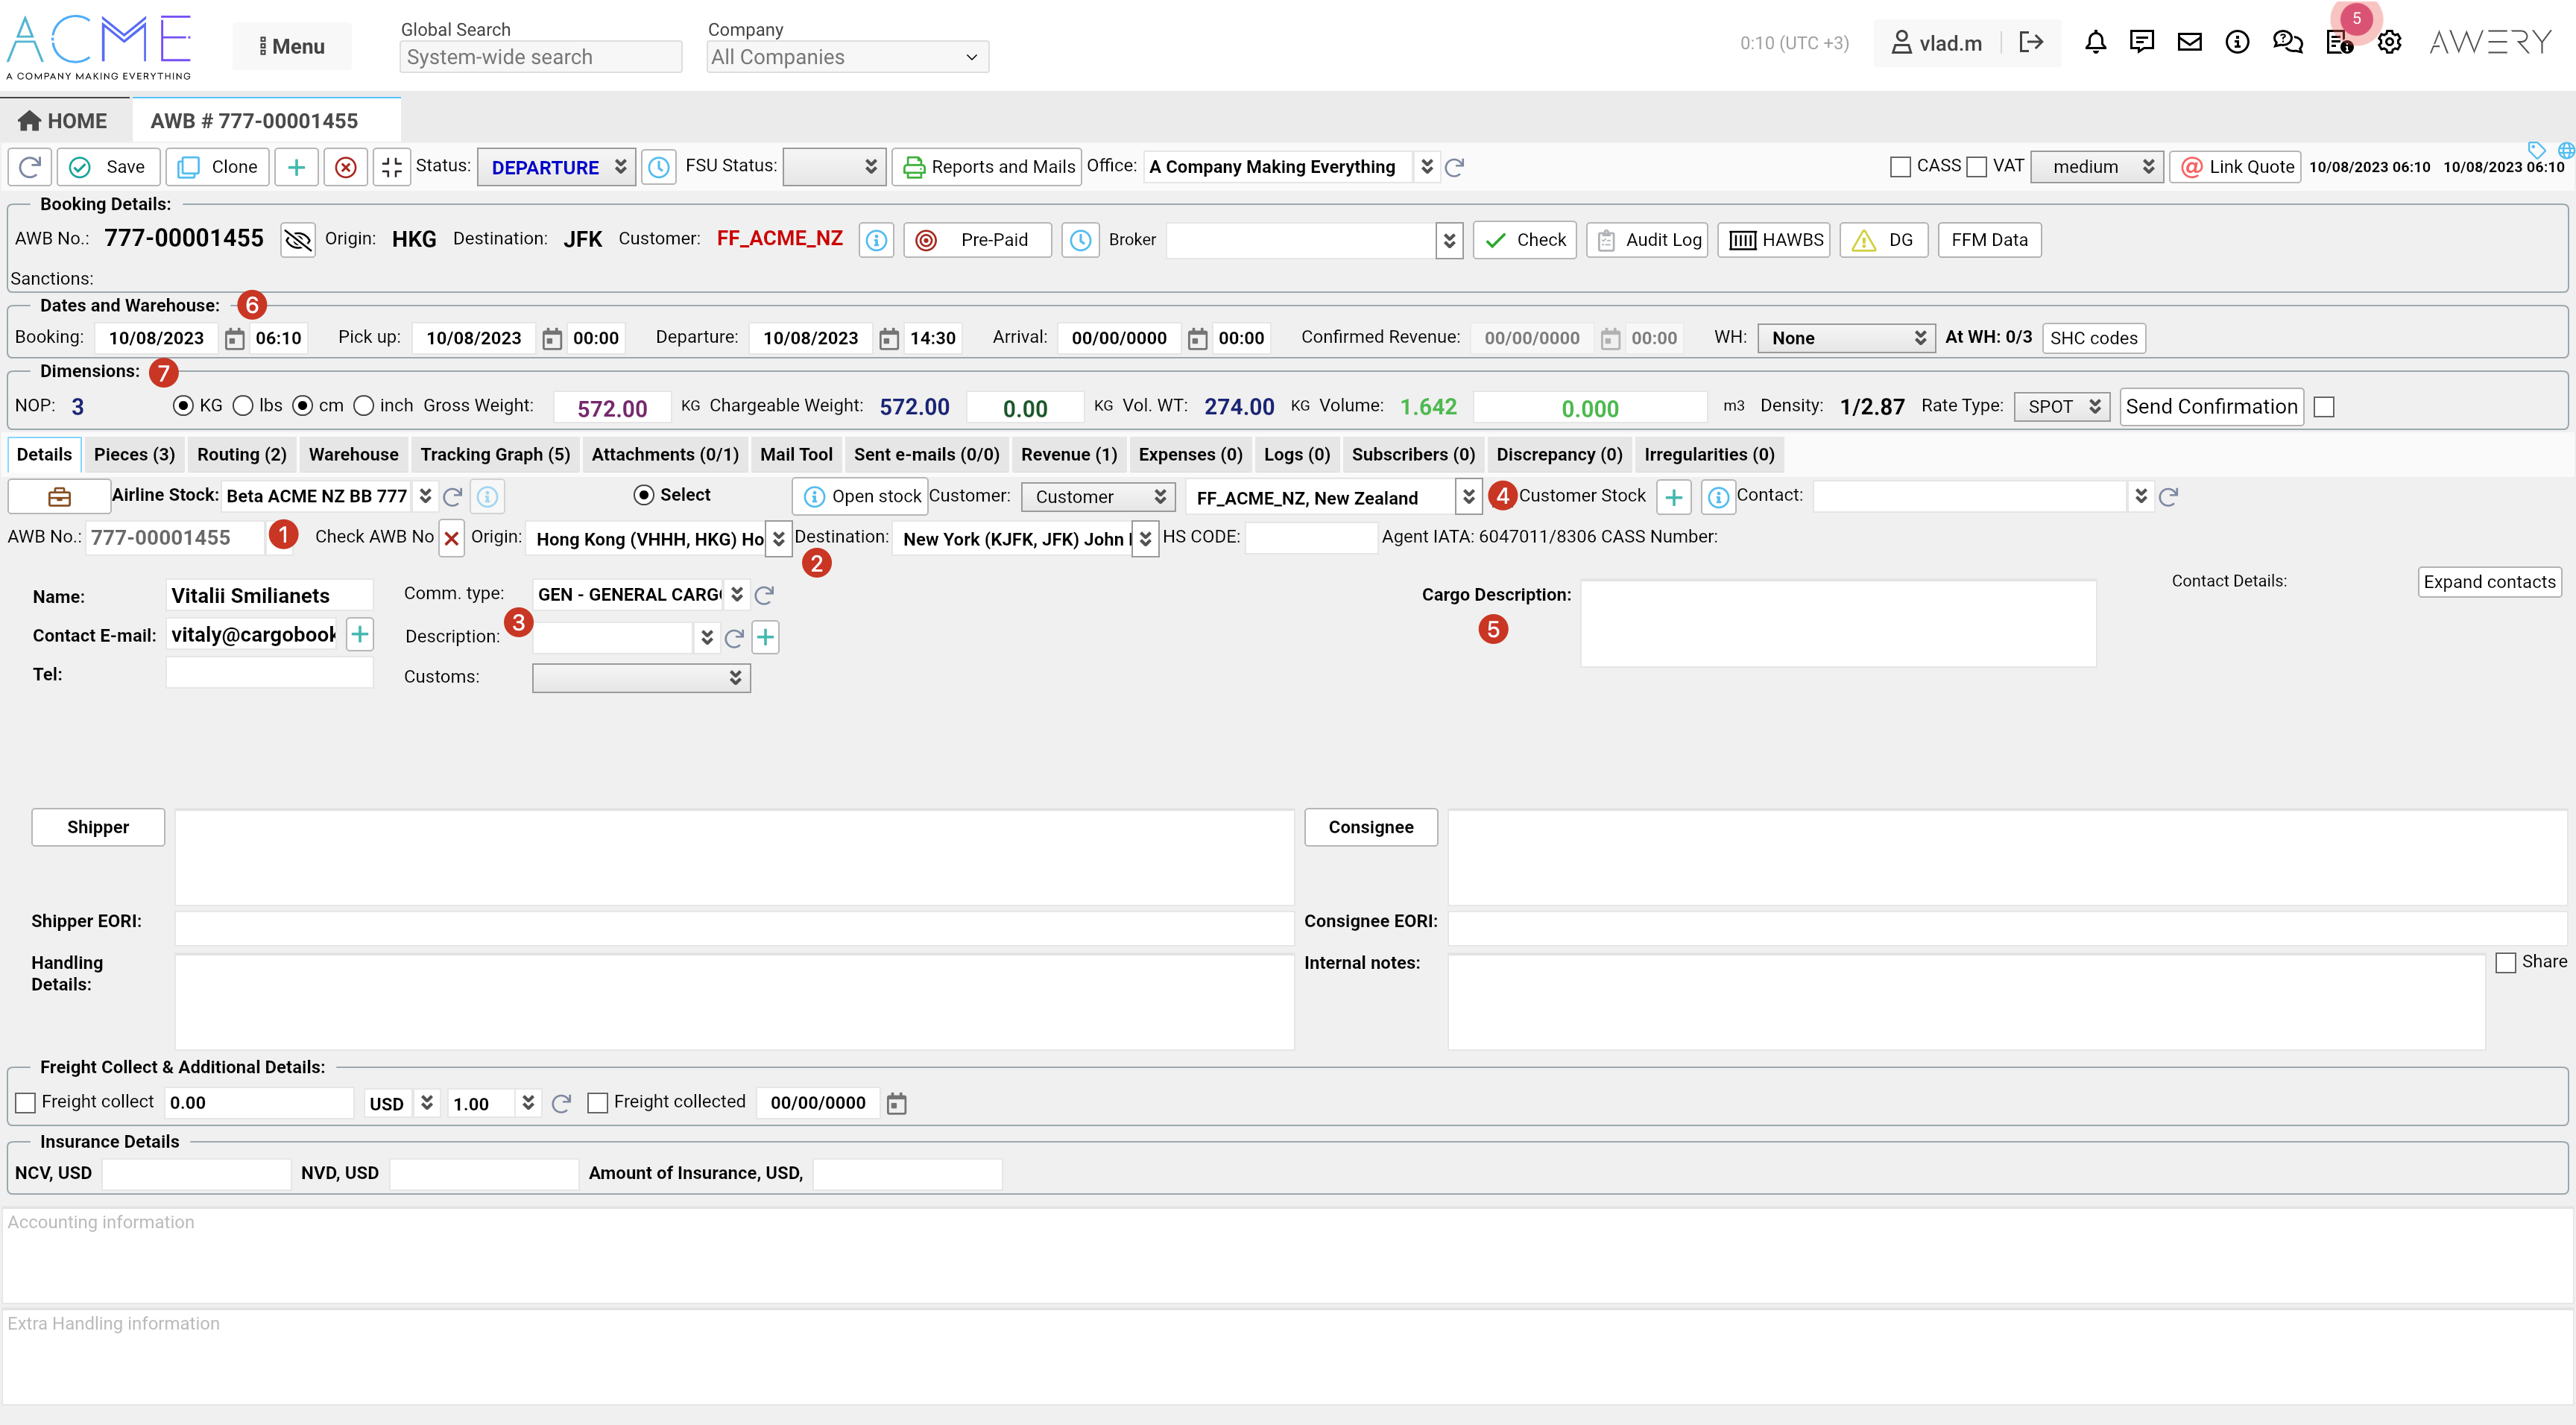
After you have identified the required shipments in the main tabular section in the AWB record line, double-click, after which the system will open the AWB details handling page.
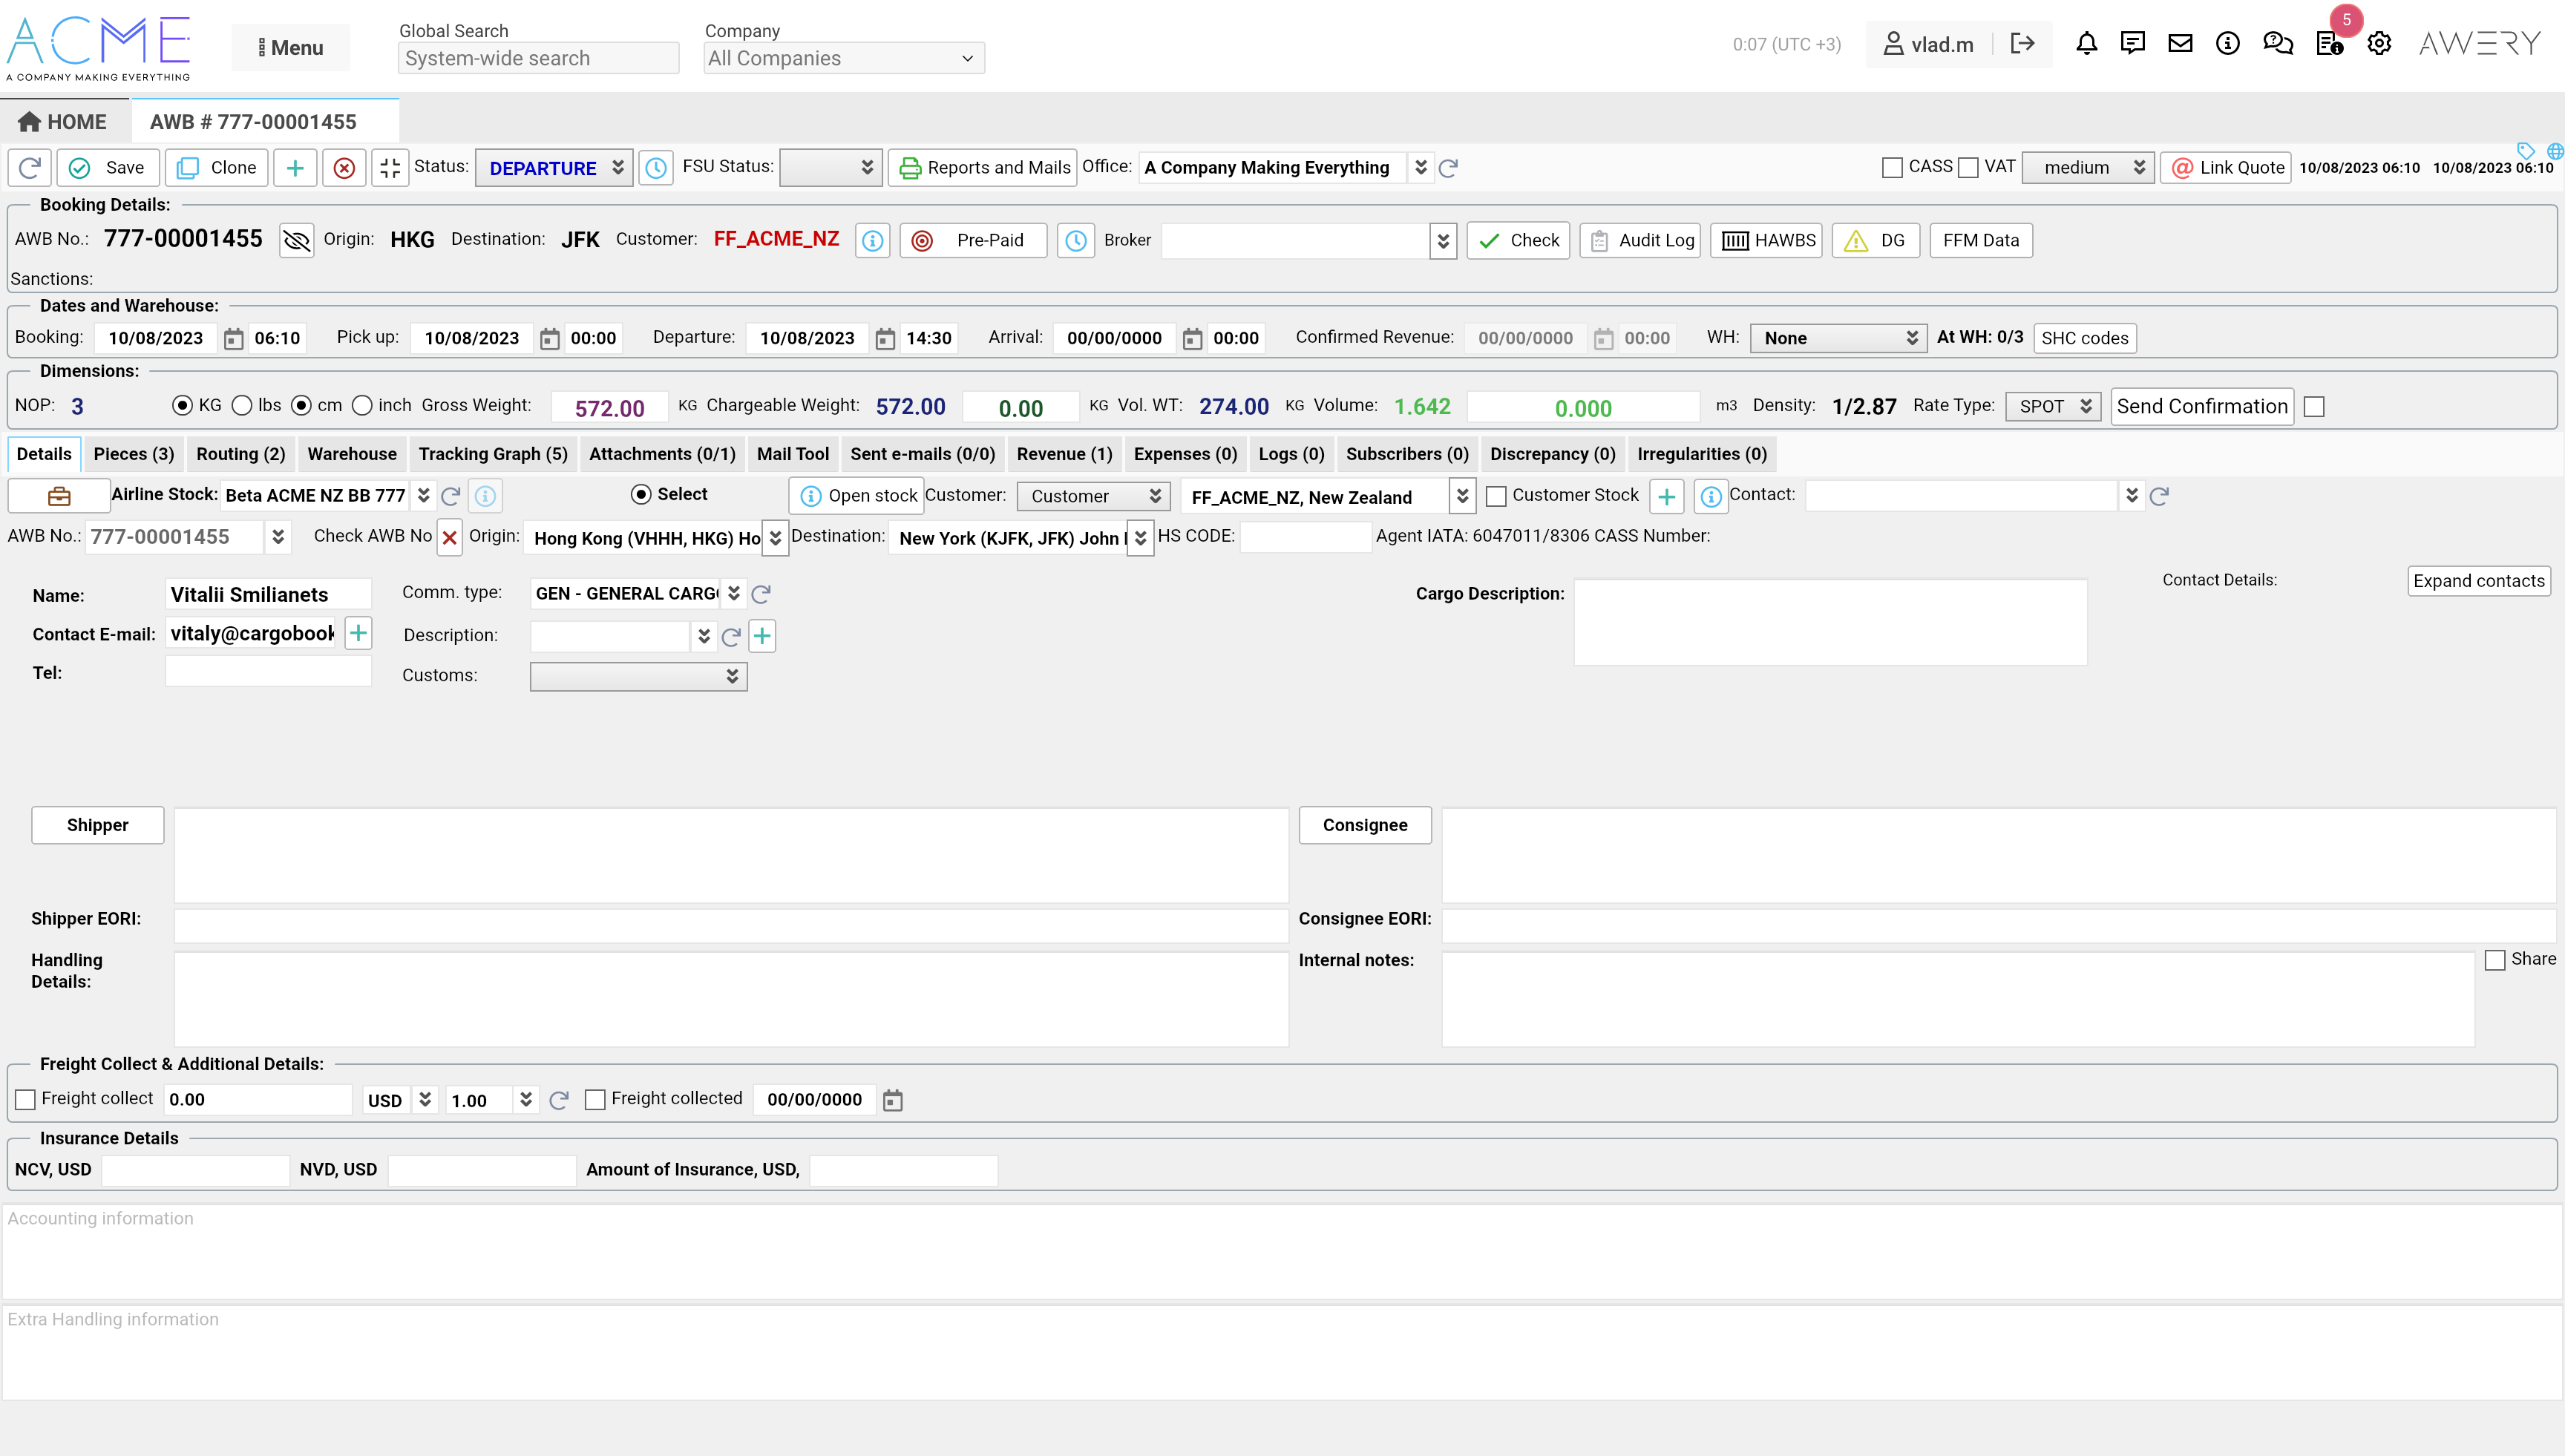
At this stage you can modify:
-
AWB number or Airline Stock.
-
Planned Origin and Destination.
-
Product Type or Commodity.
-
Agent name.
-
Custom Cargo description.
-
Booking Dates.
-
Date of booking.
-
Date of Pick Up.
-
Date of Departure.
-
Date of Arrival.
-
Date of Revenue confirmed.
-
-
Bookings Weight and pieces.
-
There is option to fill custom (bulk) measures.
-
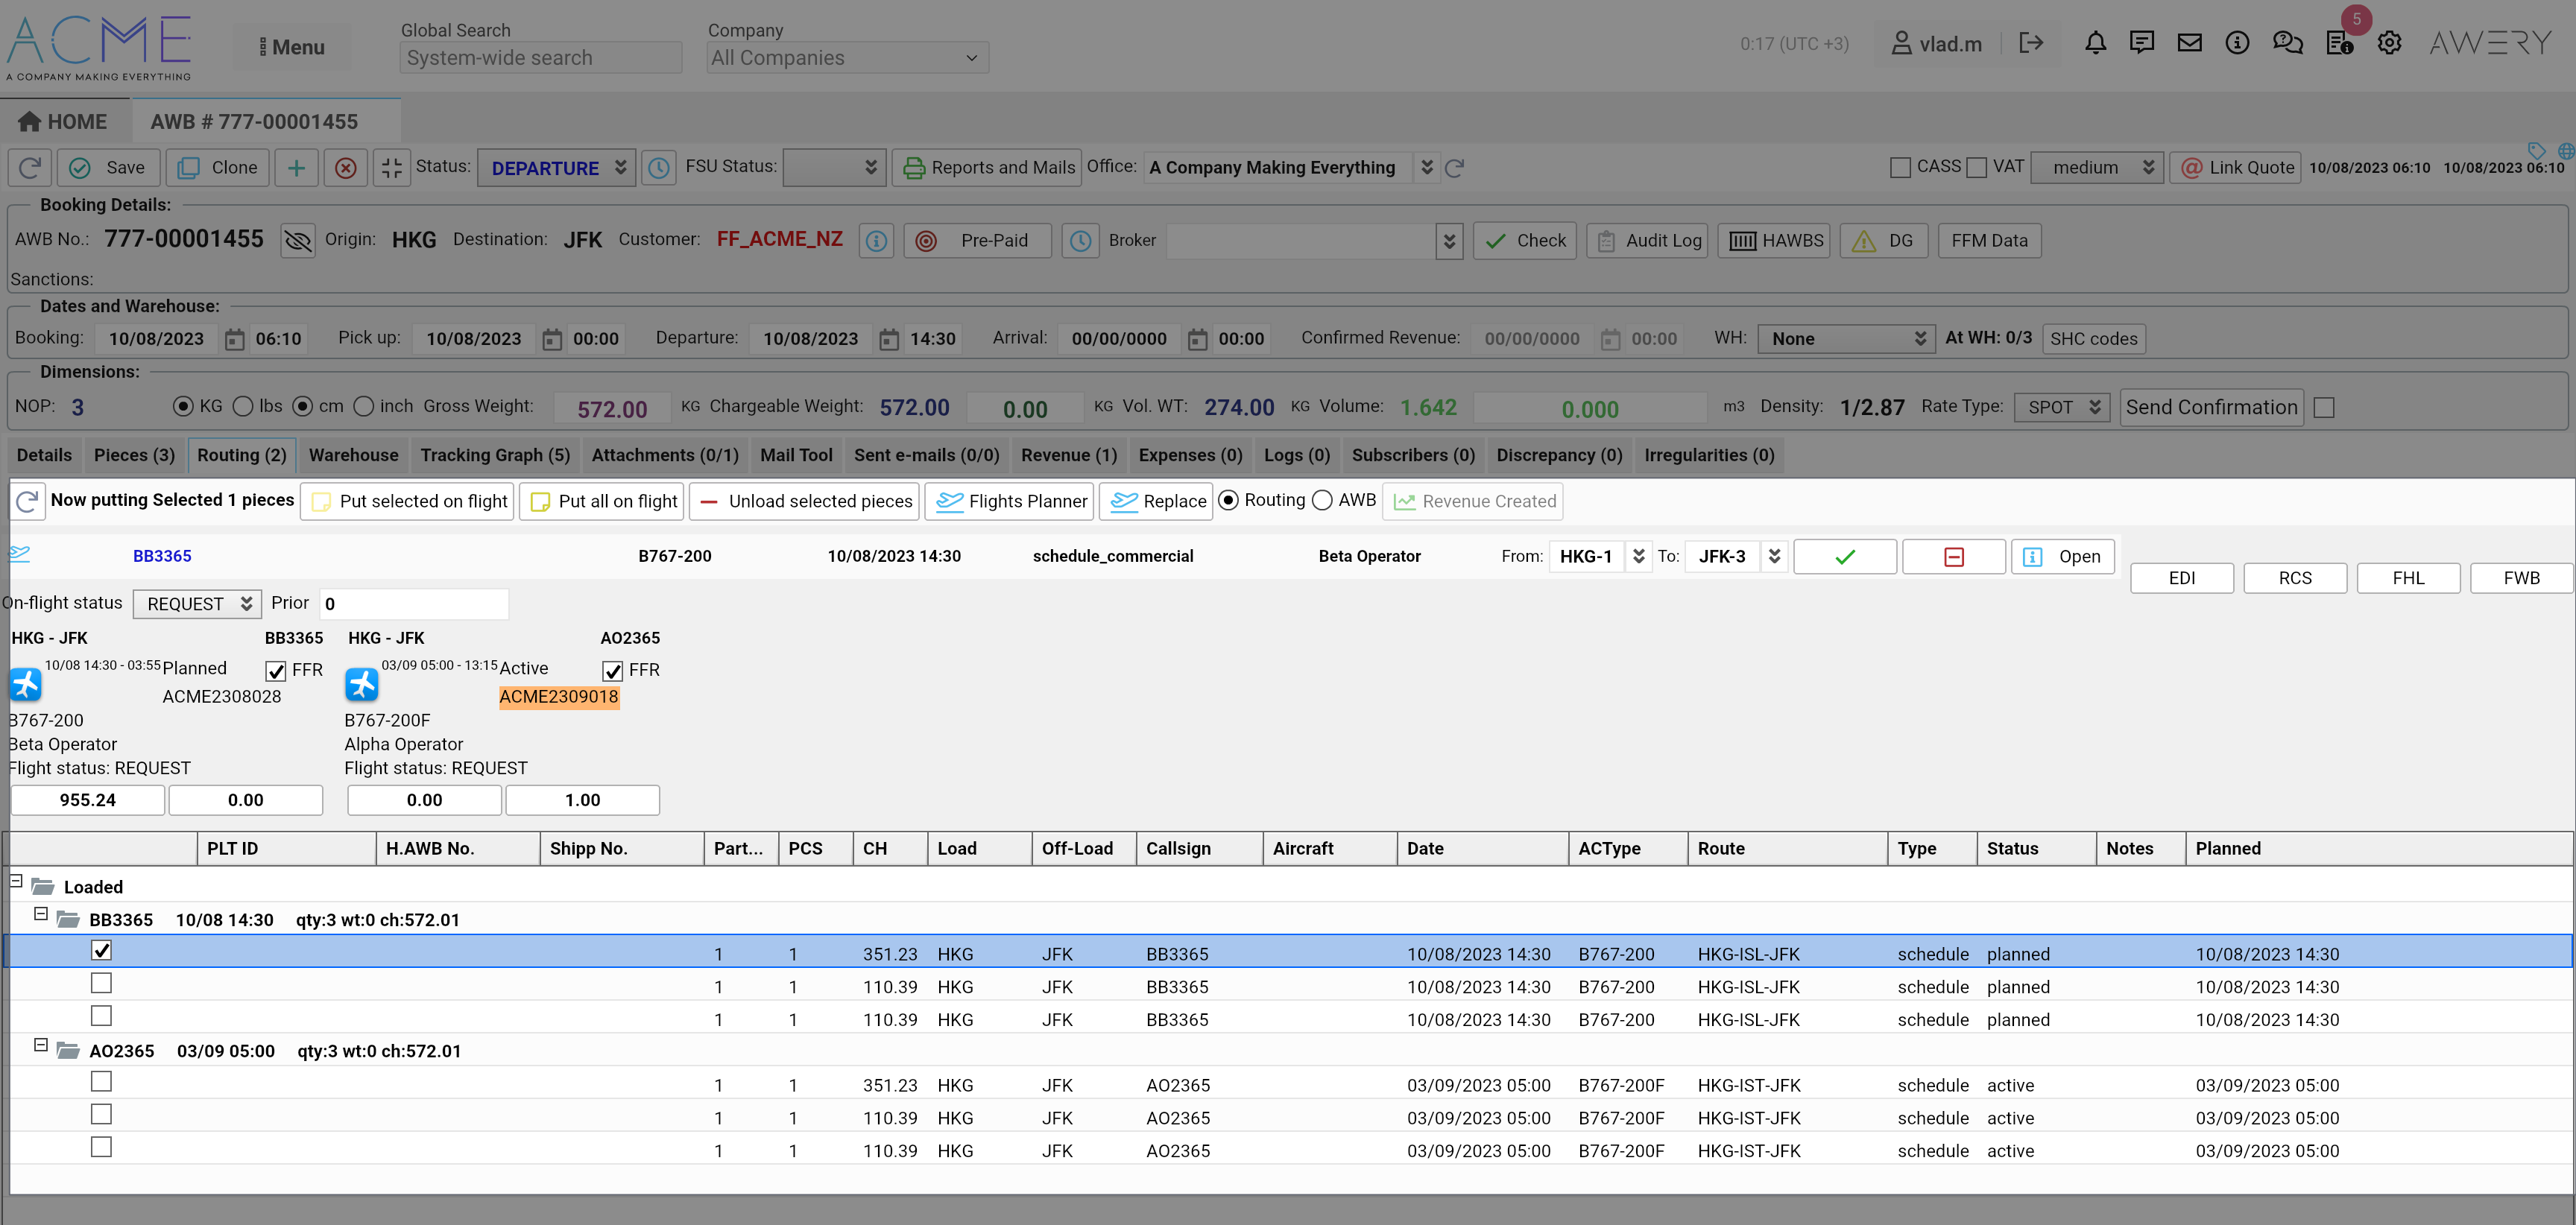
Details of all flights, as well as information on each pieces its description, properties and its status on the flight can be viewed on the "Routing" tab.
From this part of the interface, you can
-
Cargo planning.
-
Cargo rescheduling.
-
Partial unloading of cargo with automatic distribution of weight, pieces and volume.
-
Full offloading of certain pieces.
-
Full offloading of the entire AWB.
Update Arrival details
Arrival details such as Arrival timings, or warehouse can be updated automatically (as a result of receiving and processing one of FSU or FSA messages, after which the actual flight time, AWB status, AWB on-flight status and AWB timing can be updated according to the message) as well as manually (after filling in the information at the AWB or Flight level with saving entity).

Cargo Arrival Notice
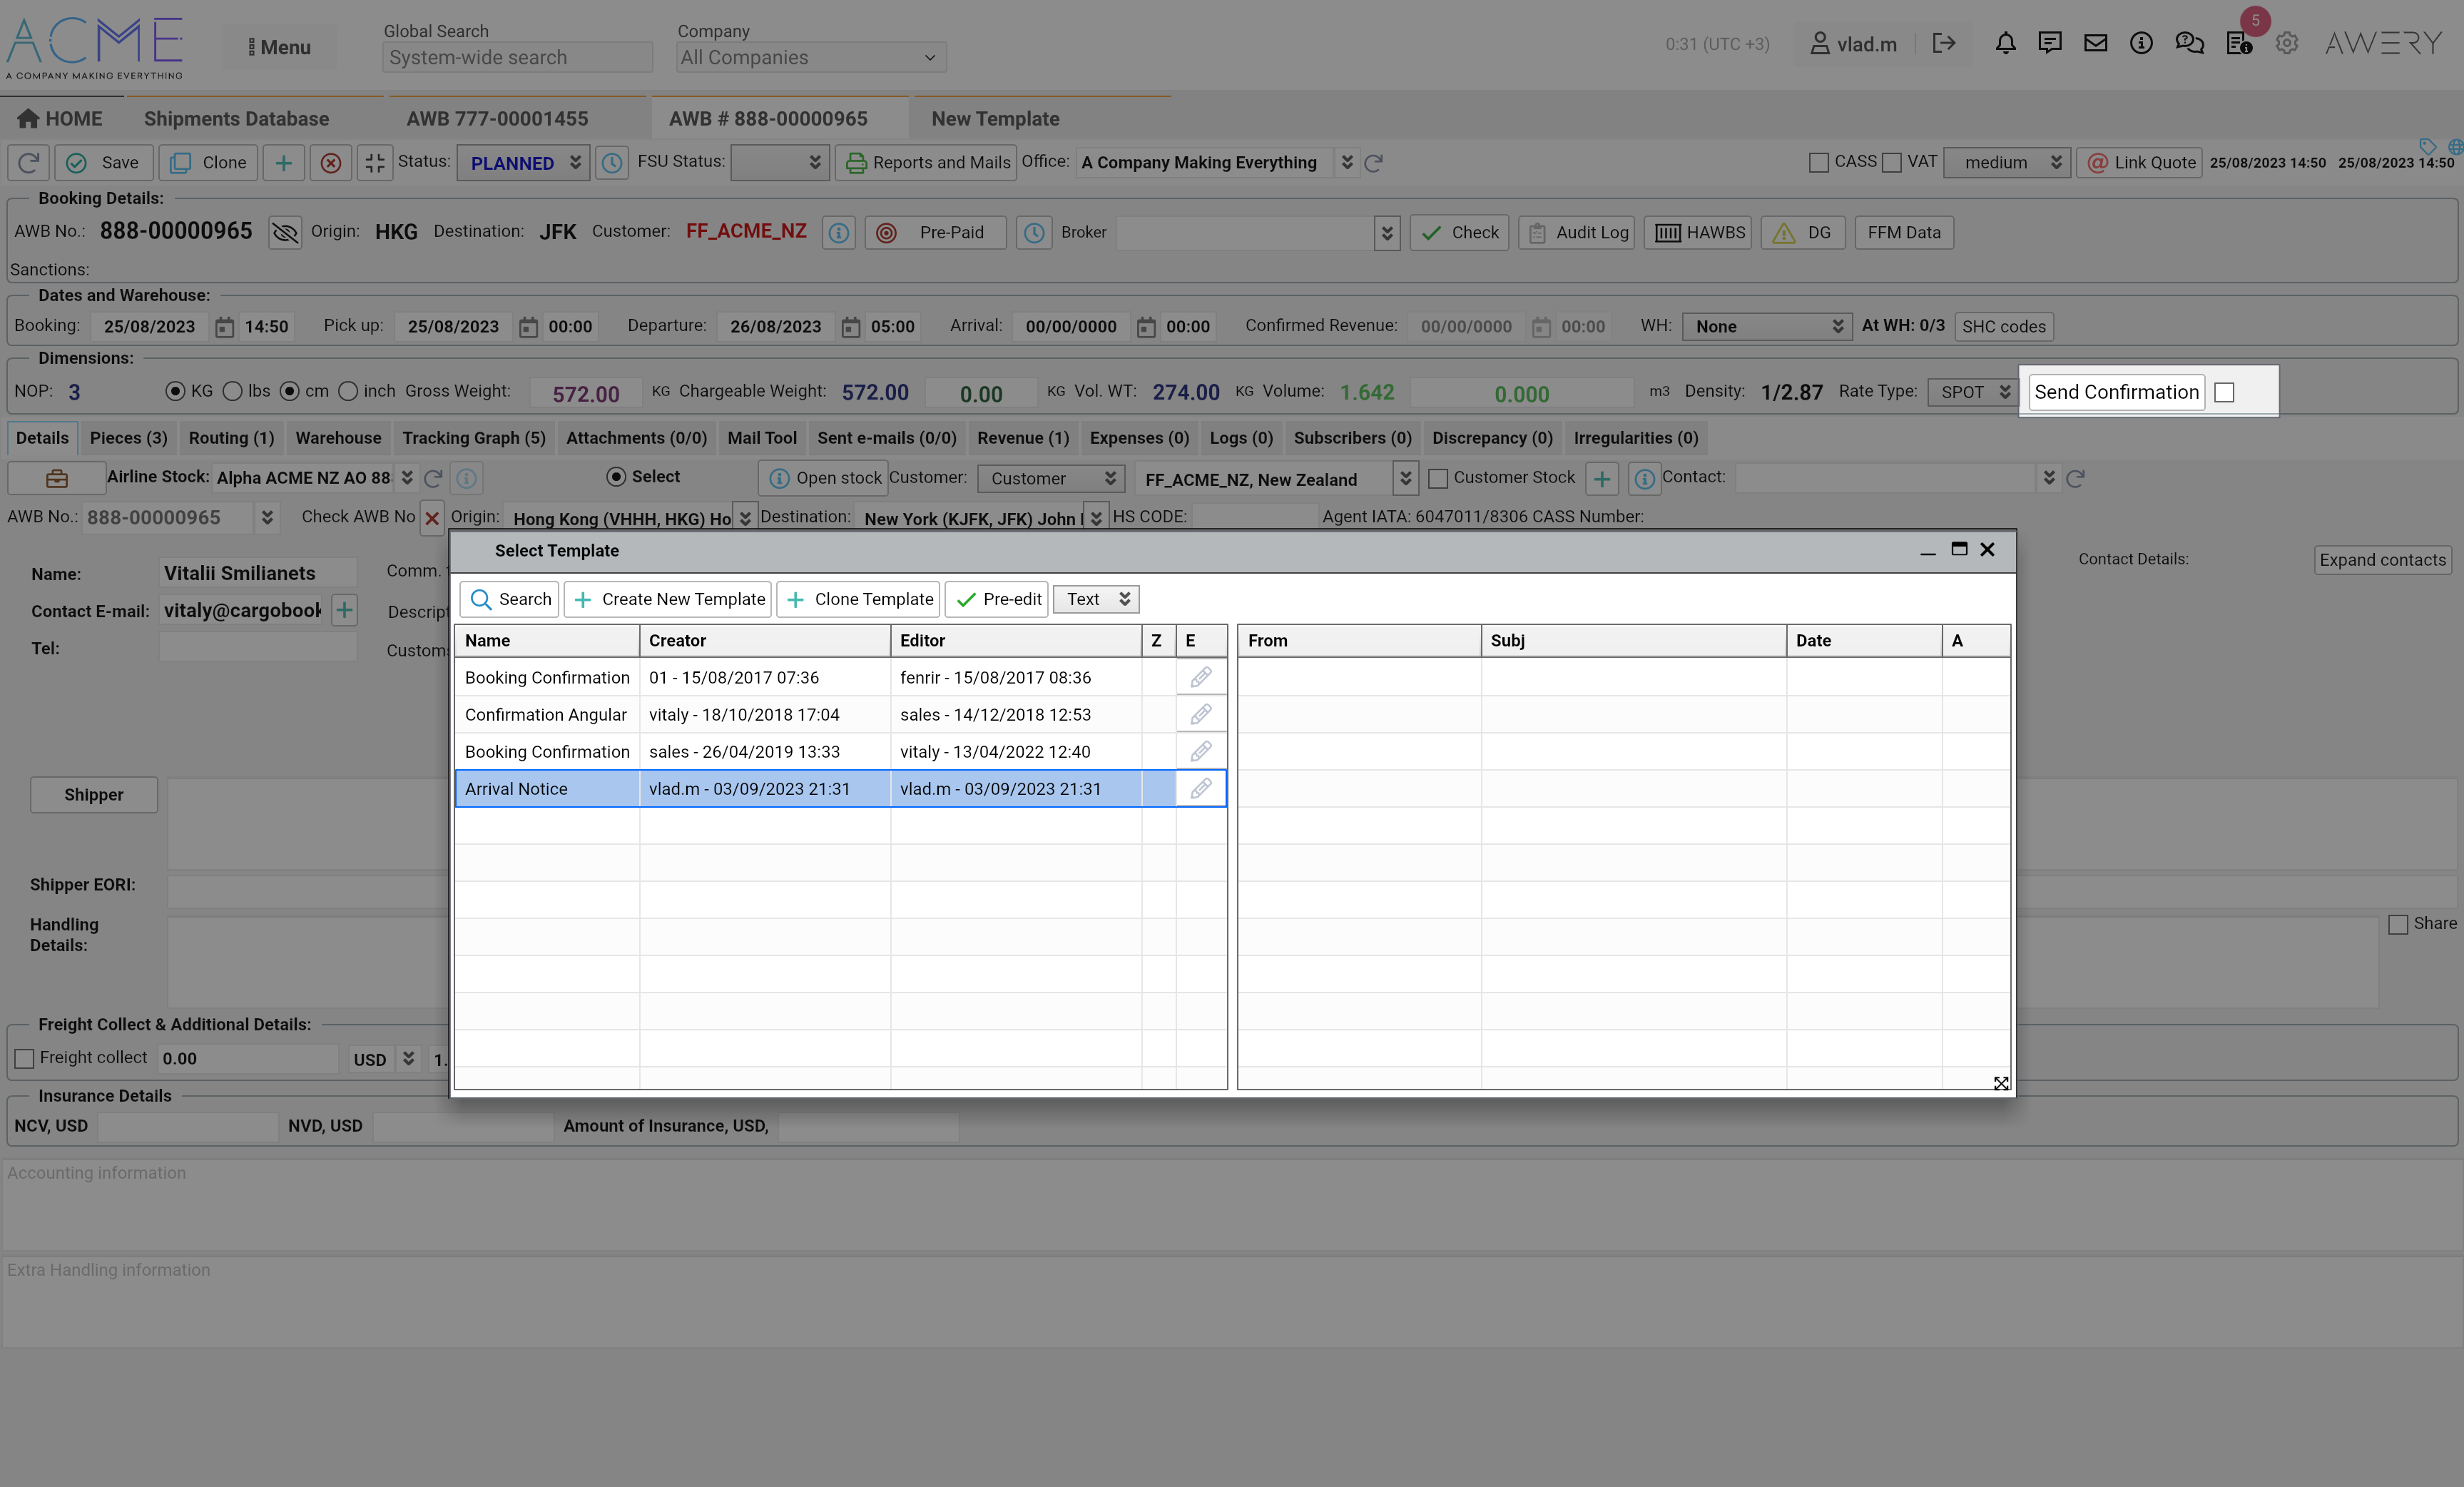
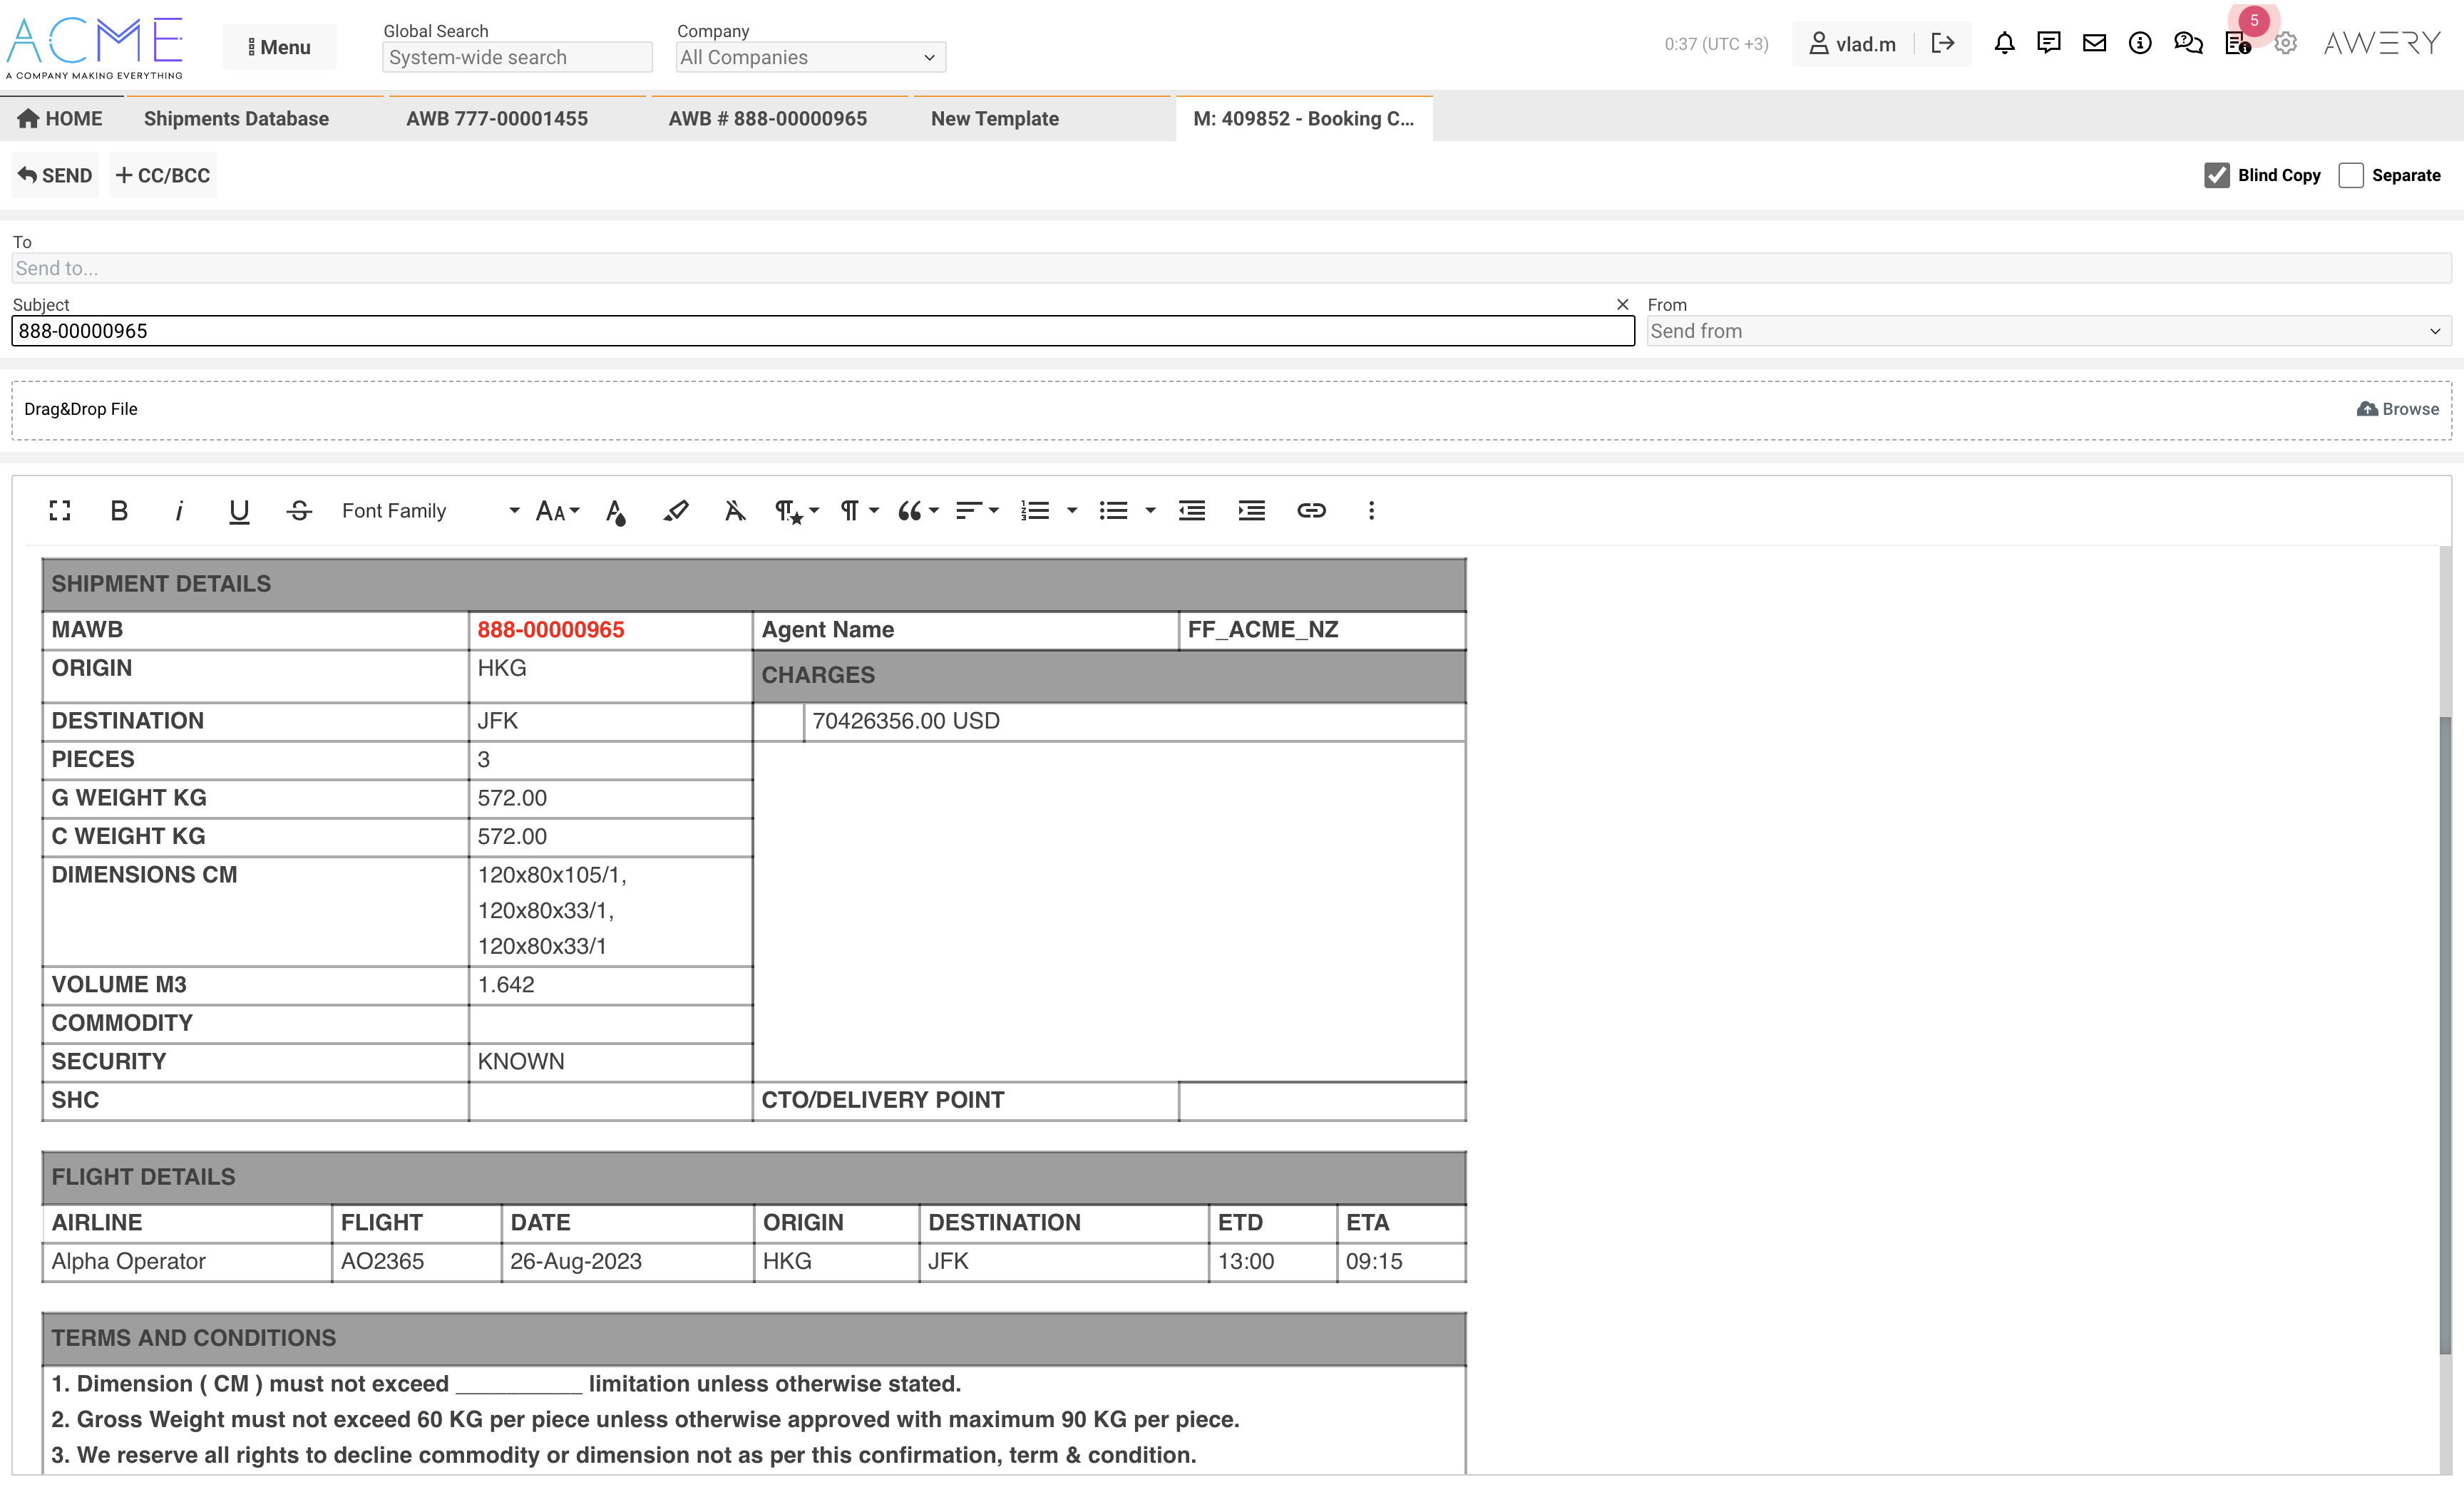
Any letters in the form of email templates can be sent directly from the AWB interface.
To do this, click on the "Booking Confirmation" button, then select a template from the list of all available templates within one AWB, after which double clicking will generate an email to be sent.
Form Delivery Order
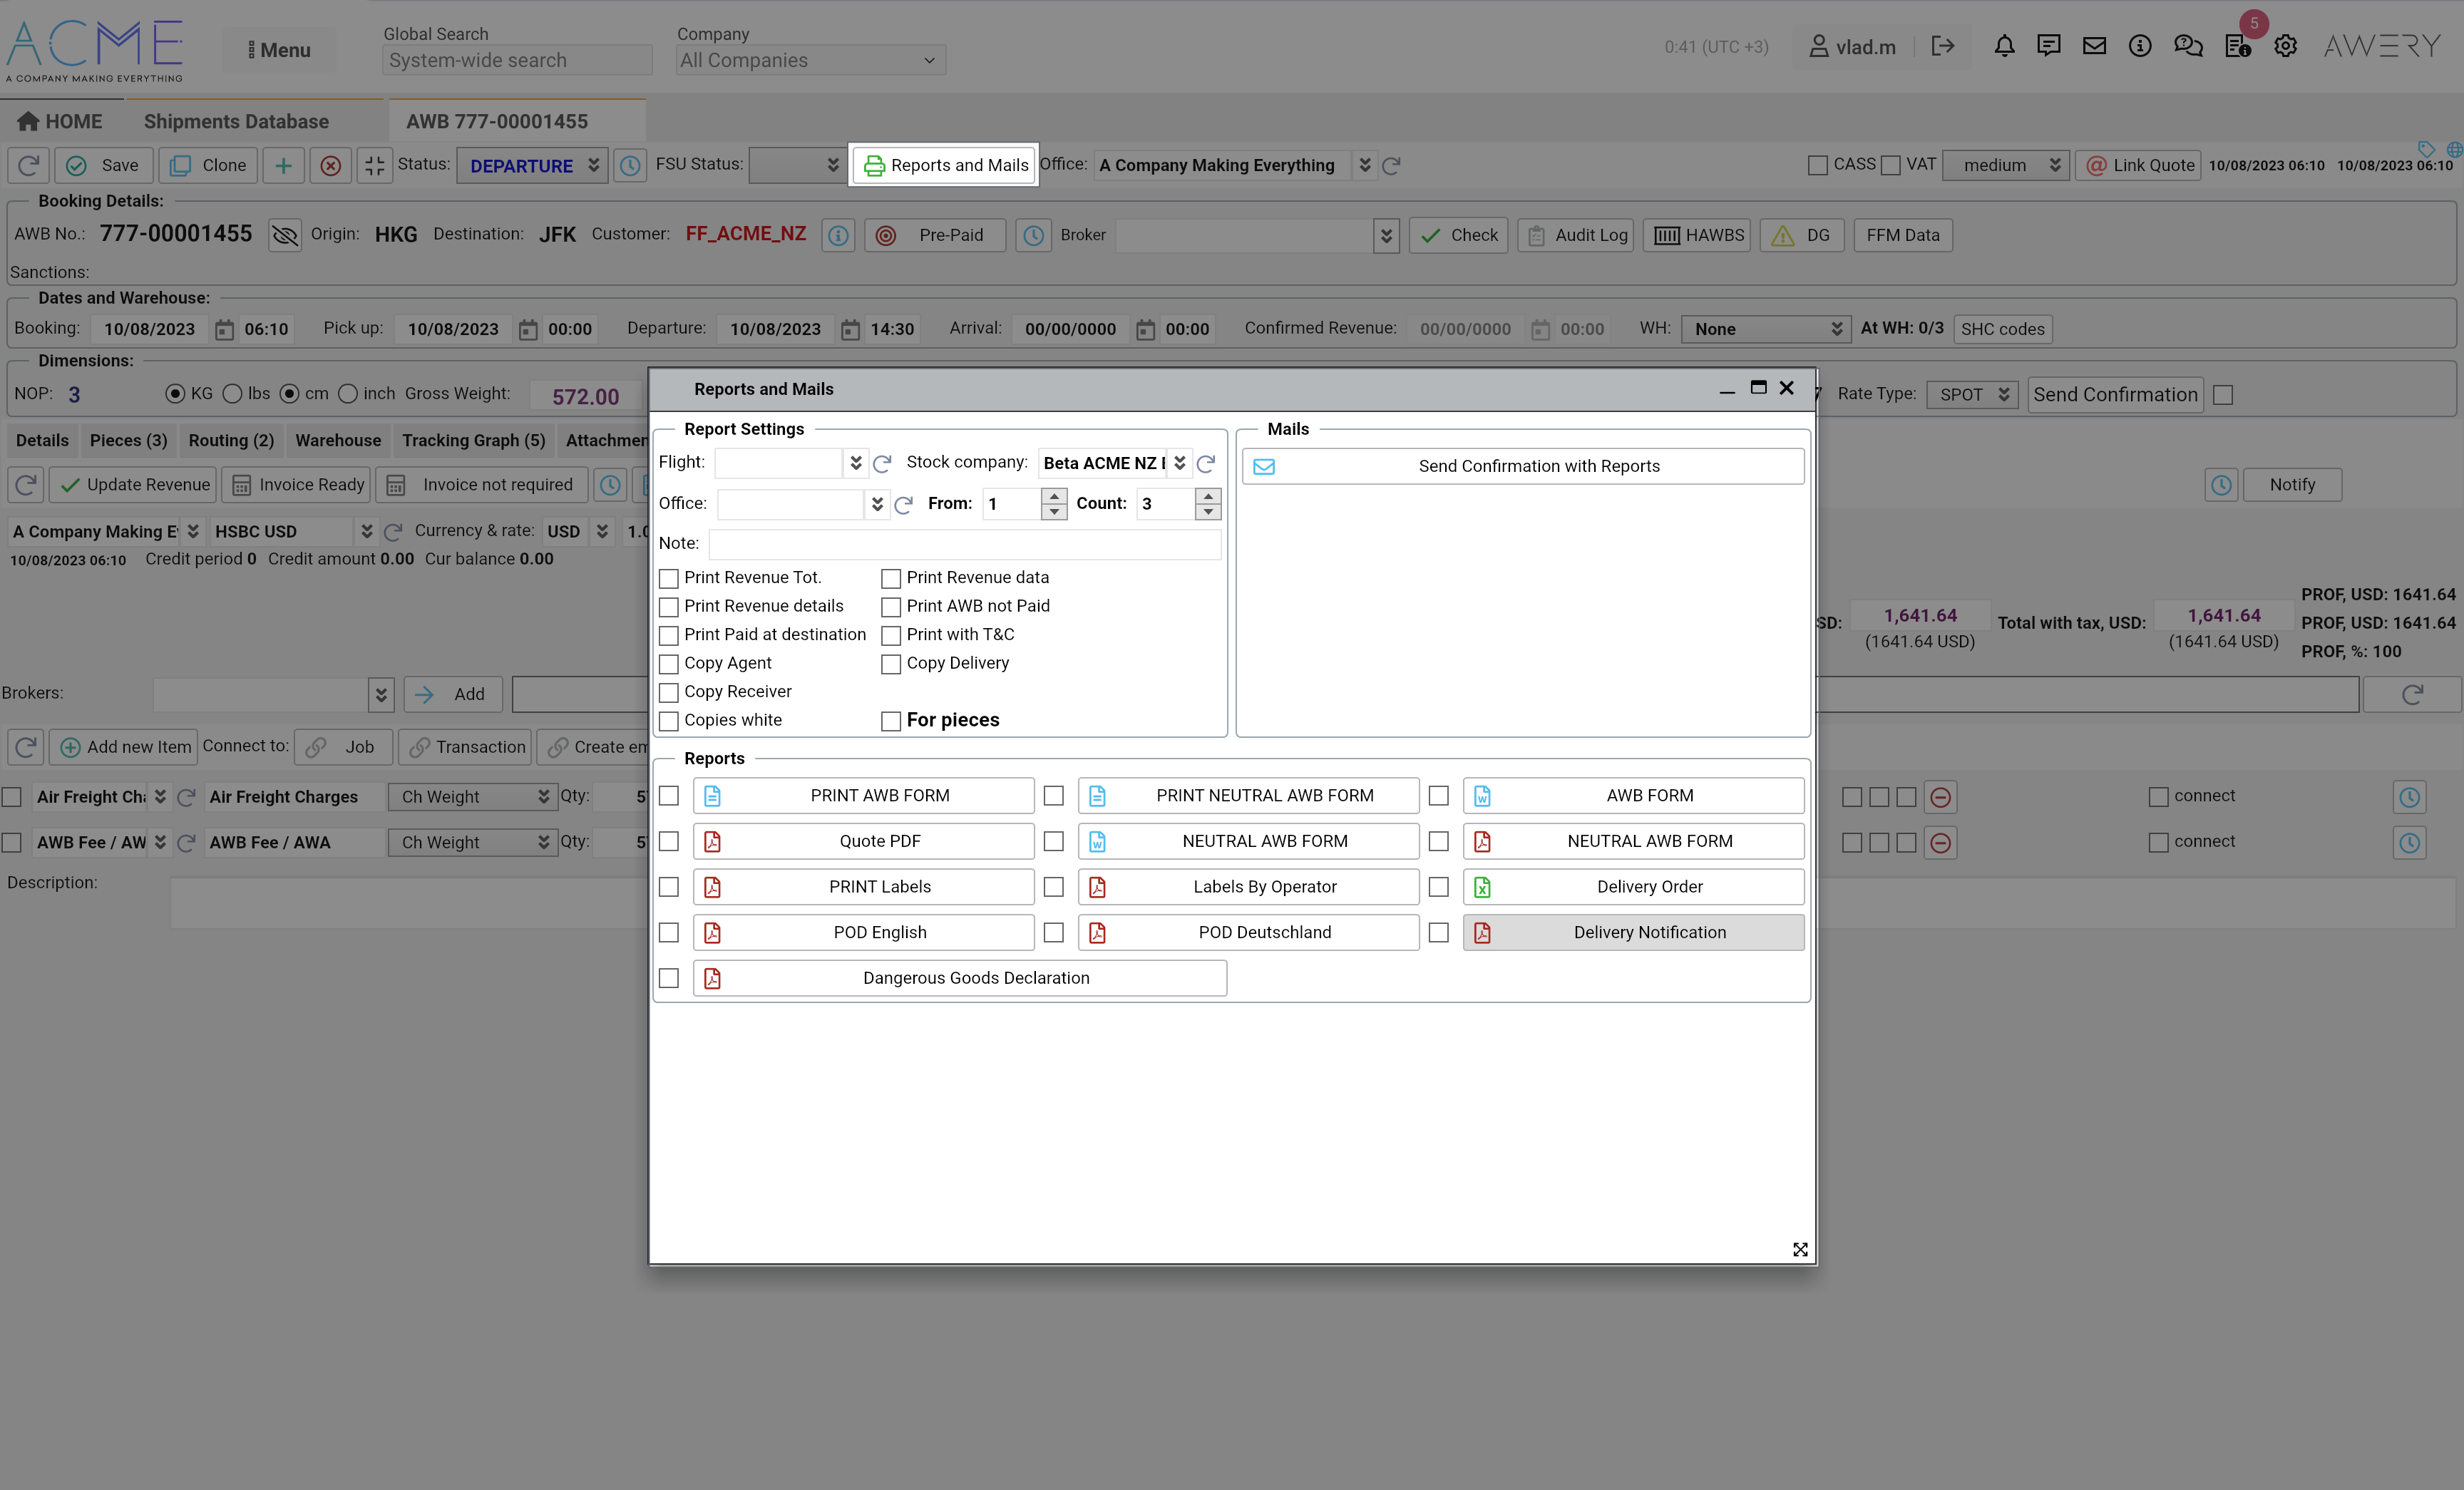
On the "Revenue" sub-tab of the AWB interface, add all income items within specific AWB. Check all saved sums and currencies Save the entered data using "Update Revenue" button.
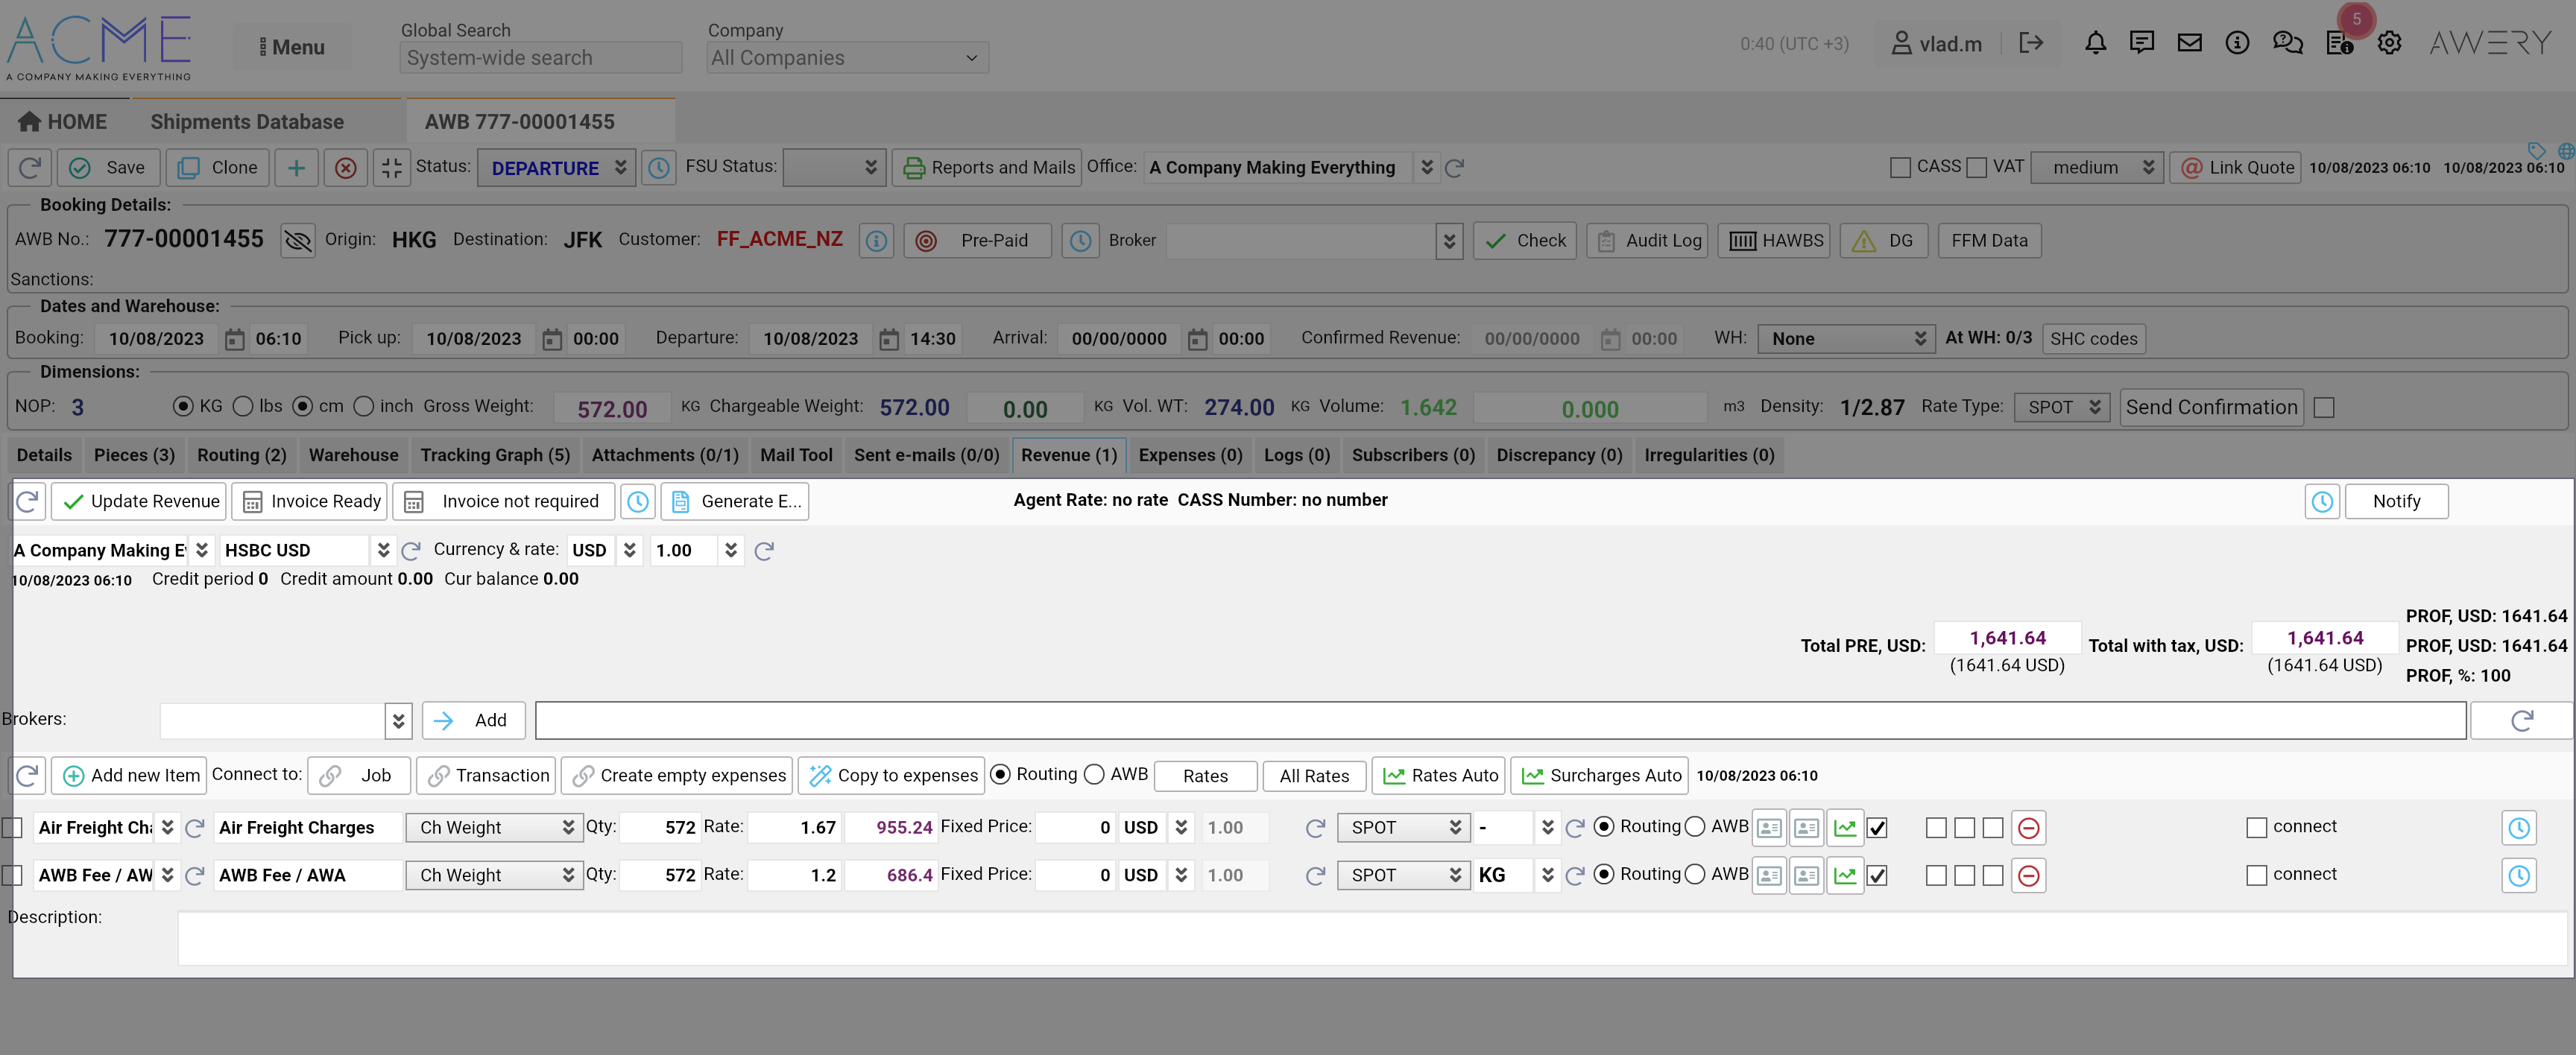
Once it's done, click on the "Reports & Mails" button to see list of available reports for this AWB.
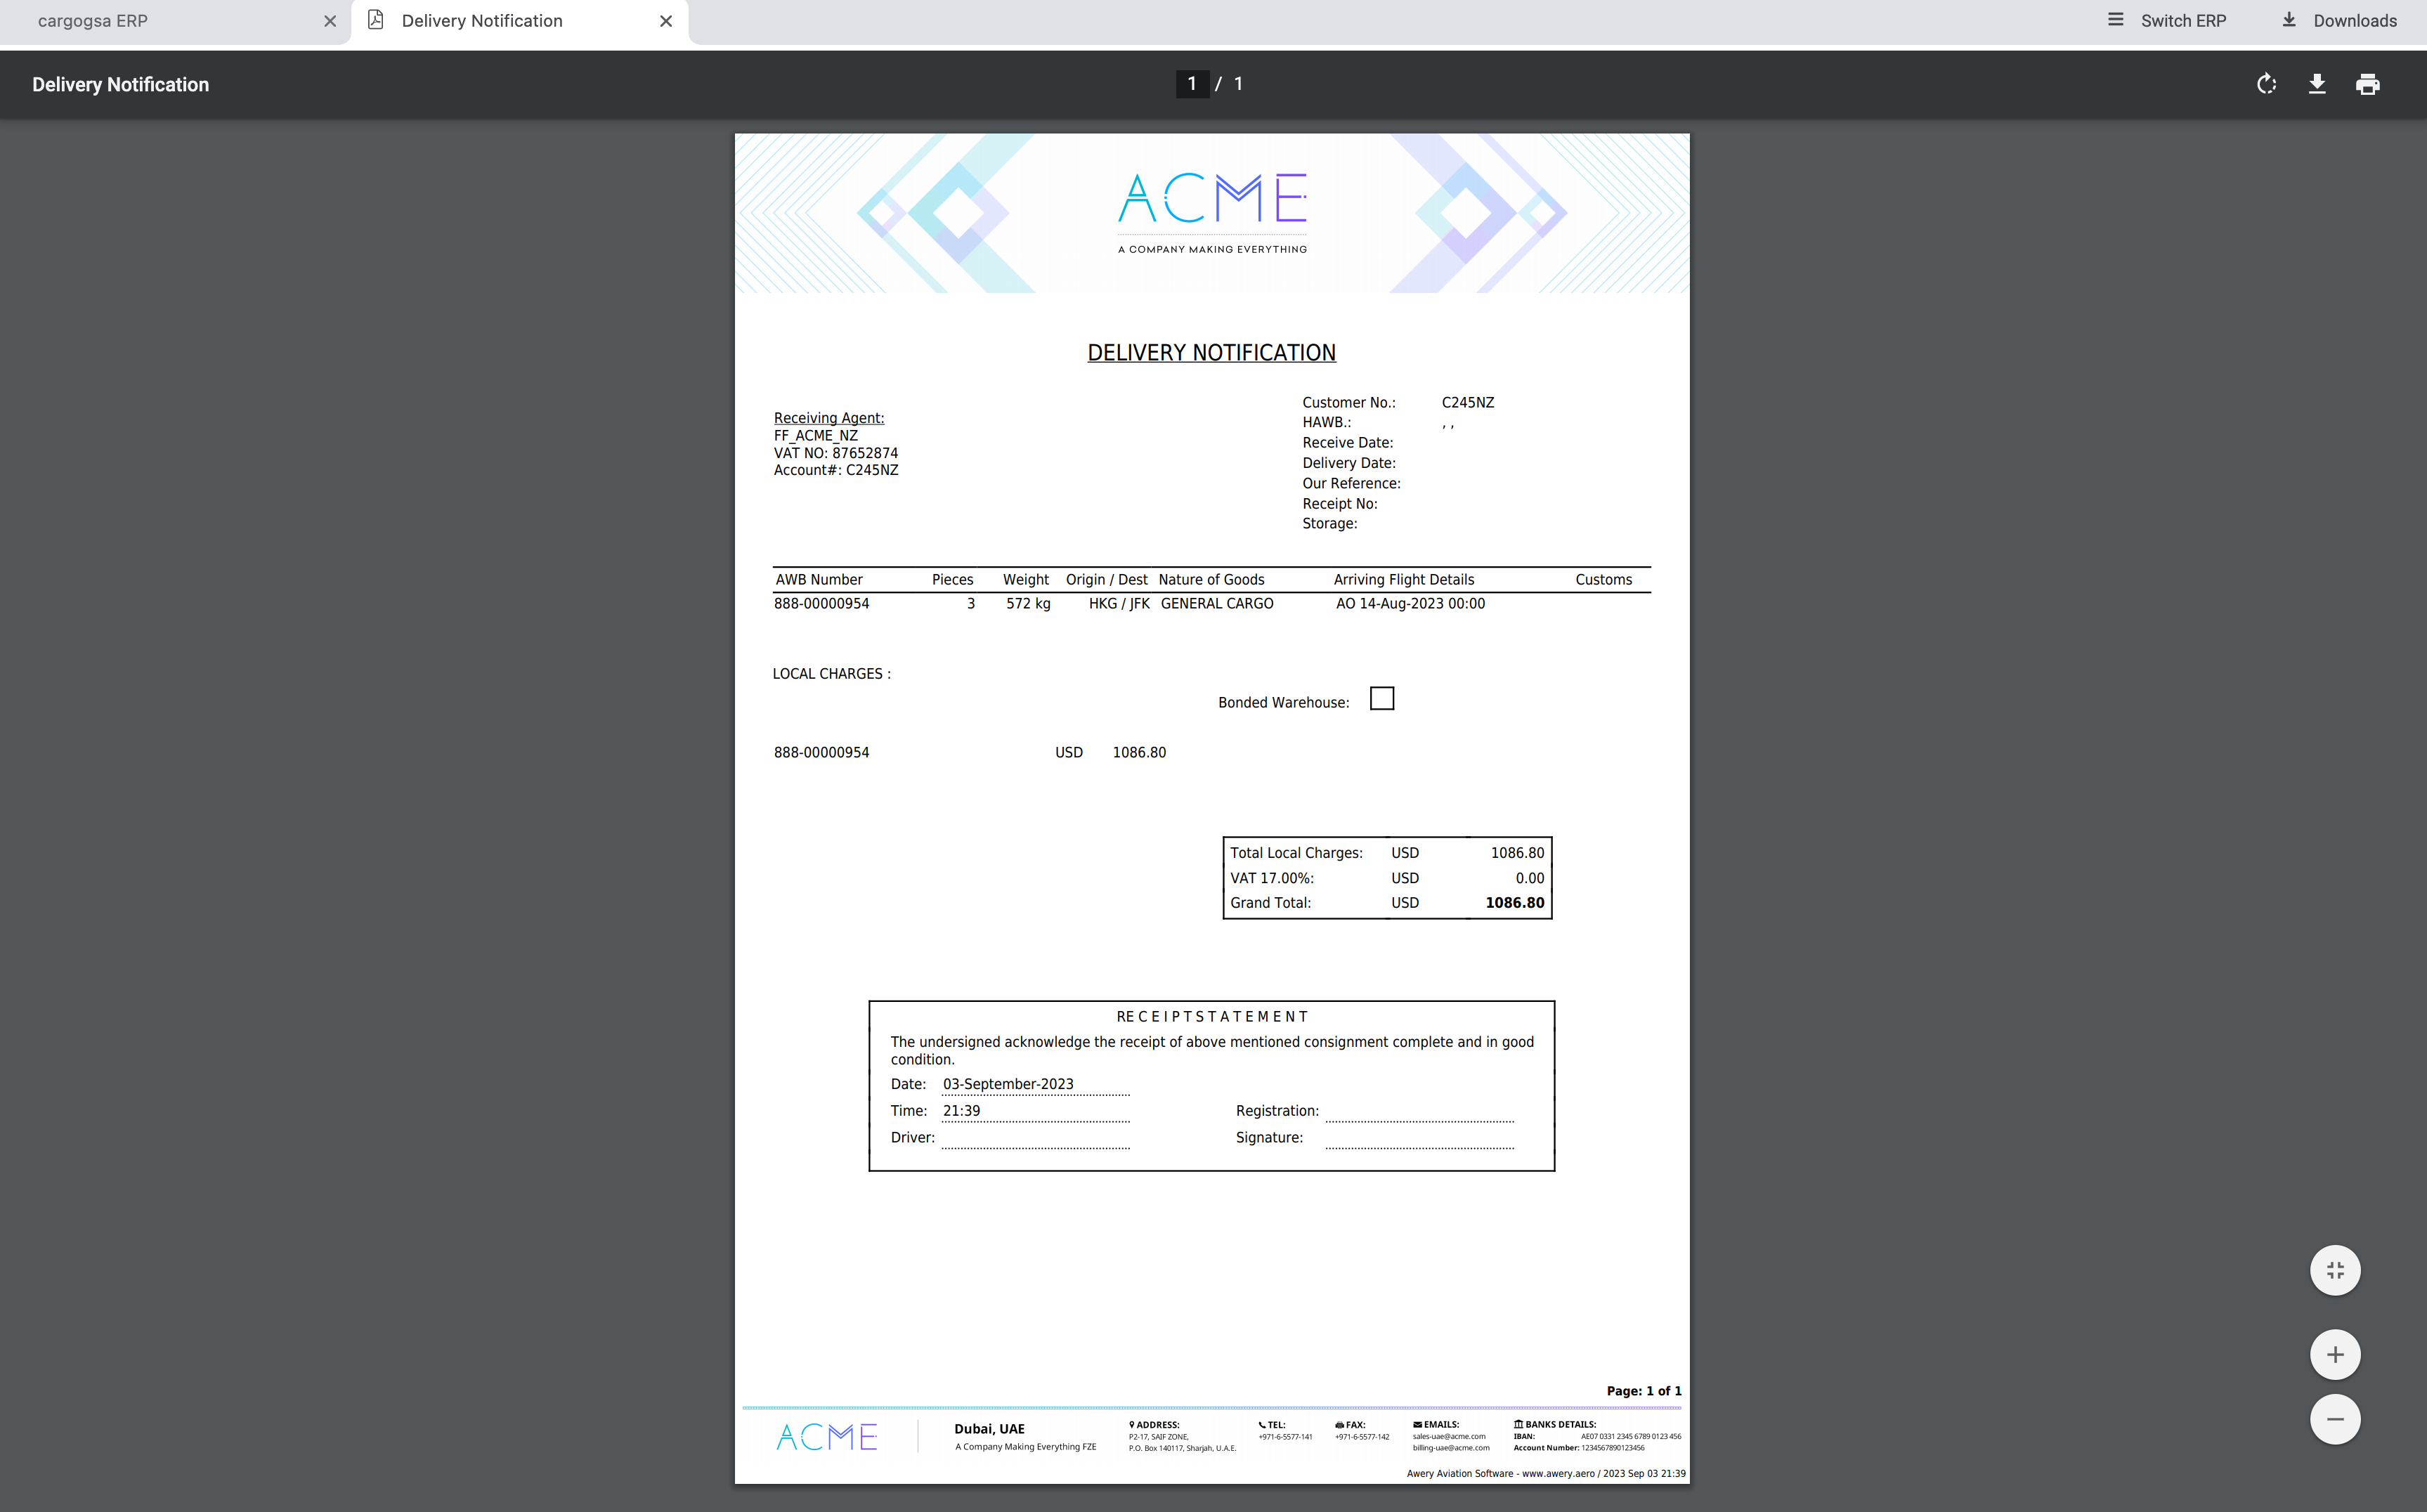
Upon clicking on the "Delivery notification" button system will generate PDF report with Charges details.