
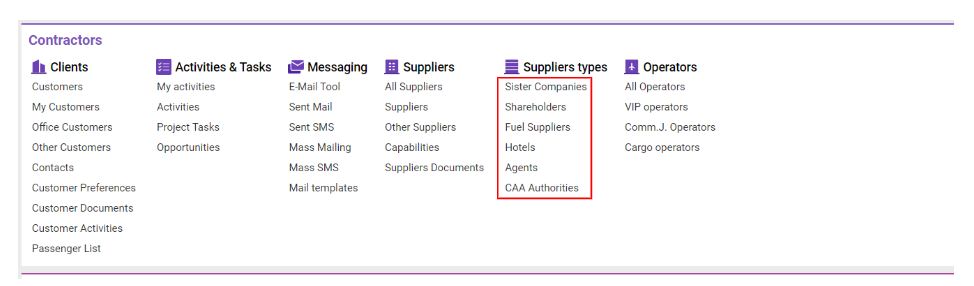
Accessing the Interior Page for all Suppliers Types: Sister companies/Shareholders/Fuel Suppliers/Hotels/Agents/CAA Authorities
Navigate to the Contractors section and under the Suppliers Types Section click any of the links below
Overview
This interface provides a comprehensive view for various supplier types, such as Sister Companies, Shareholders, Fuel Suppliers, Hotels, Agents, and CAA Authorities, covering essential details, management tools, and analysis capabilities.
Key Tabs and Features
-
Main Info Tab
-
Main Information Block: Holds essential vendor details such as Main Type, Parent Type, Status, Marketing Status, Company Size, and Payment/Billing details.
-
Additional Fields Block: Contains Address, Contact details, Agreement specifics, Credit rating, etc.
-
Code Generation: Auto-generate a Customer Code using the Generate Customer Code Number button.
-
Contacts Tab
-
Create a new contact with the + New Contact button.
-
Contact Data Tab: Includes fields for Contact Name, Prefix/Suffix, Mailing Category, Airport and Country selectors, and more.
-
Additional Fields Tab: Contains Compliance, SLX ID, and Team selectors, allowing multiple teams to be added.
-
Airports and Access Types Tabs: Add multiple entries for Airport and Access types.
Additional Options
-
Adding New Items:
-
New Item Button: Quickly add a new item to the contact.
-
Type and Data Fields: Fill out these fields and click Save to store the new item.
-
+ Add Button: Displays a new form for adding multiple items in one session.
-
Editing or Deleting Contacts:
-
Edit Button: Click to modify the selected contact's information.
-
-
Delete Button: Remove the selected contact from the list as needed.
-
Replicating Contact for Another Customer:
-
Duplicate Contact Button: Click to apply the contact details to a different customer.
-
-
Apply Button: After selecting the customer, apply the contact details to link it with the new customer.
-
Linked Suppliers Tab
-
Displays child vendors linked to the main vendor.
-
List of Capabilities Tab
-
Shows the vendor’s capabilities if linked.
-
Mail Tool Tab
-
Displays linked emails for communication tracking.
-
Activities Tab
-
Lists activities associated with the vendor.
-
Operational Info Tab
-
Notes Field: For additional operational notes.
-
Aircrafts Tab
-
Displays linked aircraft information.
-
External Links Tab
-
Required fields: Relate Type, Company selectors, External Company ID, External Customer ID.
10. Accounting Details Tab
-
Holds fields for billing and financial data, such as VAT number, Credit Amount, and Deposit details.
11. Bank Accounts Tab
-
Displays associated bank accounts.
12. Accounting Codes Tab
-
Required fields include Company, Bank, Type, Currency, and Code.
13. Procurement Tab
The Procurement Tab is designed to manage and display procurement-related information for each vendor. This includes key decision-makers, services, social media links, and essential business details.
Key Elements
-
Input Fields:
-
Social Media Links: LinkedIn, Twitter, Facebook, Instagram fields for easy access to the vendor’s social profiles.
-
Key Decision Maker and Title: Information about the primary decision-maker within the vendor’s organization.
-
Flight Service Provider, Fuel Provider, Fuel Carnet Cards, Flight Planning, Ground Handler: Fields for specifying the vendor’s capabilities and special services provided.
-
Notes: Additional remarks or information related to the vendor.
-
-
Selectors:
-
Source and Descr: The Descr selector will only show options if the Source field is filled out.
-
-
Service of Interest, Business Unit, Segment, Linked Greetings, Service Equipment, Company Size: Multiple entries can be added to each field, providing flexibility for specifying detailed vendor interests and attributes.
-
Date on Board:
-
Datepicker: This allows you to record the date the vendor was added to the board, assisting with tracking timelines.
-
Additional Opportunities
-
Adding Multiple Entries: In fields like Services of Interest, Business Unit, Segment, Linked Greetings, and Service Equipment, you can add multiple entries for comprehensive detailing.
-
Social Network Links: Each social network field has a clickable link to open the vendor’s profile directly, simplifying the verification and research process.
14. Services Tab
-
Displays linked services from the Services Database.
15. Agent Rates Tab
The Agent Rates Tab is designed for managing and viewing rate information associated with various agents. This includes selecting agents, setting weight-based rates, and managing currency types.
Key Elements
-
Selectors:
-
Agent Selector: Choose the agent or contractor for whom the rates apply.
-
Currency Selector: Specify the currency in which the rates are calculated.
-
-
Input Fields:
-
Bulk: Input for bulk rate.
-
Percent (%): Set the percentage rate.
-
Min Weight: The minimum weight applicable for the rate (only active for certain types).
-
Per kg: Rate per kilogram (only active for certain types).
-
Notes: Space for adding relevant details or notes regarding the rate.
-
-
Date From Calendar:
-
This datepicker allows you to set the start date from which the rates will apply.
-
-
Radio Buttons:
-
Kg/Lbs: Toggle between kilograms and pounds.
-
Flight/AWB/Service: Choose the rate type, impacting which input fields are available.
-
List Description
The list displays comprehensive rate details:
-
Type: Name of the rate type (Flight, AWB, Service, etc.)
-
From Date: Start date of the rate.
-
Agent: The designated contractor.
-
Min Weight: Minimum weight for the rate, if applicable.
-
%: Percentage rate.
-
Per KG: Rate per kilogram.
-
Bulk: Bulk rate value.
-
Cur: Currency type.
-
Notes: Additional information field for any extra context.
Additional Information
-
Min Weight and Per kg Fields: These fields become inactive when Flight or Service types are selected, ensuring accuracy in rate specifications.
This tab provides a structured view of rates and is essential for effective rate management and easy access to agent-specific pricing.
16. Currency Rates Tab
-
Allows creation of new currency rates, with fields for Currency, Rate, and Date.
17. Fuel Rates Tab
-
Shows fuel rate details if linked.
18. Documents and Special Documents Tab
The Documents and Special Documents tab provides a structured way to create and manage documents related to customers, contractors, or other business needs. Below is an explanation of the interface and how to use it:
How to Create Documents:
-
Click the +New button to open the document creation sidebar.
-
Fill in the necessary fields (described below).
-
Click the CREATE button to save the document.
Elements of the Interface:
-
Name: The name of the document (e.g., Passport, Business License).
-
No.: The unique number or identifier for the document.
-
Value: The monetary or other value associated with the document, if applicable.
-
Issued by: The authority or organization that issued the document.
-
Note: A field for additional notes related to the document.
-
Type: The type/category of the document (e.g., identification, license).
-
Issue country: The country where the document was issued.
-
Office: The office associated with the document.
-
Aircraft: If applicable, the aircraft associated with the document.
-
FAS: The FAS code related to the document, if relevant.
-
Access type: Defines the access level for the document (e.g., private, public).
-
Issue date: The date the document was issued.
-
Expire date: The date the document will expire.
-
Expired: A checkbox to indicate if the document is expired.
-
N/A: A checkbox to indicate if the document is not applicable or not available.
List Description:
-
Name: The document’s name.
-
No.: The document number.
-
Type: The document type.
-
Office: The office where the document was created or managed.
-
Issued By: The issuing authority for the document.
-
Is. Count.: The country that issued the document.
-
Expires: The expiration date of the document.
-
Valid: Indicates if the document is currently valid.
Icons and Background Colors:
-
Valid: If the document is valid, a tick icon appears.
-
Expired: If the document is expired, a cross icon appears.
-
N/A: If the document is not applicable, the "N/A" text is shown.
-
Left: This shows the number of days left before the document expires, or the number of days overdue.
Background Color Indicators (for Expiry Dates):
-
Violet: Indicates more than 1 day difference between the current date and the expiration date.
-
Red: Indicates up to 7 days left before the document expires.
-
Orange: Indicates up to 30 days left before expiration.
-
Yellow: Indicates up to 60 days left before expiration.
-
Strong Yellow: Indicates up to 90 days left before expiration.
Attachment Icon (F):
-
If the document has any attachments, a clip icon appears to indicate the presence of files attached to the document.
19. Guarantee Documents Tab
The Guarantee Documents tab is designed to manage documents related to bank guarantees, allowing users to create and track important financial documents that involve guarantees. Below is an overview of the interface and how to use it:
How to Create Guarantee Documents:
-
Click the +New button to open the creation sidebar.
-
Fill in the necessary fields (described below).
-
Click the CREATE button to save the guarantee document.
Fields in the Interface:
-
Bank: The name of the bank issuing the guarantee.
-
Amount: The total value of the guarantee.
-
Issued: The start date of the guarantee's validity.
-
Valid to: The end date of the guarantee’s validity.
-
Left: The number of days remaining before the guarantee expires, calculated based on the current date.
-
Currency: The currency associated with the guarantee amount.
Background Color Indicators (for Expiry Dates):
-
N/A: Indicates that the guarantee document is not active.
-
Violet: Indicates more than 1 day difference between the current date and the expiration date.
-
Red: Indicates that the guarantee expires within 7 days.
-
Orange: Indicates that the guarantee expires within 30 days.
-
Yellow: Indicates that the guarantee expires within 60 days.
-
Strong Yellow: Indicates that the guarantee expires within 90 days.
20. Statements Tab
-
Displays supplier statements if linked.
21. Entries Tab
-
Lists jobs linked to the vendor.
22. Usage Tab
-
Displays recent activities across different categories.