
How to Open the Jobs List
To access the Jobs List in Awery ERP, follow these steps:
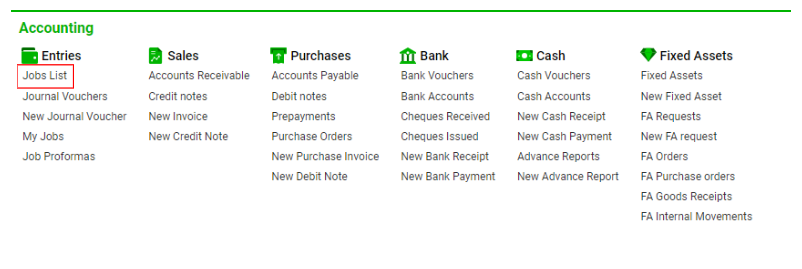
Navigate to Jobs List:
Navigate to the Accounting section and under Entries click the “Jobs List” button.
Overview:
The Jobs List allows users to view a comprehensive list of jobs created for different offices, contractors, and accounts. Users can see essential information about each job, including debitor data, creditor data, and filter the list based on this data.
List Description:
-
PSTD (Posted): Indicated with a tick whether the job is posted.
-
REC (Reconciled): Indicated with a tick whether the job is reconciled.
-
ID
The "ID" column in the Jobs List displays the number of each job. The appearance of the text and background in this column may vary based on the status and attributes of the job:
-
If the status of a job is "Awaiting Approval," the text in the "ID" column will be displayed in blue.
-
If the status of a job triggers an "Alert," the text in the "ID" column will be displayed in red.
-
The background of the cell in the "ID" column will be green for jobs that have been paid.
-
For deleted records, the background of the cell in the "ID" column will be red.
These visual cues provide users with immediate feedback on the status and attributes of each job listed in the Jobs List.
-
Status: Indicates the status of the job.
-
Date: Displays the job date.
-
Type: Displays the type of the job.
-
Sub: Displays the subtype of the job.
-
Office: Displays the office of the job.
-
Contractor: Displays the contractor of the job.
-
Doc. No: Displays the document number of the job.
-
Reference: Displays a reference of the job.
-
Taxes: Displays the taxes of the job.
-
Description: Displays the description of the job.
-
Bank: Displays the company bank of the job.
-
Debitor/DR. Account/DR. Amount/DR. Cur: Displays debitor-related information.
-
Creditor/CR. Account/CR. Amount/CR. Cur: Displays creditor-related information.
-
Allocated: This column displays the allocated amount of a job. The text color will be green if the difference between the allocated amount and the credit amount is less than 2.
-
Alloc.Exp: This column displays allocated expenses for jobs with an "Invoice" type. For jobs with an "Invoice" type, the text color will be green if the difference between the allocated amount and the credit amount is less than 2.
-
CLS (Closed): Indicated with a tick if the job is closed.
-
Left. D: Displays the remaining days to the due date of the job.
Updating a Job
Restore Deleted Jobs:
-
Use the Restore button to restore deleted jobs. Filter the list by deleted jobs, select the necessary jobs, and click the button to restore them.
Reconciliation:
-
Use the Reconcile button to mark jobs as reconciled, or the UnReconcile button to remove this setting.
-
The Reconcile button is available only for unreconciled jobs, while the UnReconcile button is available only for reconciled jobs.
Posting:
-
Use the Post button to mark jobs as posted, or the UnPost button to remove this setting.
-
The Post button is available only for unposted jobs, while the UnPost button is available only for posted jobs.
Changing Job Status:
-
To update the status of a job, use the Set Status button. Select the desired jobs, then choose a status from the toolbar, and click the Set Status button.
-
The color of the row will indicate the status of the job:
-
Jobs in an "Ok" status will maintain their default row color.
-
Jobs in an "Awaiting" status will have blue-colored rows.
-
Jobs in an "Alert" status will also have blue-colored rows.
Payment:
-
Use the PAY button to make payments for jobs. Clicking on this button will open a tab for creating a new payment job.
Sorting and Filtering:
To sort and filter the jobs list, follow these steps:
Using the Search Button or Enter Key:
-
You can initiate filtration on the page by either clicking the Search button or pressing the Enter key after entering your search criteria.
Main Filters:
-
At the top of the page, you'll find the main filters for refining your search:
-
Entry ID: Filter by job ID.
-
Doc. No: Filter by document number of a job.
-
Ref. No: Filter by reference of a job.
-
Office: Filter by job office.
-
Company Bank: Filter by the company bank associated with the job.
-
Team: Filter by team.
-
Date Type: Filter by date type (dates will be filtered based on the selected type).
-
Quick Search: Perform a quick search across all columns in the list.
-
From Date/To Date: Filter jobs within a specified date range.
-
Customer Type: Filter by customer type.
-
Customer: Filter by customer associated with the job.
-
Customer Bank: Filter by customer bank (applicable for certain job types).
-
Job Type: Filter by job type.
-
Job Subtype: Filter by job subtype.
-
Statuses: Filter by job statuses.
-
Calculate Jobs Button:
-
This button allows you to calculate the exact quantity of jobs. This is particularly useful when dealing with a large number of jobs, as not all jobs are loaded simultaneously due to pagination.
The "Filters" button provides access to additional filters on the page, allowing for more refined searches and analyses:
Description: Filter jobs by their description.
Amount: Specify an exact amount to filter the list by.
Station: Filter jobs by station.
Department: Filter jobs by department.
FA (Fixed Assets): Filter the list by Fixed Assets selected in a job transaction.
TAX: Filter jobs by tax associated with the transaction.
Additionally, you can use the following toggles for further filtration:
-
Reconciled/UnReconciled: Filter jobs based on whether they have been reconciled or not.
-
Posted/Un-Posted: Filter by posted or unposted jobs.
-
Paid/Not Paid: Filter by paid or unpaid jobs.
-
Allocated/Not Allocated: Filter jobs by allocated or unallocated amounts.
-
With Check/Without Check: Filter jobs by those with or without checks.
-
Invoice Sent/Invoice Not Sent: Filter jobs by whether the invoice has been sent or not.
-
Paid Invoices/Not Paid Invoices: Filter by paid or unpaid invoices.
-
Closed: Show closed jobs.
-
Deleted: Show deleted jobs.
-
Overdue: Filter jobs with a due date falling within a selected date range.
-
NFAlloc (Need For Allocation): Show jobs that need allocation.
-
By Transaction: Display data in the list by transaction.
-
By Date: Filter the list by date.
-
No Attachments: Show jobs without attached files.
You can clear all selected filters by using the "Clear Filters" button.
Other functionalities available on the page include:
-
New: Create new jobs.
-
Delete: Delete selected jobs by ticking the records in the list.
-
Reports: Access all available reports on the page. If the report button is unavailable, make sure to select jobs in the list. If you still can't find a report, check permissions on the page.
If you're unable to access the report button, ensure that you have selected one or more jobs in the list. Once jobs are selected, the report button should become available. If you still cannot find the report button, it's possible that there are restrictions or permissions set on the page preventing access to the reports.
Additional Actions:
PAID button: Use the PAID button located at the end of a row to mark a job as paid.
Files button: To view job files or add new files, you can use the Files button located at the end of a row.
Adding files: Upon clicking the Files button, a sidebar will appear where you can add new files. The icon will be displayed in blue if attachments are already added to the job.