General User Management
Navigation Path
Accessing User Management
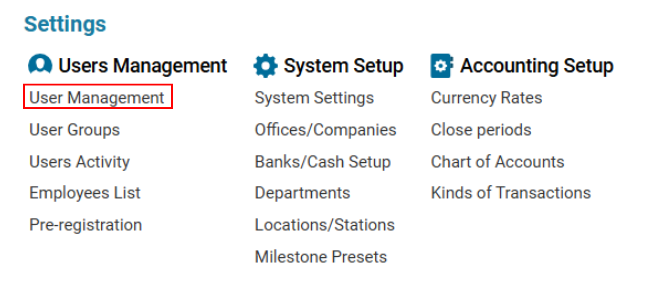
Navigate to the Settings section and under the Users Management Section click the “User Management” Button.

Set the User Type selector to General.

Overview
The User Management interface allows administrators to manage system users, including adding, editing, deleting, and viewing user details. Additionally, administrators can:
Assign group permissions.
View user statistics.
Customize notifications.
Create external users who do not have direct access to the system but can use AWERY side products (e.g., service portals, cargo booking, crew portal).
User List Description
The data table for users of type General contains the following columns:
Login – User login credential for system access.
Name – Full name of the user.
E-mail – Contact email address.
Office – Office location of the user.
Linked Entity – Associated employee name (displayed in various interfaces such as mailers, AWB, enquiries, etc.).
Two-step Verification – A green checkmark indicates that the user has extra verification enabled at login.
Notes – Additional details and comments.
Groups – List of groups the user belongs to.
Last Login – The date of the user's most recent login.
Registered On – The date the user was registered.
Creating a New System User
System users have a General user type, meaning they have direct system access.
Steps to Create a New User:
Click the +New button.
The sidebar will appear on the screen.
Fill in the required fields (marked with a red asterisk on the Main Info tab). Optional fields can be filled in later.
Required Fields:
Username – Short username used for login.
Password – User's access password.
Repassword – Confirm the password.
E-mail – User’s email address.
Name – Full name of the user.
Surname – User’s surname.
Language – Preferred system language.
Birthday – Date of birth.
Office – Select the company for the current user.
User Type – Default is General.
Additional Settings:
Default Currency – Sets the default currency for displaying prices and rates.
Team – Select the required user team.
Station – Warehouse selector.
Stock Company – Select stock company.
Contractor Type & Linked Entity – Defines employee type and associated entity.
Values – Choose between metric and imperial units.
Timing – Choose between local or UTC time format.
Airport Codes – Select either IATA or ICAO format.
Security Settings:
Block Password Reset – Prevents the user from resetting their password.
Block Interface – Automatically logs the user out after 30 minutes of inactivity.
Two-step Verification – Enables extra verification at login.
IP Restriction – Allows login only from specified IP addresses.
Finalizing User Creation
Click the Save button to confirm the creation.
Managing User Permissions
Once the user is created, additional settings can be configured:
Assigning User Groups
Select the user from the list.
Double-click the entry to open the sidebar.
Navigate to the Groups tab, which consists of:
All Groups List – Available groups.
Current User Groups List – Groups the user is assigned to.
Add required groups by checking the appropriate boxes (changes are saved automatically).
To remove a group, uncheck the box in the Current User Groups List.
Copying Permissions
You can copy permissions from one user to another.
This option is available under the Main tab.
The Copy Permission button is only active when a user is selected.
Editing User Data
User data can be edited from the sidebar after selecting a user from the list.
The Notification and Entities tabs are blocked for General users.
Deleting a User
Select the user from the list.
Check the box next to the user's name.
Click the Delete button.
Restoring a Deleted User
Click the Filters button.
Check the Deleted box.
Select the deleted user from the list.
Click the Restore button.
Blocking and Unblocking Users
Blocking a User:
Select the user from the list.
Double-click the entry to open the sidebar.
Click the Block User button under the Main tab.
Unblocking a User:
Open the Filter Bar.
Check the Blocked box.
Click Search.
Select the required user.
Click the Unblock button.
User Activity and Statistics
Click the User Activity tab to view detailed activity logs.
Choose a specific time period for analysis.
Managing User Teams
Users can be assigned to teams based on departments.
Navigate to the User Teams section to modify team assignments.
Sorting and Filtering Users
Search Parameters:
By – Search by login, name, email, or department.
Office – Filter by office location.
Group – Filter by assigned user groups.
Team – Filter by team membership.
User Type – Choose between General, Notification, and External users.
Advanced Filters – Deleted, Blocked, Password Reset Blocked, and Two-step Verification.
Generating Reports
Click the Reports button.
Choose the required report type.
Click Excel Report to download the data.
