
Creating a New AWB Wizard in Awery involves the following steps:
-
Create a New AWB Wizard:
-
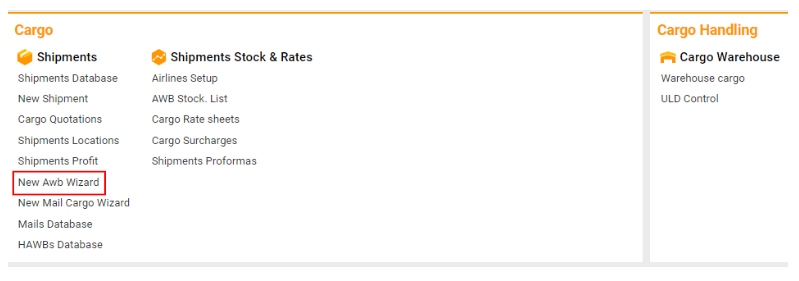
Navigate to the Cargo section and under Shipments click the “New AWB Wizard” button to create a New AWB Wizard.
-
-
Enter New AWB Wizard Details:
Fill in the necessary fields for the new shipment.
Main Information
-
Office: Select the appropriate office handling the shipment (e.g., Awery Demo Company).
-
Type: Specify the AWB type.
-
Customer: Choose the customer from the list.
-
Contact: Enter the contact information for the customer.
-
Team: Assign the shipment to a specific team.
-
Broker: Enter the broker managing the shipment.
AWB Number & Stock
-
AWB Number: Enter the AWB number.
-
Stock Company: Select the company providing the stock.
-
Type of Generation: Choose whether the AWB number is customer-generated or system-generated.
AWB Details
-
Number of Pieces: Enter the number of pieces in the shipment (e.g., 1).
-
Bulk Number of Pieces: If applicable, enter the bulk number of pieces.
-
Gross Weight: Input the gross weight of the shipment.
-
Chargeable Weight: Enter the chargeable weight, if different from the calculated weight.
-
Vol. Chargeable Weight: Input the volumetric chargeable weight.
-
Volume: Enter the volume of the shipment.
-
Total Volume (calc): Automatically calculated based on dimensions.
-
Comm. Type: Select the communication type with the customer.
-
Comm. Description: Provide a brief description of the communication.
-
SHC Codes: Enter Special Handling Codes if applicable.
-
Origin: Select the origin location of the shipment.
-
Destination: Select the destination location.
-
WH: Indicate the warehouse.
-
Rate Type: Select the rate type (e.g., TARIFF).
-
Load Deck: Choose the load deck (e.g., LD).
Accounting & Handling
-
Accounting: Input any relevant accounting information.
-
Handling Details: Enter specific handling instructions for the shipment.
-
Internal Notes: Add any internal notes related to the shipment.
Cargo Information
-
Cargo Description: Provide a detailed description of the cargo.
Shipper & Consignee
-
Shipper: Enter the shipper's name and address.
-
Consignee: Enter the consignee's name and address.
Freight Collect
-
Amount: Enter the amount to be collected for freight.
-
Collected on Date: Specify the date on which the freight was collected.
-
Currency: Default currency for freight collection (e.g., AED).
-
Rate: Conversion rate for the currency.
Pieces Details
-
Process Pieces Details with eMagic Service: Click to process the pieces details.
-
QTY: Quantity of the items.
-
LWH: Dimensions (Length, Width, Height).
-
Piece WT: Weight per piece.
-
Total WT: Total weight of the pieces.
-
Volume: Volume of the pieces.
-
N.S.N.: If applicable, National Stock Number.
-
T.D.G.: If applicable, Dangerous Goods code.
-
UN ID: UN identification number for hazardous materials.
Revenue
-
Office: Confirm the office (e.g., Awery Demo Company).
-
Bank: Bank details if required.
-
Currency: Currency for the transaction (e.g., EUR).
-
Rate: Conversion rate for the currency.
-
Edit Date: Date of the edit.
-
Type: Specify the type (e.g., Charter Type).
-
Agent Rate: Input the rate agreed with the agent.
-
CASS Number: Enter the CASS number, if applicable.
-
Credit Period: Specify the credit period agreed upon.
-
Credit Amount: Input the credit amount.
-
Cur Balance: Current balance.
-
Total PRE, EUR: Pre-tax total in EUR.
-
Total with Tax, EUR: Total amount with tax in EUR.
-
PROF, EUR: Profit in EUR.
-
PROF, %: Profit percentage.
Brokers & Routing
-
Brokers: Add brokers' details if applicable.
-
Routing: Input the routing details for the shipment.
Expenses
-
Default Currency, USD: Default currency for expenses.
-
Settlement Currency, USD: Settlement currency.
-
Estimated: Estimated expenses.
-
Allocated: Allocated expenses.
-
Estimated Diff: Difference between estimated and allocated expenses.
-
Total Pre: Pre-tax total for expenses.
-
Diff: Difference in expenses.
-
Sel.: Selected expenses.
-
PROF: Profit from the expenses.
-
Save and Create the AWB:
-
Review the information for accuracy.
-
Click the "Create AWB" button to save the AWB.
-
This guide should assist you in creating a new AWB by following the structured steps, ensuring that all relevant information is accurately captured. Adjust the fields according to the specific requirements of each shipment.