
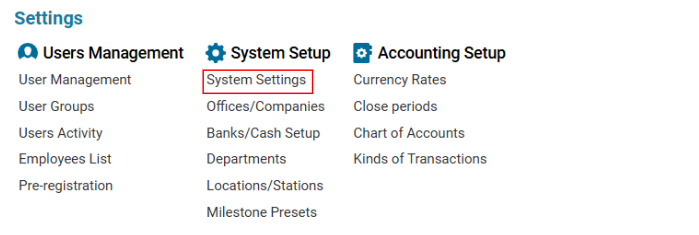
Accessing Cities & Districts
Navigate to the Settings section and under the System Setup Section click the “System Settings” Button. Then under the E-Commerce Section click the “Cities & Districts" button.

Overview
This section allows users to create and manage Cities, Districts, and Zones for logistics and booking purposes.
Main Functionalities
-
Data Table Columns
For Cities List:
-
City: The name of the city.
For Districts List:
-
District: The district name associated with a city.
-
Min Order: Minimum order quantity required in this district.
-
Zone: Name or number of the zone assigned to this district.
For Zones List:
-
Name: The name of the zone.
-
Couriers: Number of couriers assigned to the zone.
-
Driver: Name of the driver responsible for the zone.
How to Create a City
-
Open the Cities & Districts list.
-
Click the "+" button to open a blank form.
-
Enter the City Name.
-
Click Save to confirm the entry.
How to Delete a City
-
Select the City from the list.
-
Click the Delete button.
How to Create a District
-
Open the Cities & Districts list.
-
Click the "+" button to open a blank form.
-
Enter the District Name.
-
Assign a City to the district.
-
Set the Minimum Order Quantity (if applicable).
-
Assign a Zone (if applicable).
-
Click Save to confirm the entry.
How to Delete a District
-
Select the District from the list.
-
Click the Delete button.
How to Create a Zone
-
Open the Cities & Districts list and select the Zones Tab.
-
Click the "+" button to open a blank form.
-
Enter the Zone Name.
-
Assign the Number of Couriers for this zone.
-
Enter the Driver Name responsible for the zone.
-
Click Save to confirm the entry.
How to Delete a Zone
-
Select the Zone from the list.
-
Click the Delete button.
Where You Can Use Cities & Districts
-
Booking System: Select a City, District, and/or Zone while creating a booking.
-
Logistics & Delivery: Assign deliveries to specific districts and zones for efficient management.