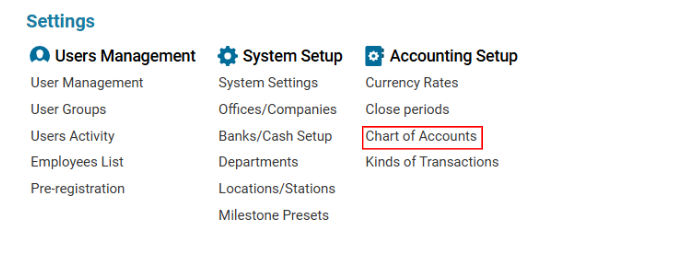
Accessing Chart of Accounts
Navigate to the Settings section and under the Account Setup Section click the “Close Periods” Button.
Overview
The Chart of Accounts interface allows users to:
-
Create, update, delete, and clone accounts for use in transactions.
-
Assign accounts to different kinds and groups, controlling user permissions.
-
Set specific conditions and requirements for accounts that will be enforced in transaction entries (in the “Jobs” interface).
List Description
|
Field |
Description |
|---|---|
|
Acc_no |
Account’s unique number |
|
Name |
Account’s name |
|
Parent name |
Name of the parent (main) account |
|
Parent Acc No |
Number of the parent account |
|
Closing Account |
Number and name of the closing entry |
|
Native |
Name in the local language |
|
Contragent |
Type of contragent (counterparty) |
|
Sub Type |
Child type of the account |
|
Type code |
Type selected in the “Account types” interface |
|
Type |
Determines how debit/credit transactions affect the account balance (see below for details) |
|
Report type |
Name of the report where the account appears |
|
Control |
Green tick indicates the account is a parent (if “Control” is checked) |
|
Groups |
Names of user groups with access to the account |
Type Field Logic
-
“+” in Debit: Increases account balance by the transaction amount.
-
“+” in Credit: Decreases account balance by the transaction amount.
-
“-” in Debit: Decreases account balance by the transaction amount.
-
“-” in Credit: Increases account balance by the transaction amount.
-
“+/-”: Balance change depends on the account type code on the other side of the transaction.
Additional List Description (KINDS Tab)
|
Field |
Description |
|---|---|
|
ID |
Number of the accounting record |
|
Name |
Name of the accounting record |
|
Type |
Type of the accounting record |
|
Sub Type |
Child type of the accounting record |
|
DR ACC NO |
Debit account number |
|
CR ACC NO |
Credit account number |
Additional List Description (GROUPS Tab)
-
With “view_all_accounts” permission: All accounts are visible.
-
No groups assigned: Account is available to all users.
-
With groups assigned: Account is visible only to users in those groups.
Explanation of Checkboxes
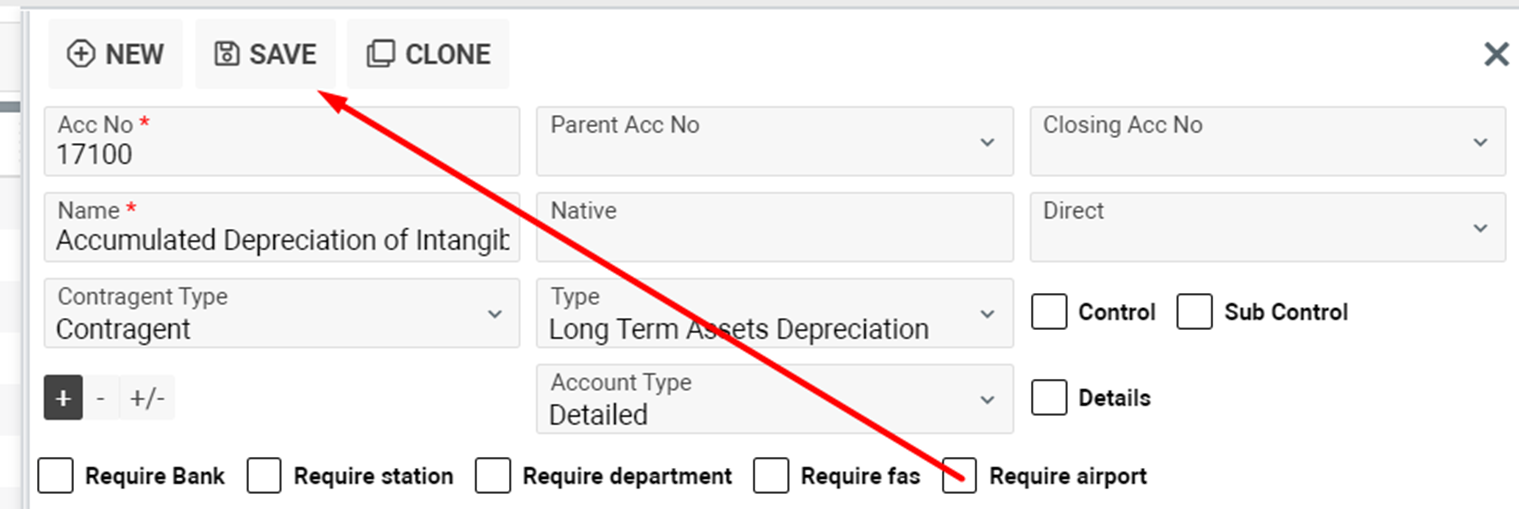
-
Require Bank: If checked, the “Contractor Bank Selection” field is required in transactions.
-
Require Station: If checked, the “Station” field is required in transactions.
-
Require Department: If checked, the “Department” field is required in transactions.
-
Require FAS: If checked, the “Fixed Asset” field is required in transactions.
-
Require Airport: If checked, the “AP” field is required in transactions.
-
Control: Indicates the account is a parent.
-
Sub Control: Indicates the account is a child.
-
Details: Enables more detailed information in ledger reports.
Manuals
How to Create a New Entry
-
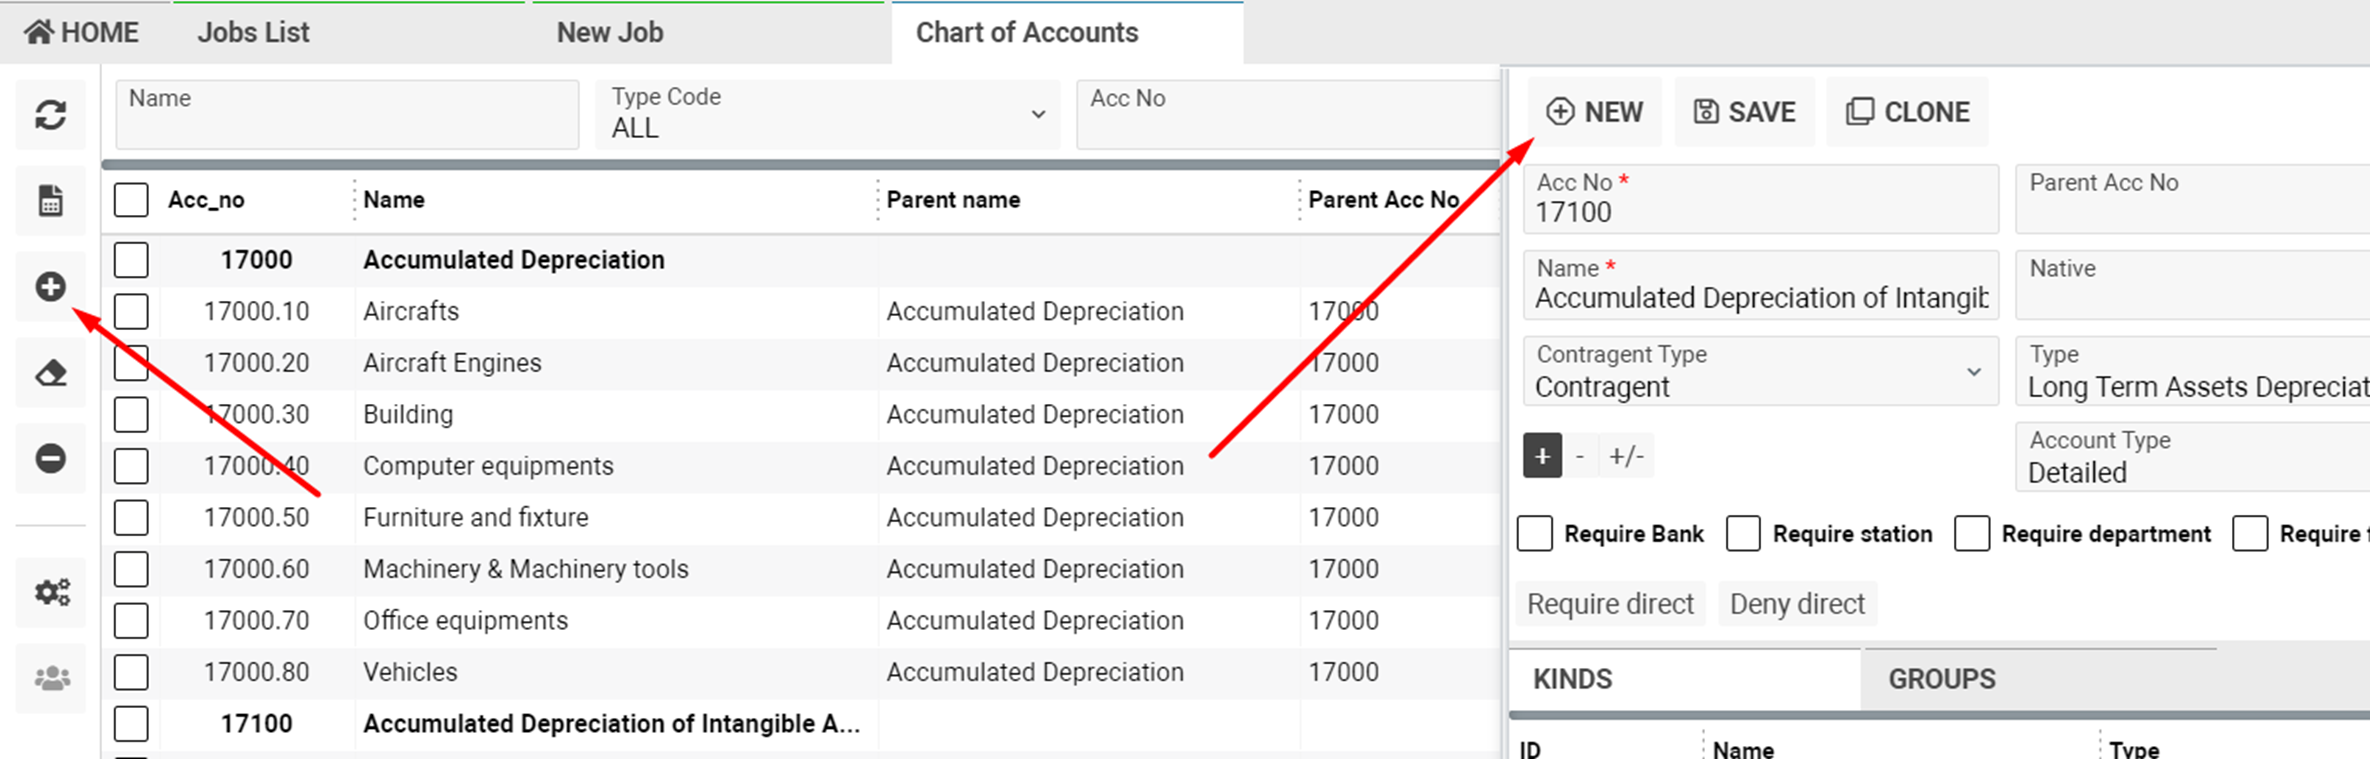
Click the NEW button in the form or left menu.
-
Fill in the required fields (Acc No and Name are mandatory).
-
Click the SAVE button.
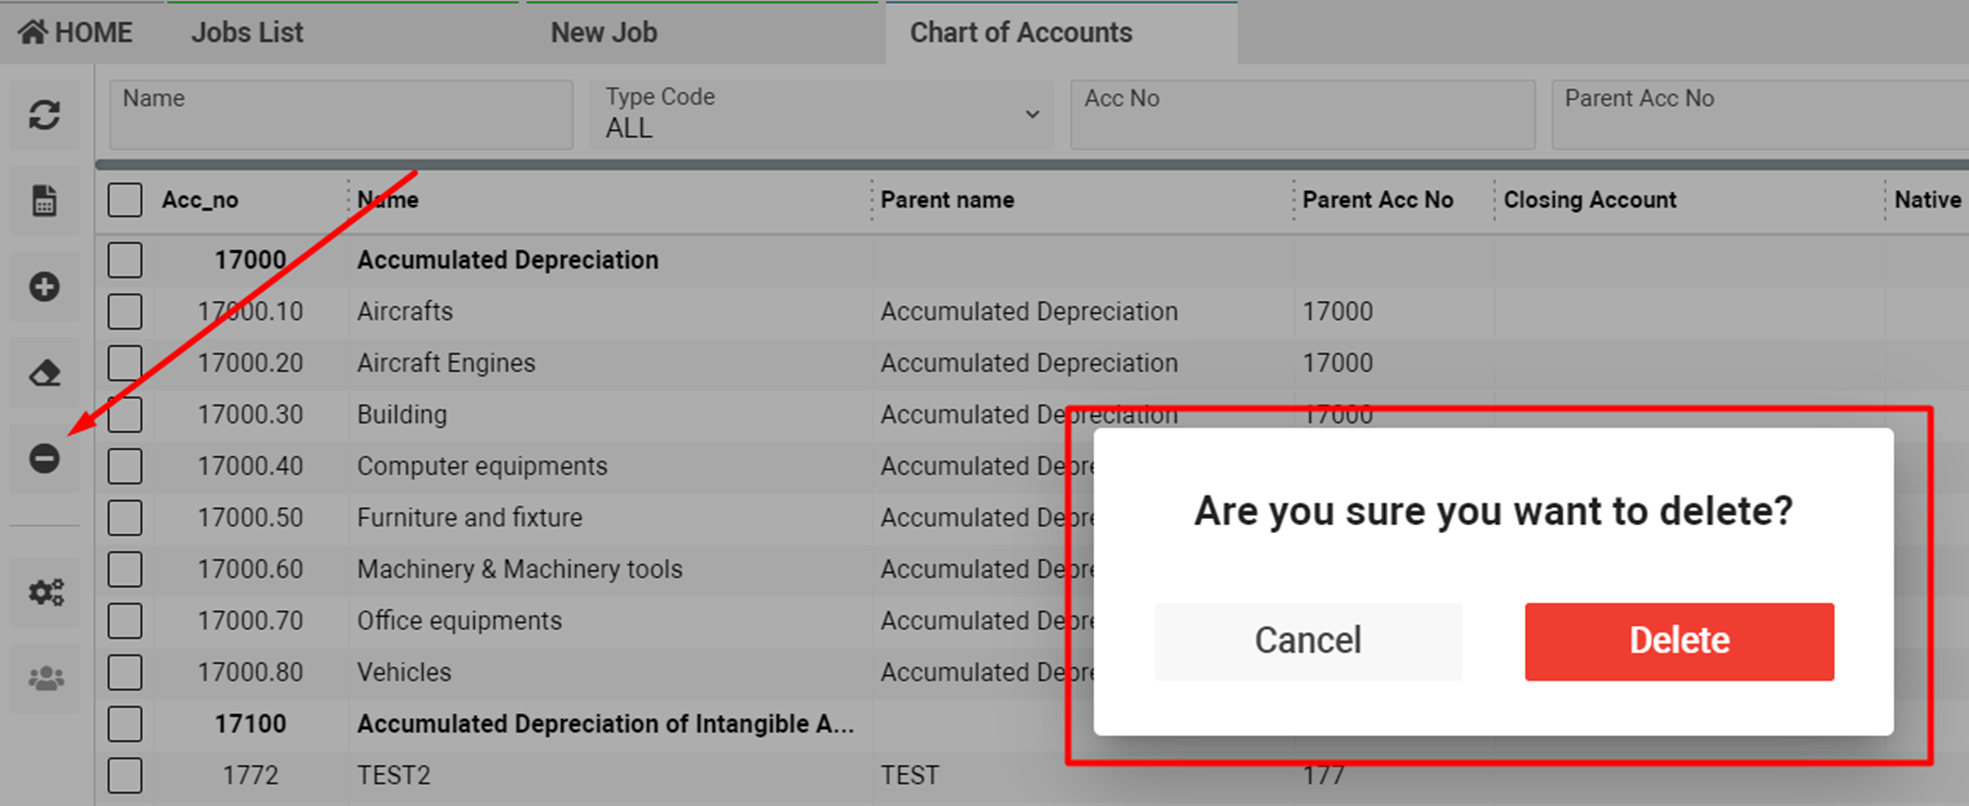
How to Delete an Entry
-
Select the entry you want to delete.
-
Click the Delete button.
-
Confirm the action by clicking Delete again, or cancel by clicking Cancel.
How to Update an Entry
-
Click the edit icon or double-click the row.
-
Make the necessary changes.
-
Click SAVE to update.

How to Clone an Entry
-
Select the entry you want to clone and click the Edit button.
-
Click the CLONE button.
-
Rename the Name field.
-
Click SAVE to finish cloning.
How to Add a New Entry to the “KINDS” Tab
-
Go to the Kinds of Transaction interface.
-
Click the New button.
-
Fill in the DR ACC field with the required account.
Sorting and Filtering
-
By Parent Acc No: View all child types for a selected parent account.
-
By Groups: View accounts available for each user group.
-
By Type Code: View accounts with the selected type code.

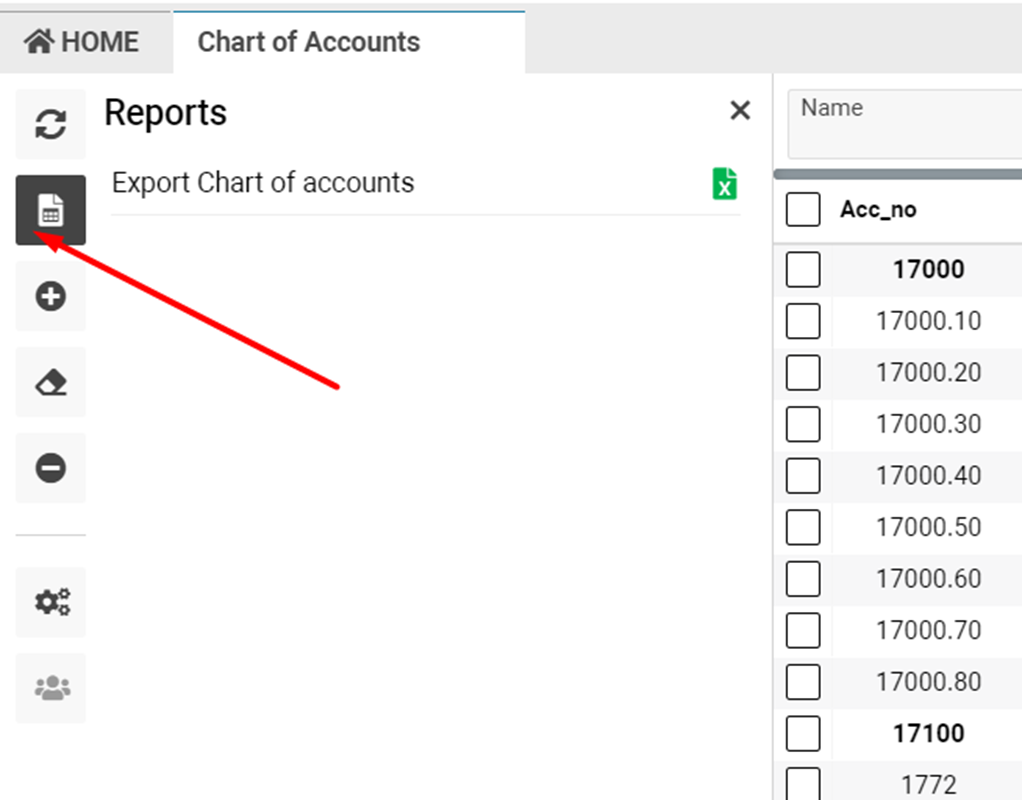
Reports
-
Click the export icon to generate the Export Chart of Accounts report.
-
The report can be exported in Excel format, showing all accounts, types, and groups for convenient review.