AWB Revenue/Expenses Types
AWB Revenue/Expenses Types
Navigation To AWB Revenue/Expenses Types:
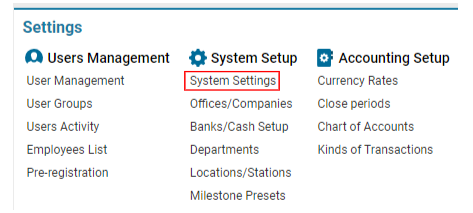
Navigate to the Settings section and under System Setup click the “System Settings” button.

Then navigate to the Cargo section and click the “AWB Revenue/Expenses Types” button.

Overview
With this feature, you can:
Create different charge types for AWB revenue and expenses.
Specify debit and credit accounts for each charge type.
Automatically display charge types when creating a JOB from an AWB.
Main Functionality on the Page
Search:
This field allows filtering entries by parameters such as Priority, Type, Description, Rate, Vendor Type, Kind ID, Expense Kind ID, and Tax.
List of Existing Items:
Prior: Determines the display order in selectors.
Type: The charge type. You can create multiple charges with the same type.
CODE: Code for the revenue/expense type.
Rate: The rate associated with the revenue/expense type.
Vendor Type: Vendor type used for AWB expenses.
Kind: Creditor account (kind_id).
Expenses Kind: Debitor account (expenses_kind_id).
Tax: Applicable tax for the type.
Editor:
A set of buttons and fields to add, edit, or delete items.
Manuals
Creating a New AWB Revenue/Expense Type
Adding a New Type:
Click the New button in the Editor.
Fill in the mandatory fields:
Type: Specify the charge type.
Description: Provide a description of the charge.
Optional Fields:
CODE: Enter the charge code.
Priority: Set the display order in selectors (ascending).
Kind (Credit Account): Select from the drop-down list of previously created options.
Expenses Kind (Debit Account): Select from the drop-down list of previously created options.
Tax: Select the applicable tax from the drop-down.
Vendor Type: Choose the appropriate vendor type from the drop-down, or leave it empty. The vendor type will be entered automatically when creating a new AWB expense.
After completing the data, click the Save button.
Editing an Existing Type:
Select the entry from the list that you want to edit. The data will be displayed in the Editor.
Make the necessary updates and click the Save button.
Deleting an Entry:
To delete an outdated entry, select it from the list. The data will be displayed in the Editor.
Click the Delete button, which will become available after selecting the entry.
Using AWB Revenue/Expenses Types in the System
AWB Revenue/Expense Tabs:
You can specify the charge type directly in the AWB Revenue/Expense tabs.
Creating a JOB from an AWB:
When you create a JOB from an AWB, a transaction will be automatically generated using the selected debit and credit accounts (if the charge type has a specified Kind and Expense Kind).
