
All Suppliers/Suppliers/Other Suppliers Interior Page
Accessing the All Suppliers/Suppliers/Other Suppliers Interior Page
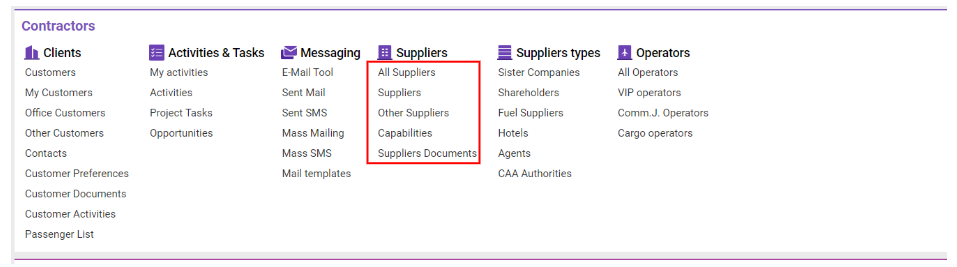
Navigate to the Contractors section and under the Suppliers Section click any of the links below.
Overview
The All Suppliers/Suppliers/Other Suppliers Interior Page offers a detailed interface for managing vendor and supplier data across various categories, providing tools for tracking essential information, contacts, capabilities, rates, and compliance documentation. Below is a breakdown of its main sections and functions:
Key Sections and Their Functions:
-
Main Info Tab:
-
Main Information: Allows for selection of supplier details such as Main type, Source, Office, Status, and Payment type. Custom codes can be generated here.
-
Additional Fields: Input fields for address, phone, email, compliance codes, credit rating, etc.
-
Upload/Download Options: Space for uploading or downloading a supplier logo.
-
-
Contacts Tab:
-
Contact Data: Options to add new contacts, including details like name, phone, airport, and roles (e.g., decision-maker).
-
-
Additional Fields: Compliance fields, known aliases, and team selectors.
-
Airports & Access Types: Options to link suppliers to specific airports and define access types.
The Additional Options feature within the Contacts Tab enables quick updates and efficient management of contact details for suppliers. Here’s how to leverage these options:
Steps to Add or Edit Contact Items:
-
Add New Items:
-
Click the New item button.
-
-
Enter details in the Type and Data fields.
-
Click Save to add the item.
-
Add Multiple Items:
-
After saving the initial item, click the + Add button to display a new form.
-
-
Fill in the necessary fields for each additional item and save each one.
-
Editing Contacts:
-
To edit an existing contact, click the Edit button.
-
-
Make the necessary changes in the contact details and save them.
-
Deleting Contacts:
-
Click the Delete button if you need to remove a contact.
-
-
Copying to Contacts:
-
To add the same contact for another customer:
-
Click the Copy to button.
-
-
-
Select the relevant customer and click Apply.
-
Linked Suppliers Tab:
-
Displays any child vendors associated with a primary vendor.
-
-
List of Capabilities Tab:
-
Shows the capabilities assigned to the vendor for easy reference.
-
-
Mail Tool Tab:
-
Displays linked communications if connected to the E-Mail Tool.
-
-
Activities Tab:
-
Lists activities associated with the vendor.
-
-
Operational Info Tab:
-
Notes Field: Space to record relevant operational details.
-
-
Aircrafts Tab:
-
Links any aircraft related to the vendor.
-
-
External Links Tab:
-
Input fields to link external IDs for companies and customers, with required fields like Company and Relate type.
-
-
Accounting Details Tab:
-
Fields for Registered company name, VAT number, Credit amount, and Billing currency.
-
-
Bank Accounts Tab:
-
Lists bank accounts connected to the vendor.
-
-
Accounting Codes Tab:
-
Provides spaces for assigning codes to company accounts, banks, and types.
-
-
Procurement Tab:
-
Allows input of social media links, decision-maker titles, and services of interest.
-
-
Adding Multiple Entries:
-
You can add multiple entries in fields such as:
-
Services of Interest
-
Business Unit
-
Segment
-
Linked Greetings
-
Service Equipment
-
-
This flexibility helps you to tailor each entry to reflect specific business needs and vendor attributes.
-
-
Conditional Display in the Descr Selector:
-
The Descr selector will only display options if the Source field is filled. Ensure that the Source field is populated to enable additional descriptive selections.
-
-
Social Network Links:
-
You can click on the icons in the interface to directly access linked social media profiles associated with the vendor. This provides quick access to a vendor's online presence and enhances engagement options.
-
-
Services Tab:
-
Displays any services the vendor is linked to.
-
-
Agent Rates Tab:
-
Used for setting agent rate parameters like weight minimums, percentages, and effective dates.
-
-
Currency Rates Tab:
-
Field for adding and managing currency rates relative to other currencies.
-
-
Fuel Rates Tab:
-
Shows fuel rates if linked to the vendor.
-
-
Documents and Special Documents Tab:
How to Create Documents:
-
Initiate Document Creation:
-
Click the +New button to open the sidebar for adding a new document.
-
-
Fill in the Document Details:
-
Populate the fields in the sidebar:
-
Name: Document name
-
No.: Document number
-
Value: Relevant value associated with the document
-
Issued by: Authority that issued the document
-
Note: Additional notes or remarks
-
-
-
Select Additional Information:
-
Choose options from the selectors:
-
Type: Document type
-
Issue country: Country where the document was issued
-
Office: Company name
-
Aircraft, FAS, Access type: Additional relevant categories
-
-
-
Specify Dates:
-
Set the Issue date and Expire date using the datepickers.
-
-
Check Expiry and Activity Status:
-
Mark the Expired or N/A checkbox, if applicable.
-
-
Finalize and Create:
-
Click the CREATE button to save the document.
-
Document List Interface:
Each document in the list will display:
-
Name: Document name
-
No.: Document number
-
Type: Document type
-
Office: Associated company
-
Issued By: Issuing authority
-
Is. Count.: Country of issuance
-
Expires: Expiration date
-
Valid: Current validation status:
-
Tick mark: Document is valid
-
-
Cross mark: Document is expired
-
Left: Days left until expiration or the N/A status if inactive
Background Colors for Expiration Alerts:
-
Violet: More than 1 day remaining
-
Red: Less than 7 days remaining
-
Orange: Less than 30 days remaining
-
Yellow: Less than 60 days remaining
-
Strong Yellow: Less than 90 days remaining
Attachment Indicator:
-
F (clip icon): Indicates that attachments are included with the document.
This setup ensures comprehensive tracking and timely updates on document statuses and relevant details.
-
Guarantee Documents Tab:
-
Manage documents related to guarantees with date and currency fields.
-
-
Statements Tab:
-
Displays statements related to the vendor.
-
-
Entries Tab:
-
Lists jobs associated with the vendor.
-
-
Usage Tab:
-
Provides information on recent activities across categories.
-